How to Install Arduino Driver
Installing Arduino Driver
Next, we will introduce the driver installation of UNO R3 development board. The driver installation may have slight differences in different computer systems. So in the following let’s move on to the driver installation in the WIN 7 system.
The Arduino folder contains both the Arduino program itself and the drivers that allow the Arduino to be connected to your computer by a USB cable. Before we launch the Arduino software, you are going to install the USB drivers.
Plug one end of your USB cable into the Arduino and the other into a USB socket on your computer.
When you connect UNO board to your computer at the first time, right click the icon of your “Computer” —>for “Properties”—> click the “Device manager”, under “Other Devices”, you should see an icon for“Unknown device” with a little yellow warning triangle next to it. This is your Arduino.
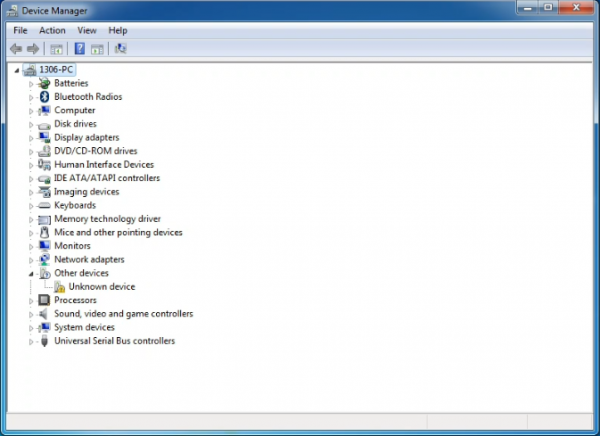
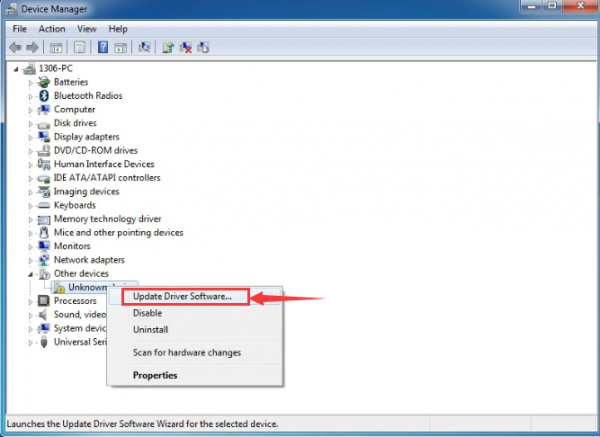
Then right-click on the device and select the top menu option (Update Driver Software...) shown as the figure below..
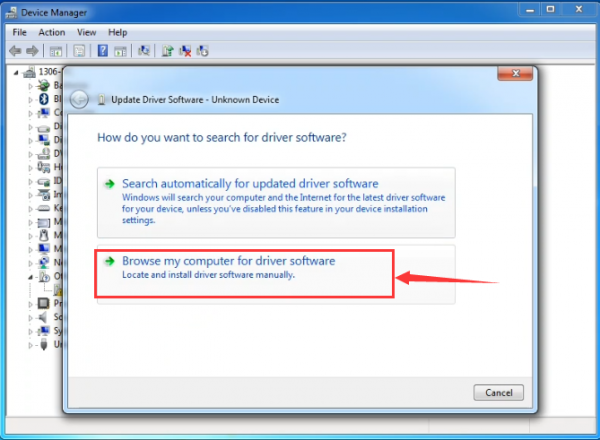
It will then be prompted to either “Search Automatically for updated driversoftware” or “Browse my computer for driver software”. Shown as below. In this page, select “Browse my computer for driver software”.
After that, select the option to browseand navigate to the “drivers” folder of Arduino installation.
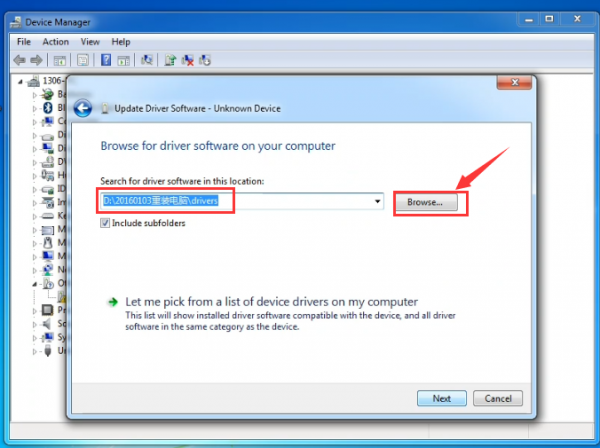
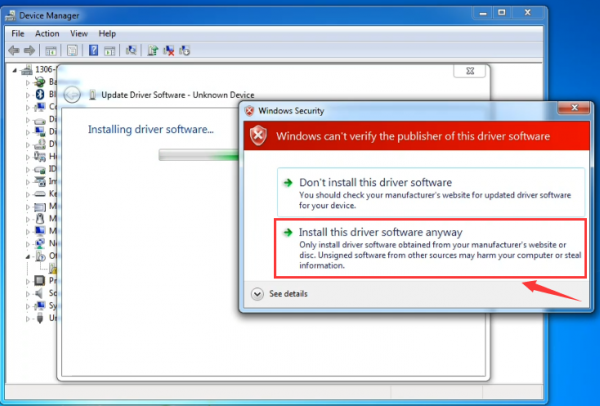
Click “Next” and you may get a security warning, if so, allow the software to be installed. Shown as below.
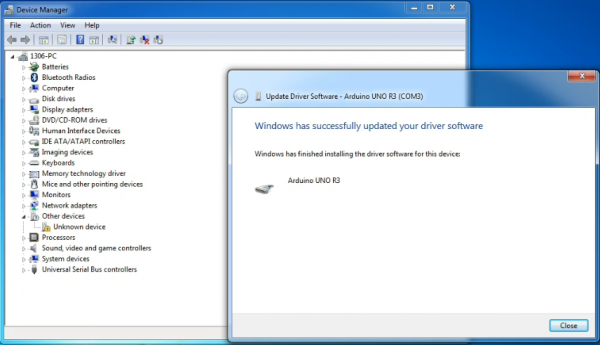
Once the software has been installed, you will get a confirmation message. Installation completed, click “Close”.
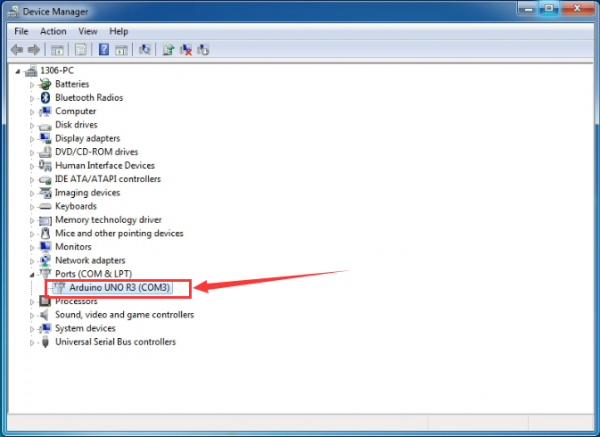
Up to now, the driver is installed well. Then you can right click “Computer” —>“Properties”—>“Device manager”, you should see the device as the figure shown below.
Example Use of ARDUINO IDE
STEP 1: Open Arduino
In the previous, we have introduced the driver installation of UNO R3 development board. So this time let’s first have basic understanding of the development environment of ARDUINO. After master that, we are about to upload the program to Arduino board.
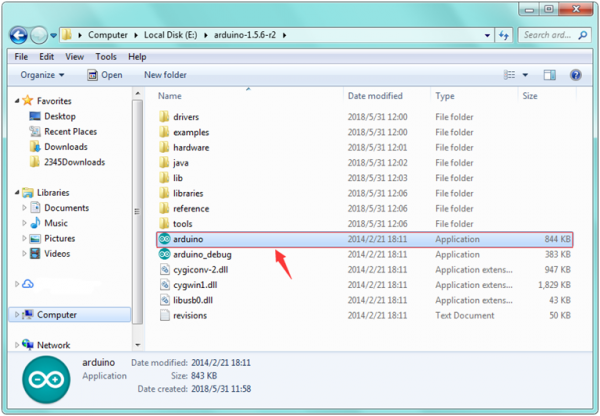
First of all, click the icon of ARDUINO to open the ARDUINO development software, as the figure shown below.
STEP 2: Build Projects
When open the Arduino software, you will have two options as below:
- Build a new project
- Open an exiting project example
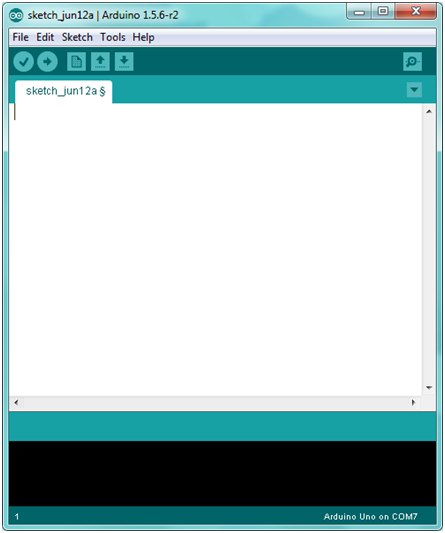
If you want to build a new project, please select “File”→then click “New”, you will see the software interface as follows.
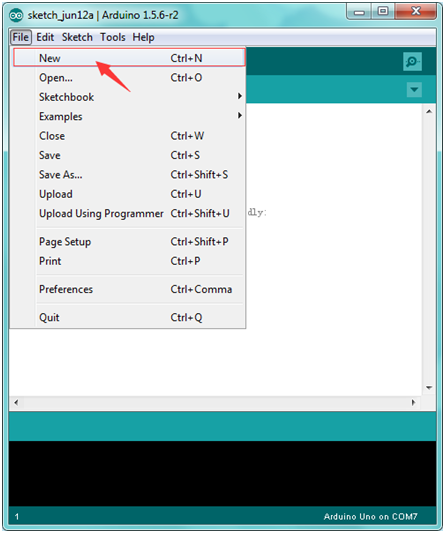
![]()
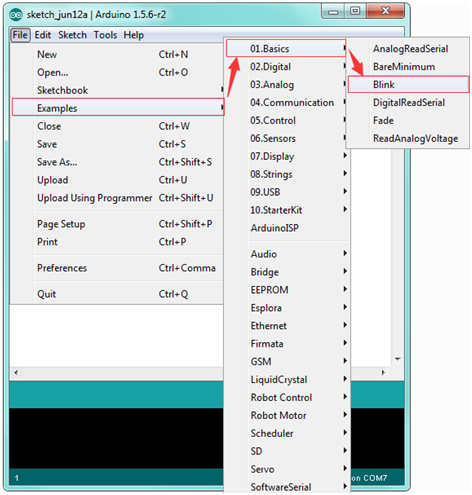
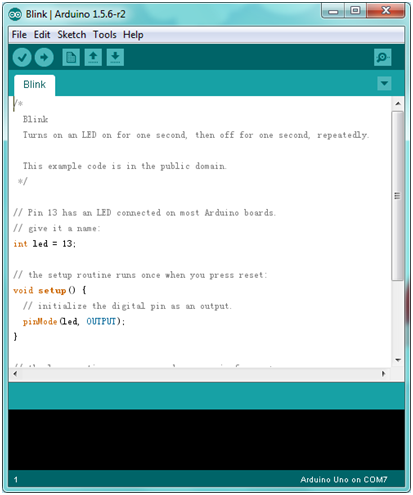
If you want to open an example project, please select File→Example→Basics→Blink. Shown below.
![]()
STEP 3: Select Arduino Board
In order to avoid any mistakes during the process of uploading the code to the board, you must first select the correct Arduino board that matches the board connected to your computer.
Or you can directly open the Control Panel of your computer, then click to open Device Manager, you can check your board and port here. Shown as below.
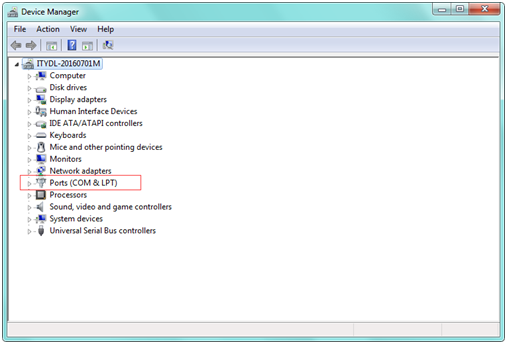
Then come back to the Arduino software, you should click Tools→Board , select the correct board. Here in our tutorial we should select Arduino Uno. Shown as below.
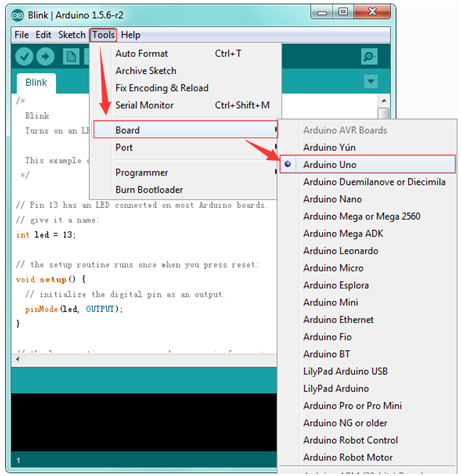
STEP 4: Select Serial Port
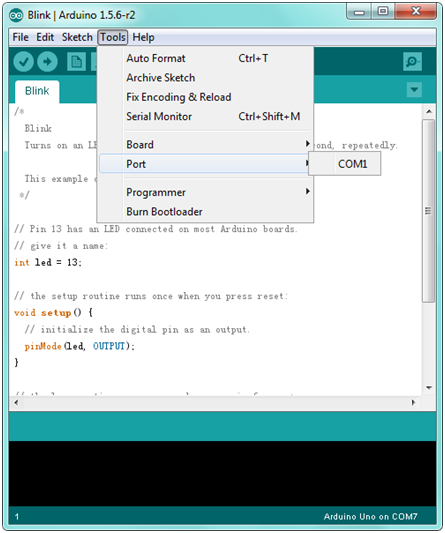
Next, we should select the serial device of Arduino board. You can click Tools→Serial Port. If you want to find out your Arduino board, you could disconnect your Arduino board, then reopen the menu, you will see the Arduino board disappear. After that reconnect the board and select the serial port.
You should select the correct Serial port that matches the port showed on the Device Manager of your computer.
The figure shown below is only for your reference.
Attach your Arduino board to your computer with the USB cable and check that the “Board Type” and “Serial Port” are set correctly.
STEP 5: Upload the Code to Your Board
Before showing you how to upload the code to your board, first of all let me introduce the function of each icon on the Tool bar of Arduino IDE. Look at the picture showed below.
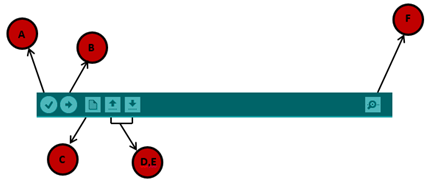
A- Used to verify whether there is any compiling mistakes or not.
B- Used to upload the sketch to your Arduino board.
C- Used to create shortcut window of a new sketch.
D- Used to directly open an example sketch.
E- Used to save the sketch.
F- Used to send the serial data received from board to the serial monitor.