Install Arduino Driver
Before launch the Arduino software, you are going to install the USB drivers.
Installing Drivers for Arduino Board in Windows 7
Plug one end of your USB cable into the Arduino and the other into a USB socket on your computer.
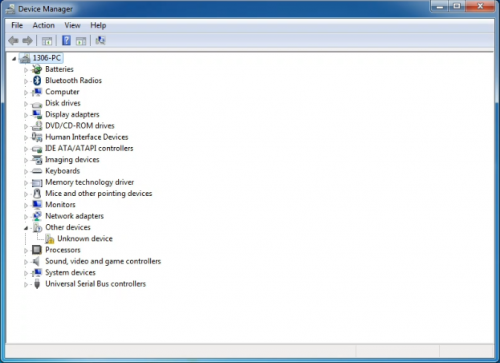
- First, right click “Computer” —>select “Properties”—> click “Device manager”, you should see an icon for ‘unknown device’ with a little yellow warning triangle next to it. This is your Arduino.

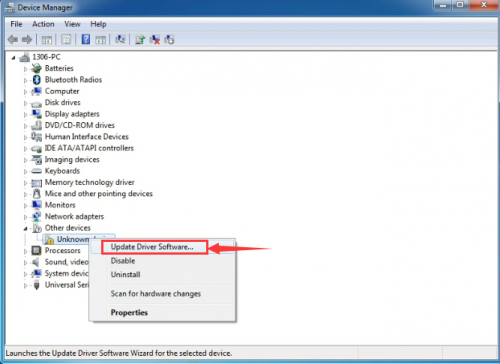
- Right-click on the device and select the top menu option (Update Driver Software...).

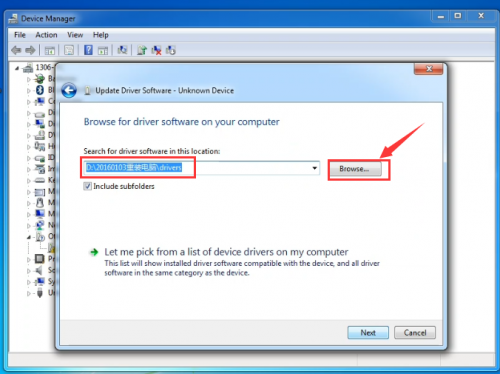
- You will then be prompted to either ‘Search Automatically for updated driver software’ or ‘Browse my computer for driver software’.
In this page, click “Browse my computer for driver software”. 
- Select the option to browse and navigate to the drivers folder.

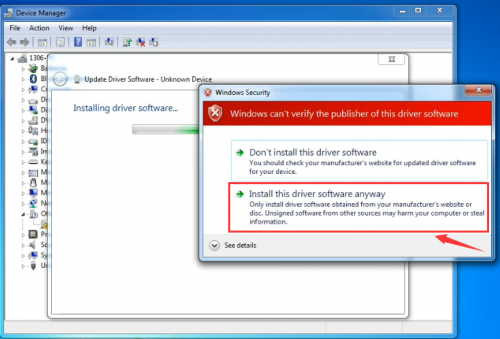
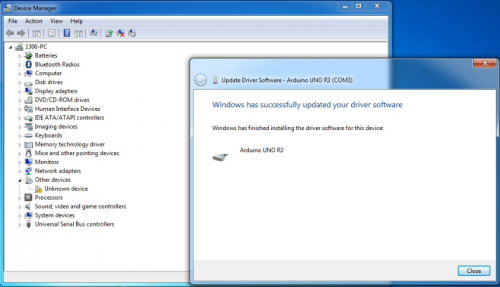
- Click 'Next' and you may get a security warning, if so, allow the software to be installed. Once the software has been installed, you will get a confirmation message.

- Installation completed, click “Close”.

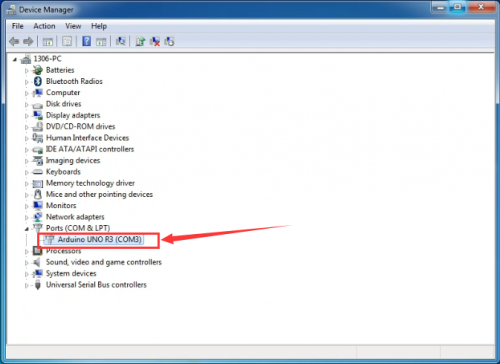
- After installation, go to check the “Device manager” again. right click “Computer” —> “Properties”—> “Device manager”, you can see the device shown as below figure.

Example for Using Arduino IDE
When successfully installing the USB driver for UNO R3 board, you can find the corresponding serial port in Windows Device Manager. Next, we will show you the program “Hello World!” displayed on the serial monitor of Arduino IDE. Here we use the Arduino 1.5.6 version.
Sample Code as below:
Copy and paste the following source code to Arduino IDE.
int val;
int ledpin=13;
void setup()
{
Serial.begin(9600);
pinMode(ledpin,OUTPUT);
}
void loop()
{
val=Serial.read();
if(val=='R')
{
digitalWrite(ledpin,HIGH);
delay(500);
digitalWrite(ledpin,LOW);
delay(500);
Serial.println("Hello World!");
}
}
Then,set the Board and COM port, shown below.


If setting well the board and port, you can see it display on the bottom right corner, which is the same as the Device Manager display.

Then, click the verify to compile the sketch, if no mistake, click upload to upload the program.
Done uploading, open the serial monitor on the upper right corner and set the baud rate as 9600, enter an “R” and then click “Send”, finally you can see the D13 indicator on the UNO R3 board blinks once, and “Hello World!” is displayed on the serial monitor. Shown below.


Congrats. Your first programming is done well!