Ks0112 keyestudio EASY plug Digital Push Button: Difference between revisions
Keyestudio (talk | contribs) No edit summary |
Keyestudio (talk | contribs) |
||
| (14 intermediate revisions by the same user not shown) | |||
| Line 1: | Line 1: | ||
[[image:ks0112图.jpg|thumb|600px|right|Keyestudio EASY plug Digital Push Button]] | |||
==Introduction== | ==Introduction== | ||
The EASY Plug Push-button module is a tidy little design that lets you control a DC power source using an everyday tactile button.<br> | |||
This basic application module is widely applied to Arduino, Raspberry Pi platforms.<br> | |||
When the button is pressed, it outputs HIGH level signal; if release the button, it outputs LOW level signal.<br> | |||
You can simply connect to an IO port to have your first taste of Arduino.<br> | |||
This sensor needs to be used together with EASY plug control board.<br> | |||
<span style=color:red> '''Special Note:''' <br> | |||
The sensor/module is equipped with the RJ11 6P6C interface, compatible with our keyestudio EASY plug Control Board with RJ11 6P6C interface. <br> If you have the control board of other brands, it is also equipped with the RJ11 6P6C interface but has different internal line sequence, can’t be used compatibly with our sensor/module. </span><br> | |||
<br> | |||
==Specification== | ==Specification== | ||
* | * Connector: Easy plug | ||
* Supply Voltage: 3.3V to 5V | * Supply Voltage: 3.3V to 5V | ||
* Large button | * Large button and high-quality top cap | ||
* Sensor type: Digital | * Sensor type: Digital | ||
<br> | |||
==Technical Details== | |||
* Dimensions: 38mm*20mm*18mm | |||
* Weight: 5.6g | |||
<br> | |||
==Connect It Up== | |||
Connect the EASY Plug push button sensor and LED module to control board using RJ11 cables. <br> | |||
<br>[[File:按键灯.jpg|500px|frameless|thumb]]<br> | |||
<br> | |||
==Example 1: Button Controlled Light== | |||
<br> | |||
'''Upload the Code'''<br> | |||
Below is an example code. Open or drag below code to [https://wiki.keyestudio.com/Getting_Started_with_Mixly Mixly Blocks] and upload. <br> | |||
<br>[[File:ks0397 4.1.png|500px|frameless|thumb]]<br> | |||
<br> | |||
<br>[[File: | '''What You Should See'''<br> | ||
Powered up and upload well the code, press down the button, LED module is turned on. While release the button, LED is off. | |||
<br>[[File:ks0397 4-1.png|500px|frameless|thumb]]<br> | |||
<br>[[File:ks0397 4-3.png|500px|frameless|thumb]]<br> | |||
<br> | |||
Open the monitor, it will print out the value read from the button. | |||
<br>[[File:ks0397 4-2.png|500px|frameless|thumb]]<br> | |||
== | <br> | ||
< | ==Example 2: Simulating Table Lamp== | ||
<br> | |||
'''Upload the Code'''<br> | |||
Below is an example code. Open or drag below code to [https://wiki.keyestudio.com/Getting_Started_with_Mixly Mixly Blocks] and upload. | |||
<br>[[File:ks0397 4.2.png|600px|frameless|thumb]]<br> | |||
< | |||
<br> | |||
'''What You Should See'''<br> | |||
Powered up and upload well the code, press down the button, LED light is turned on, it will not be off when release the button; But if press the button once again, LED will be turned off. It seems like your table lamp. <br> | |||
<br>[[File:ks0397 4-5.png|500px|frameless|thumb]]<br> | |||
<br> | |||
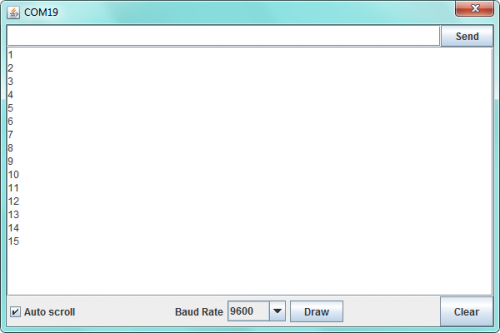
Open the monitor, you should be able to see how many times do you press the button. | |||
<br>[[File:ks0397 4-4.png|500px|frameless|thumb]]<br> | |||
<br> | |||
<br> | |||
==Resources == | ==Resources == | ||
https://fs.keyestudio.com/KS0112 | |||
<br> | |||
==Buy from == | |||
*[https://www.keyestudio.com/new-keyestudio-easy-plug-digital-push-button-module-for-arduino-steam-p0091-p0091.html '''Official Website''' ] | |||
= | *[https://www.aliexpress.com/store/product/New-Keyestudio-EASY-Plug-Digital-Push-Button-for-Arduino/1452162_32643204056.html?spm=2114.12010612.8148356.10.64de484e0lsdsr Shop on aliexpress] | ||
[[category: | [[category:EASY Plug]] | ||
Latest revision as of 16:12, 7 January 2021
Introduction
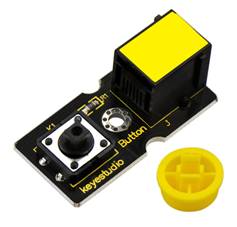
The EASY Plug Push-button module is a tidy little design that lets you control a DC power source using an everyday tactile button.
This basic application module is widely applied to Arduino, Raspberry Pi platforms.
When the button is pressed, it outputs HIGH level signal; if release the button, it outputs LOW level signal.
You can simply connect to an IO port to have your first taste of Arduino.
This sensor needs to be used together with EASY plug control board.
Special Note:
The sensor/module is equipped with the RJ11 6P6C interface, compatible with our keyestudio EASY plug Control Board with RJ11 6P6C interface.
If you have the control board of other brands, it is also equipped with the RJ11 6P6C interface but has different internal line sequence, can’t be used compatibly with our sensor/module.
Specification
- Connector: Easy plug
- Supply Voltage: 3.3V to 5V
- Large button and high-quality top cap
- Sensor type: Digital
Technical Details
- Dimensions: 38mm*20mm*18mm
- Weight: 5.6g
Connect It Up
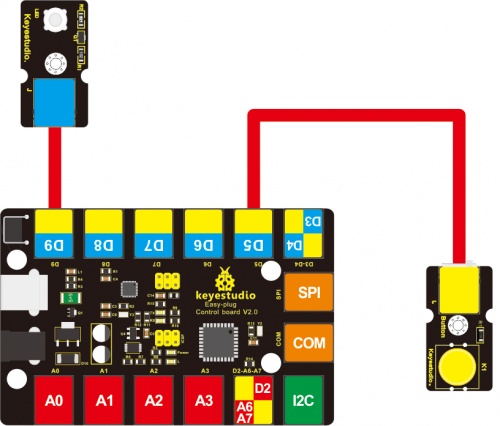
Connect the EASY Plug push button sensor and LED module to control board using RJ11 cables.
Example 1: Button Controlled Light
Upload the Code
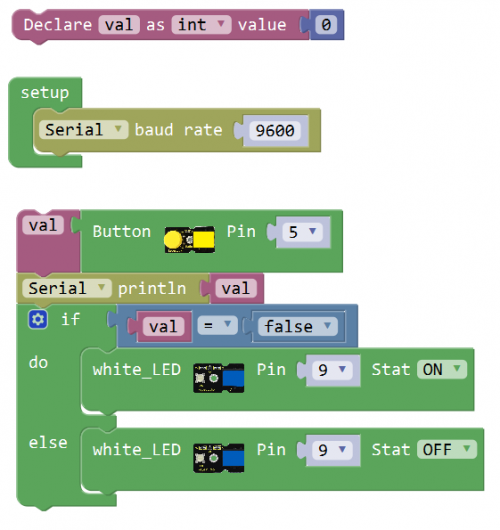
Below is an example code. Open or drag below code to Mixly Blocks and upload.
What You Should See
Powered up and upload well the code, press down the button, LED module is turned on. While release the button, LED is off.
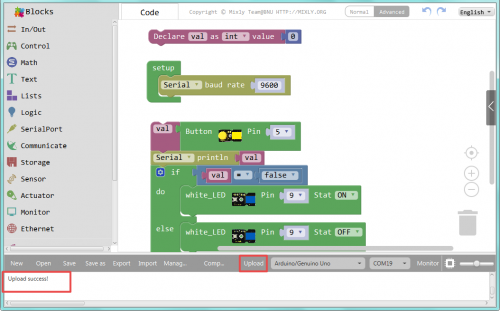
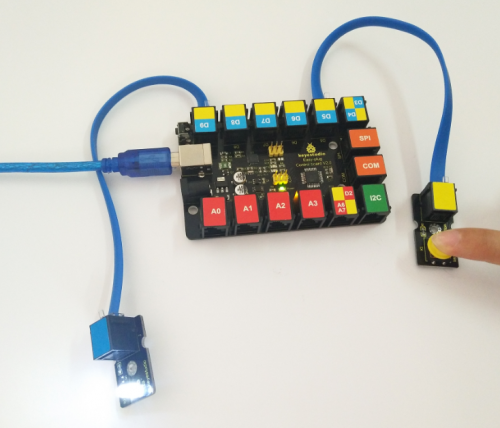
Open the monitor, it will print out the value read from the button.
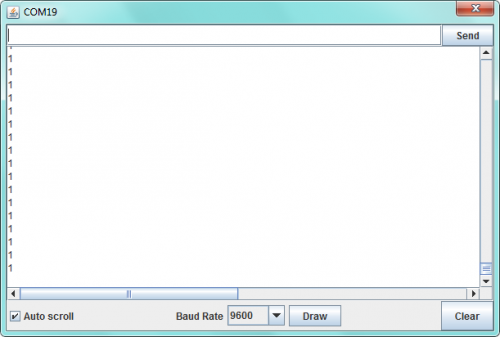
Example 2: Simulating Table Lamp
Upload the Code
Below is an example code. Open or drag below code to Mixly Blocks and upload.
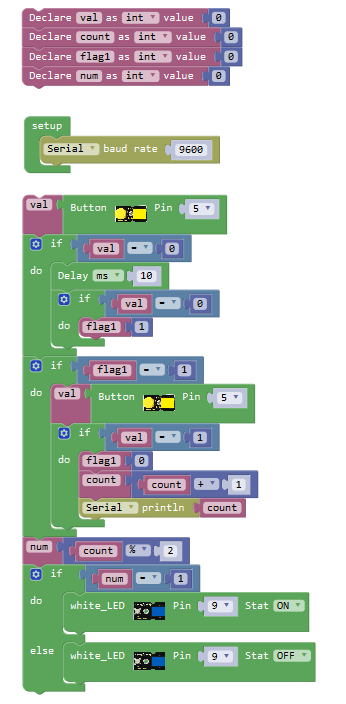
What You Should See
Powered up and upload well the code, press down the button, LED light is turned on, it will not be off when release the button; But if press the button once again, LED will be turned off. It seems like your table lamp.
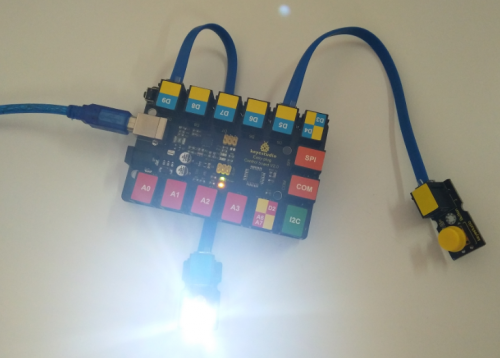
Open the monitor, you should be able to see how many times do you press the button.
Resources
https://fs.keyestudio.com/KS0112
