Ks0115 keyestudio EASY plug Digital Tilt Sensor Module: Difference between revisions
Keyestudio (talk | contribs) |
Keyestudio (talk | contribs) |
||
| (4 intermediate revisions by the same user not shown) | |||
| Line 6: | Line 6: | ||
Here is the principle of tilt sensor to illustrate how it works:<br> | Here is the principle of tilt sensor to illustrate how it works:<br> | ||
<br>[[File:ks0115 works.jpg|600px|frameless|thumb]]<br> | <br>[[File:ks0115 works.jpg|600px|frameless|thumb]]<br> | ||
<br> | |||
<span style=color:red> '''Special Note:''' <br> | |||
The sensor/module is equipped with the RJ11 6P6C interface, compatible with our keyestudio EASY plug Control Board with RJ11 6P6C interface. <br> If you have the control board of other brands, it is also equipped with the RJ11 6P6C interface but has different internal line sequence, can’t be used compatibly with our sensor/module. </span><br> | |||
<br> | <br> | ||
==Features== | ==Features== | ||
* Connector: Easy plug | * Connector: Easy plug | ||
| Line 21: | Line 26: | ||
==Connect It Up== | ==Connect It Up== | ||
Connect the EASY Plug Tilt sensor and LED module to control board using RJ11 cables. Then connect the control board to your PC with a USB cable. | Connect the EASY Plug Tilt sensor and LED module to control board using RJ11 cables. Then connect the control board to your PC with a USB cable. | ||
<br>[[File:倾斜灯.jpg| | <br>[[File:倾斜灯.jpg|600px|frameless|thumb]]<br> | ||
<br> | <br> | ||
| Line 34: | Line 39: | ||
<br> | <br> | ||
Done uploading the code, if tilt the sensor, you should see the led state ON or OFF. | Done uploading the code, if tilt the sensor, you should see the led state ON or OFF. | ||
<br>[[File:ks0397 13-2.png| | <br>[[File:ks0397 13-2.png|600px|frameless|thumb]]<br> | ||
<br>[[File:ks0397 13-3.png| | <br>[[File:ks0397 13-3.png|650px|frameless|thumb]]<br> | ||
| Line 47: | Line 52: | ||
'''Hookup Guide'''<br> | '''Hookup Guide'''<br> | ||
Connect the EASY Plug tilt sensor and two LED modules to control board using an RJ11 cable. <br> | Connect the EASY Plug tilt sensor and two LED modules to control board using an RJ11 cable. <br> | ||
<br>[[File:倾斜两灯.png| | <br>[[File:倾斜两灯.png|600px|frameless|thumb]]<br> | ||
<br> | <br> | ||
| Line 59: | Line 64: | ||
<br> | <br> | ||
Upload success, if tilt the sensor to one side, you should see one led is turned on; if tilt toward another side, another led is turn on. | Upload success, if tilt the sensor to one side, you should see one led is turned on; if tilt toward another side, another led is turn on. | ||
<br>[[File:ks0397 13-6.png| | <br>[[File:ks0397 13-6.png|600px|frameless|thumb]]<br> | ||
<br>[[File:ks0397 13-5.png| | <br>[[File:ks0397 13-5.png|600px|frameless|thumb]]<br> | ||
<br> | <br> | ||
<br> | <br> | ||
==Resources == | ==Resources == | ||
https://fs.keyestudio.com/KS0115 | |||
https:// | |||
<br> | |||
==Buy from == | ==Buy from == | ||
*[https://www.keyestudio.com/new-keyestudio-easy-plug-digital-tilt-sensor-module-for-arduino-starter-steam-p0089-p0089.html '''Official Website'''] | *[https://www.keyestudio.com/new-keyestudio-easy-plug-digital-tilt-sensor-module-for-arduino-starter-steam-p0089-p0089.html '''Official Website'''] | ||
Latest revision as of 16:15, 7 January 2021
Introduction
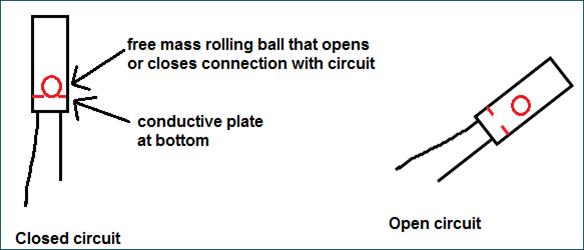
The tilt-switch twig is the equivalent of a button, and is used as a digital input. Inside the tilt switch is a ball that make contact with the pins when the case is upright. Tilt the case over and the balls don't touch, thus not making a connection.
When the switch is level it is open, and when tilted, the switch closes. It can be used for orientation detection, alarm device or others.
Here is the principle of tilt sensor to illustrate how it works:
Special Note:
The sensor/module is equipped with the RJ11 6P6C interface, compatible with our keyestudio EASY plug Control Board with RJ11 6P6C interface.
If you have the control board of other brands, it is also equipped with the RJ11 6P6C interface but has different internal line sequence, can’t be used compatibly with our sensor/module.
Features
- Connector: Easy plug
- Supply Voltage: 3.3V to 5V
- Sensor type: Digital
Technical Details
- Dimensions: 39mm*20mm*18mm
- Weight: 4.8g
Connect It Up
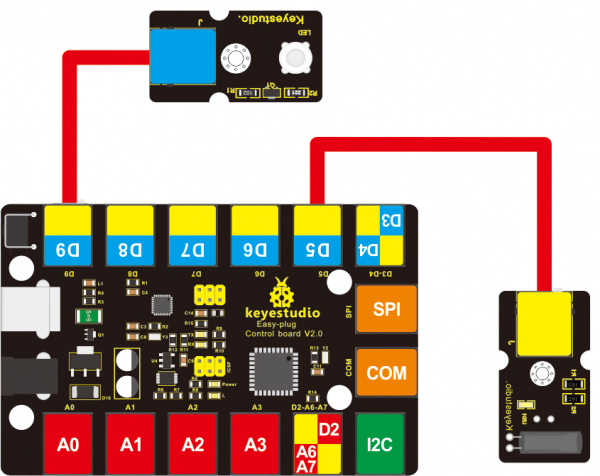
Connect the EASY Plug Tilt sensor and LED module to control board using RJ11 cables. Then connect the control board to your PC with a USB cable.
Upload the Code
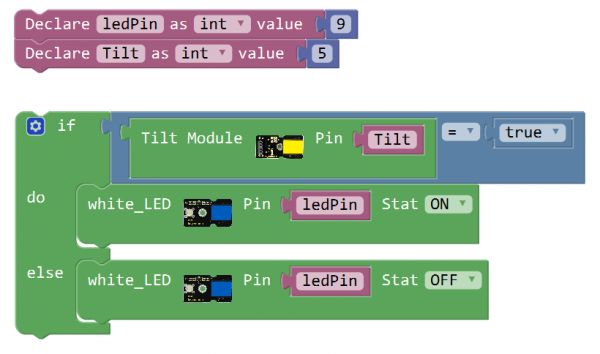
Below is an example code. Open or drag below code to Mixly Blocks and upload.
What You Should See
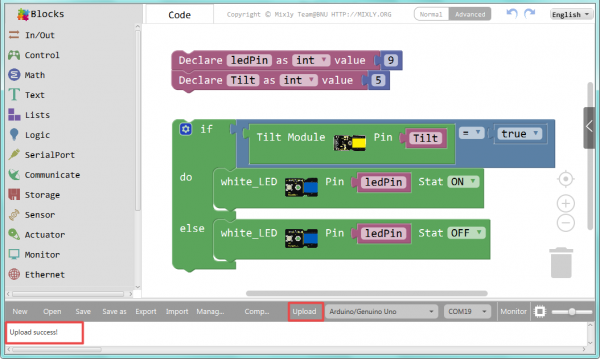
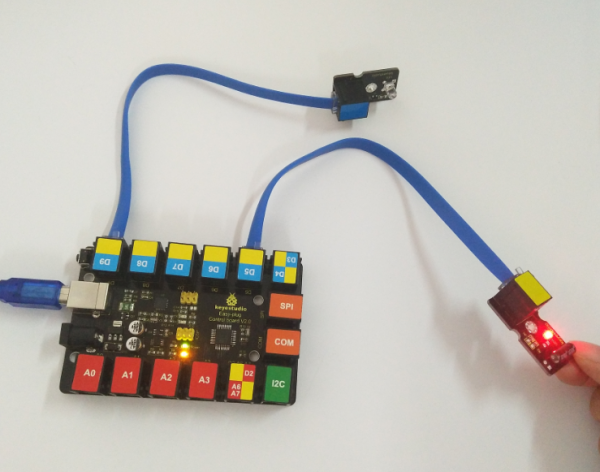
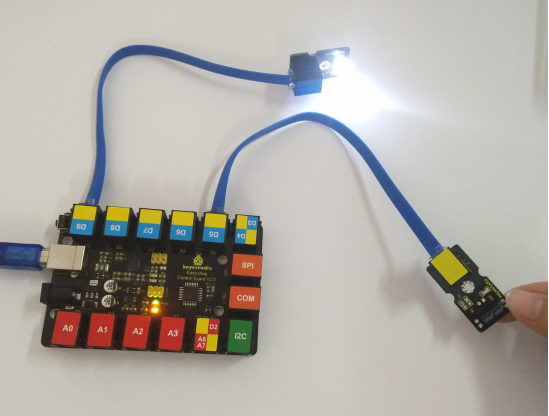
Done uploading the code, if tilt the sensor, you should see the led state ON or OFF.
Extension Experiment
Controlling Two Lights
Next, how to use tilt sensor to control two lights on and off. Let’s get started right now!
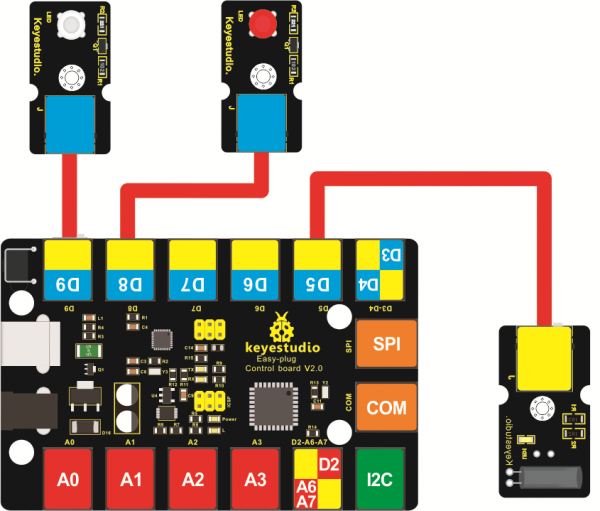
Hookup Guide
Connect the EASY Plug tilt sensor and two LED modules to control board using an RJ11 cable.
Upload the Code
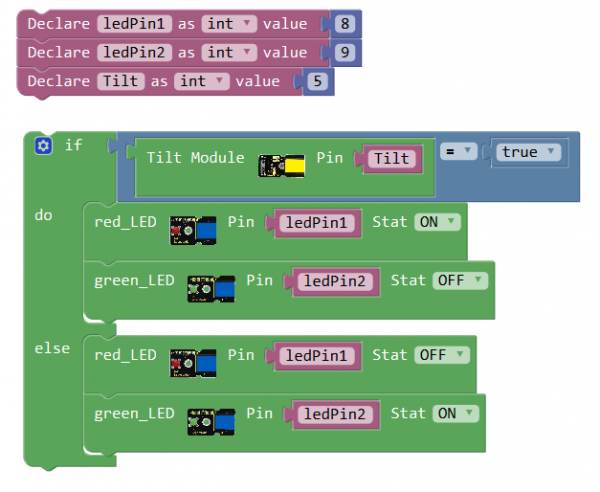
Below is an example code.
What You Should See
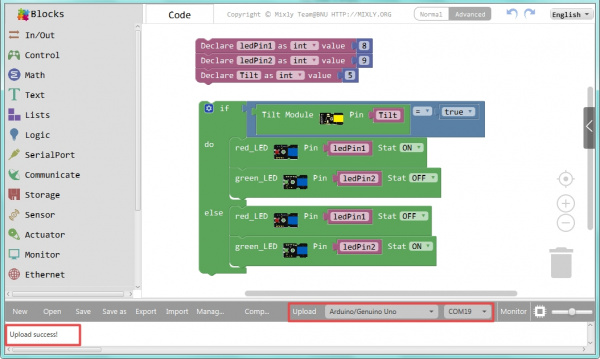
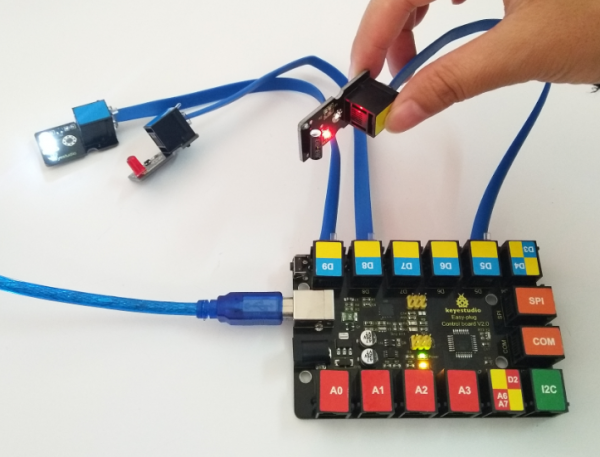
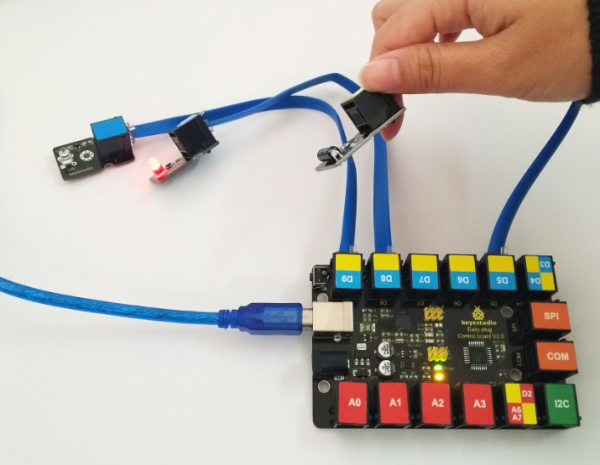
Upload success, if tilt the sensor to one side, you should see one led is turned on; if tilt toward another side, another led is turn on.
Resources
https://fs.keyestudio.com/KS0115
