Ks0139 keyestudio EASY plug I2C 8x8 LED Matrix: Difference between revisions
Keyestudio (talk | contribs) |
Keyestudio (talk | contribs) |
||
| (10 intermediate revisions by the same user not shown) | |||
| Line 6: | Line 6: | ||
This module uses HT16K33 chip to drive an 8x8 dot matrix. Just need to use the I2C communication port of microcontroller to control the dot matrix, which can save more port resources of microcontroller.<br> | This module uses HT16K33 chip to drive an 8x8 dot matrix. Just need to use the I2C communication port of microcontroller to control the dot matrix, which can save more port resources of microcontroller.<br> | ||
The four pin of this module is integrated into a crystal plug. All you need to do is connect the module to control board for communication using an RJ11 cable.<br> | The four pin of this module is integrated into a crystal plug. All you need to do is connect the module to control board for communication using an RJ11 cable.<br> | ||
'''Note:''' | This module should be used with EASY plug control board.<br> | ||
<span style=color:red> '''Special Note:''' <br> | |||
The sensor/module is equipped with the RJ11 6P6C interface, compatible with our keyestudio EASY plug Control Board with RJ11 6P6C interface. <br> If you have the control board of other brands, it is also equipped with the RJ11 6P6C interface but has different internal line sequence, can’t be used compatibly with our sensor/module. </span><br> | |||
<br> | <br> | ||
==Specification== | ==Specification== | ||
* Interface: Easy plug | * Interface: Easy plug | ||
| Line 17: | Line 21: | ||
<br> | <br> | ||
==Connection Diagram == | ==Connection Diagram == | ||
<br>[[File:图片1-0139.png| | <br>[[File:图片1-0139.png|700px|frameless|thumb]]<br> | ||
<br> | <br> | ||
==Sample Code== | ==Sample Code== | ||
Below is an example code. Open or drag below code to [https://wiki.keyestudio.com/Getting_Started_with_Mixly Mixly Blocks] and upload. <br> | |||
<br>[[File:ks0397 21.1.png|500px|frameless|thumb]]<br> | |||
< | <br> | ||
==What You Should See== | |||
Upload the code successfully, it will light up a dot light on the matrix. | |||
<br>[[File:0397-21-1.png|500px|frameless|thumb]]<br> | |||
<br> | |||
==Extension Experiment 1== | |||
<br> | |||
<span style=color:brown><big>'''Showing 0~5'''</big></span><br> | |||
You can upload the code below to show the number 0~5. | |||
<br>[[File:ks0397 21.2.1.png|500px|frameless|thumb]]<br> | |||
<br>[[File:ks0397 21.2.2.png|500px|frameless|thumb]]<br> | |||
<br>[[File:ks0397 21.2.3.png|500px|frameless|thumb]]<br> | |||
<br> | |||
'''What You Should See'''<br> | |||
Upload the code successfully, the matrix will show the number from 0 to 5. | |||
<br>[[File:0397-21-2.png|500px|frameless|thumb]]<br> | |||
<br>[[File:0397-21-3.png|500px|frameless|thumb]]<br> | |||
<br>[[File:0397-21-4.png|500px|frameless|thumb]]<br> | |||
<br> | |||
==Extension Experiment 2== | |||
<br> | |||
<span style=color:brown><big>'''Button Controlled Heart'''</big></span><br> | |||
<br> | |||
'''Hookup Guide'''<br> | |||
Connect the EASY Plug 8x8 LED Matrix module and button module to control board using RJ11 cables. | |||
<br>[[File:8x8点阵按键.jpg|500px|frameless|thumb]]<br> | |||
<br> | |||
'''Test Code'''<br> | |||
Below is an example code.<br> | |||
<br>[[File:ks0397 21.3.1.png|500px|frameless|thumb]]<br> | |||
<br>[[File:ks0397 21.3.2.png|500px|frameless|thumb]]<br> | |||
<br> | |||
'''What You Should See'''<br> | |||
<br>[[File:ks0397 21-6.png|500px|frameless|thumb]]<br> | |||
<br> | |||
Upload the code successfully, press the button, you can control the matrix show a big heart image or a small one. It seems like a beating heart. | |||
<br>[[File:0397-21-5.png|500px|frameless|thumb]]<br> | |||
<br>[[File:0397-21-6.png|500px|frameless|thumb]]<br> | |||
<br> | |||
== Resources == | == Resources == | ||
https:// | https://fs.keyestudio.com/KS0139 | ||
<br> | |||
== Get One Now == | == Get One Now == | ||
'''Official Website''' | *[https://www.keyestudio.com/keyestudio-easy-plug-iic-i2c-88-le-d-dot-matrix-display-for-arduino-steam-p0081-p0081.html '''Official Website''' ] | ||
*[https://www.aliexpress.com/store/product/2016-New-Keyestudio-EASY-plug-IIC-I2C-8-8-LE-D-Dot-Matrix-Display-for-Arduino/1452162_32637470995.html?spm=2114.12010612.8148356.33.5f23503bM43KdL Aliexpress store ] | |||
[[Category:EASY Plug]] | [[Category:EASY Plug]] | ||
Latest revision as of 08:22, 8 January 2021
EASY plug I2C 8x8 LED Matrix
Introduction
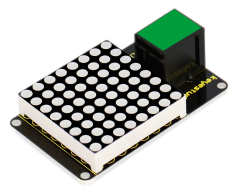
What's better than a single LED? Lots of LEDs! A fun way to make a small display is to use an 8x8 matrix.
This module uses HT16K33 chip to drive an 8x8 dot matrix. Just need to use the I2C communication port of microcontroller to control the dot matrix, which can save more port resources of microcontroller.
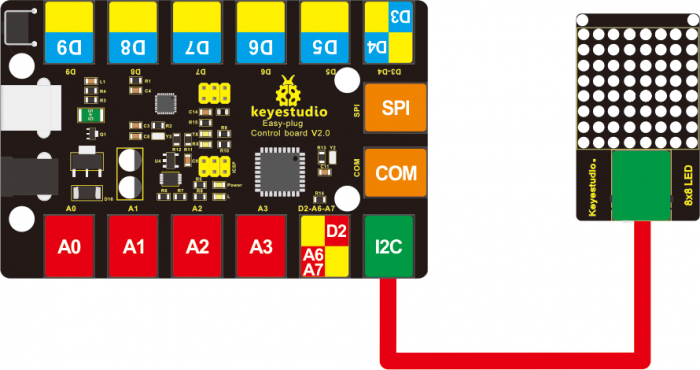
The four pin of this module is integrated into a crystal plug. All you need to do is connect the module to control board for communication using an RJ11 cable.
This module should be used with EASY plug control board.
Special Note:
The sensor/module is equipped with the RJ11 6P6C interface, compatible with our keyestudio EASY plug Control Board with RJ11 6P6C interface.
If you have the control board of other brands, it is also equipped with the RJ11 6P6C interface but has different internal line sequence, can’t be used compatibly with our sensor/module.
Specification
- Interface: Easy plug
- Supply voltage: 4.5V-5.5V
- Maximum display: 16*8
- Size: 56*32mm*18mm
- Weight: 14.7g
Connection Diagram
Sample Code
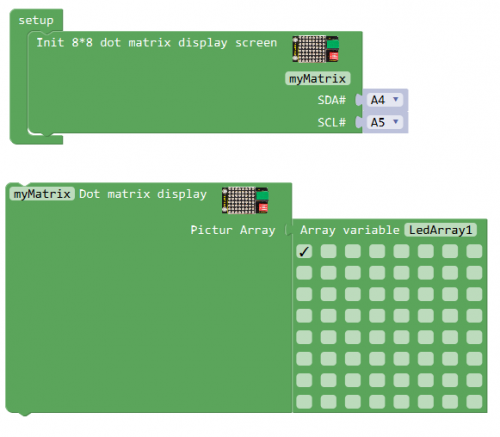
Below is an example code. Open or drag below code to Mixly Blocks and upload.
What You Should See
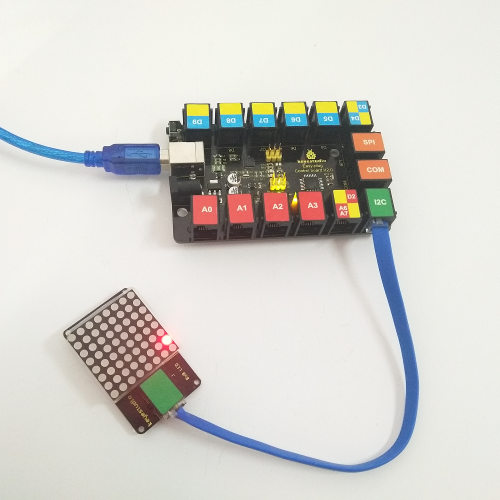
Upload the code successfully, it will light up a dot light on the matrix.
Extension Experiment 1
Showing 0~5
You can upload the code below to show the number 0~5.
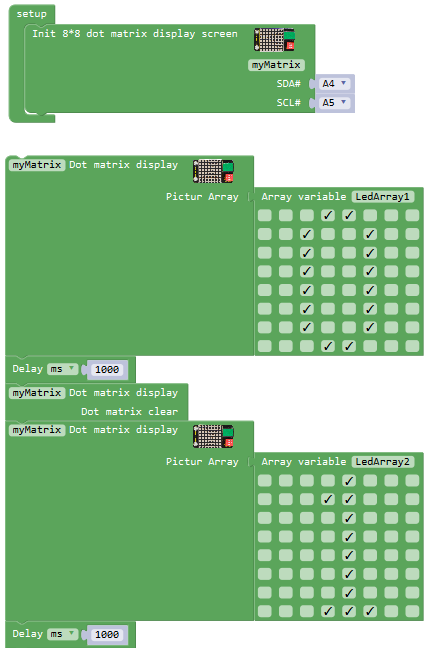
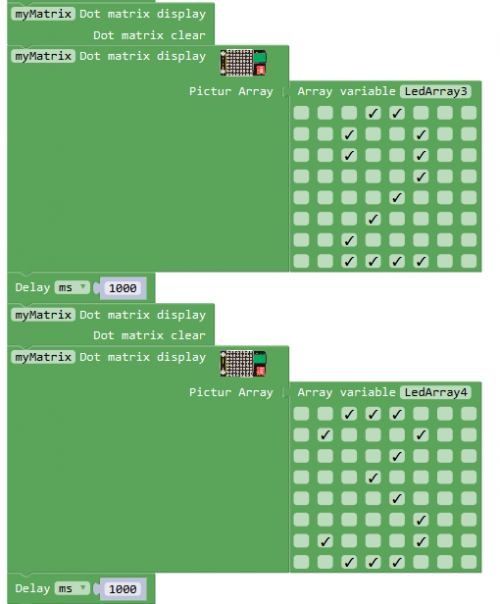
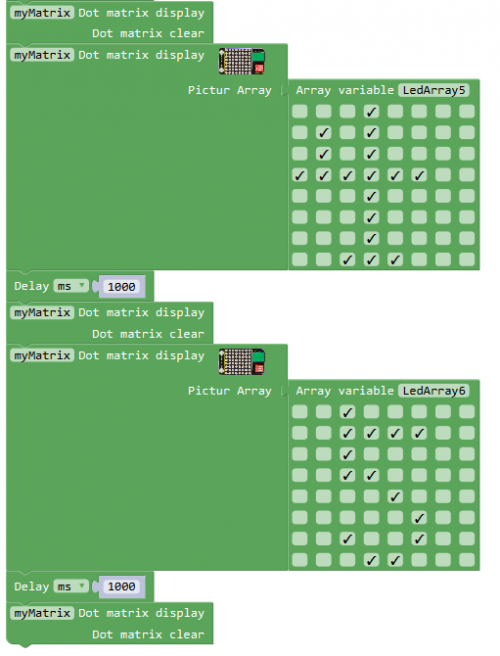
What You Should See
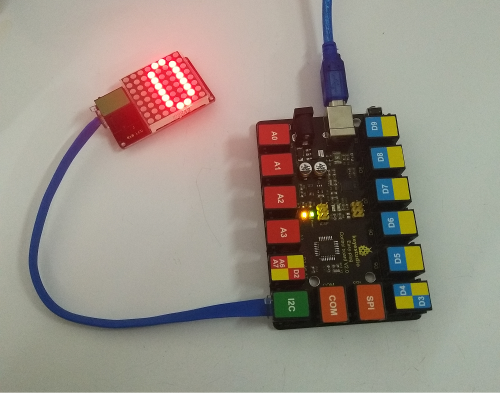
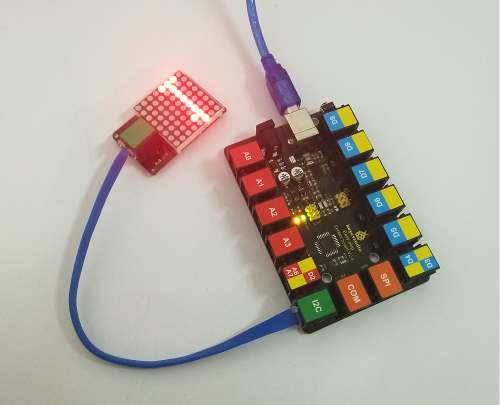
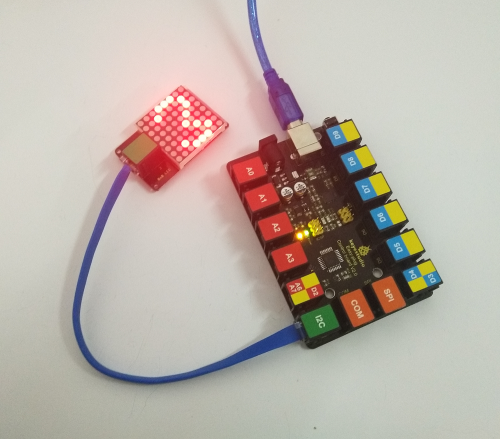
Upload the code successfully, the matrix will show the number from 0 to 5.
Extension Experiment 2
Button Controlled Heart
Hookup Guide
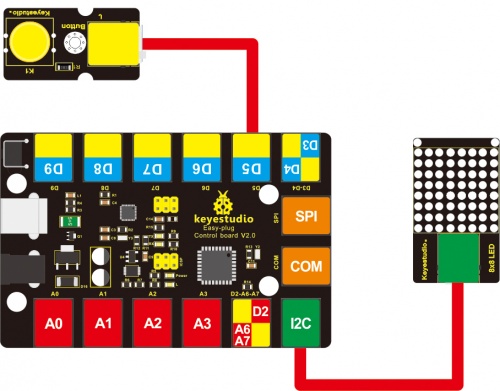
Connect the EASY Plug 8x8 LED Matrix module and button module to control board using RJ11 cables.
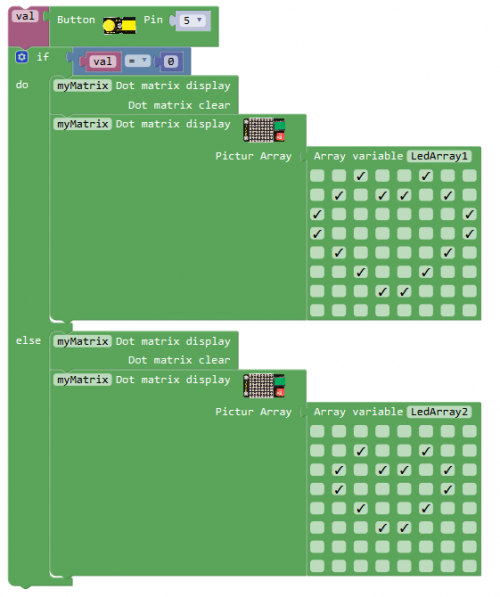
Test Code
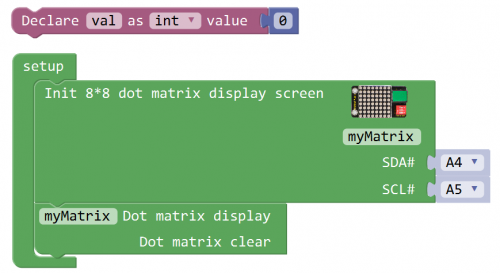
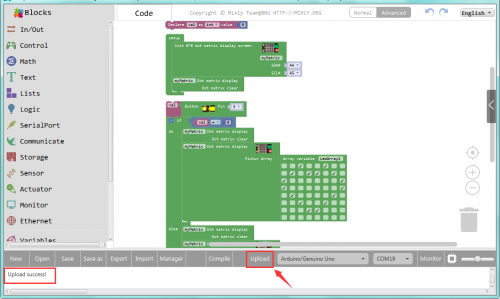
Below is an example code.
What You Should See
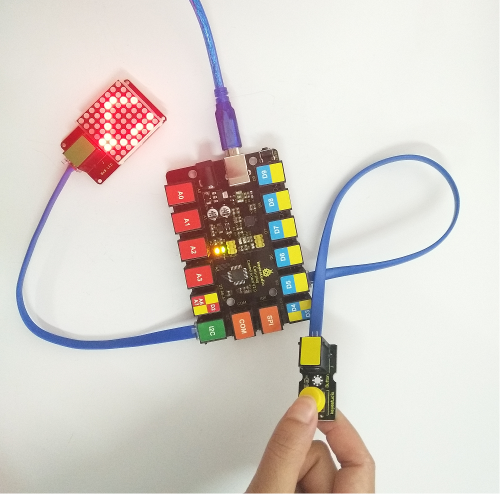
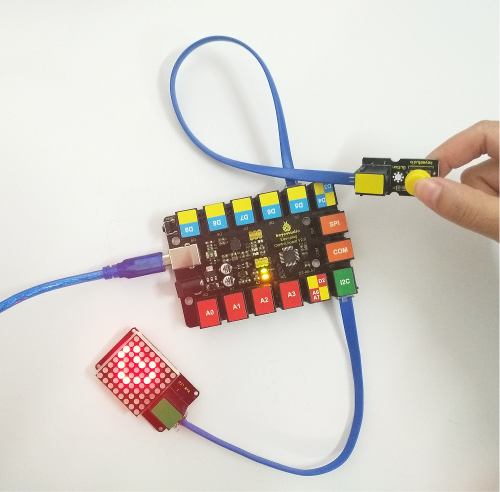
Upload the code successfully, press the button, you can control the matrix show a big heart image or a small one. It seems like a beating heart.
Resources
https://fs.keyestudio.com/KS0139
