Ks0286 keyestudio CNC Kit / CNC Shield V3.0 +keyestudio Uno R3+4pcs DRV8825 Driver / GRBL Compatible: Difference between revisions
Keyestudio (talk | contribs) |
Keyestudio (talk | contribs) |
||
| Line 44: | Line 44: | ||
For different operating system, there may be slight difference in installation method. Below is an example in WIN 7. | For different operating system, there may be slight difference in installation method. Below is an example in WIN 7. | ||
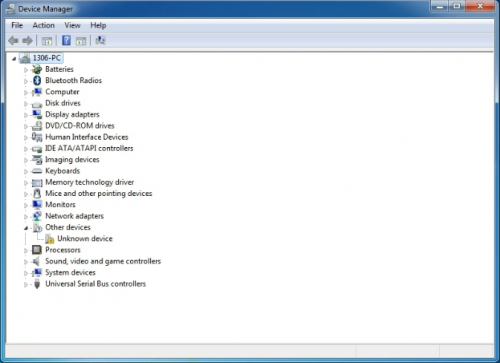
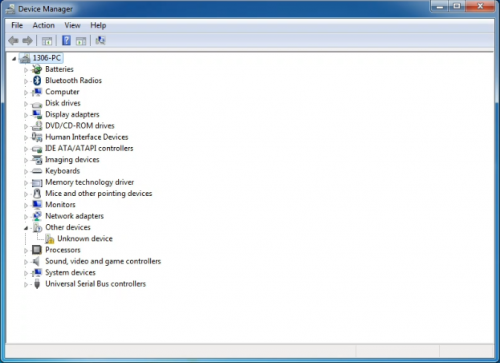
When you connect Arduino Uno to your computer at the first time, right click “Computer” —>“Properties”—> “Device manager”, you can see “Unknown devices”. | When you connect Arduino Uno to your computer at the first time, right click “Computer” —>“Properties”—> “Device manager”, you can see “Unknown devices”. | ||
<br>[[File:KS0286-1.png|500px|frameless|thumb]]<br> | <br>[[File:KS0286-1.png|500px|frameless|thumb]]<br> | ||
Revision as of 14:04, 3 August 2017
Keyestudio CNC Kit / CNC Shield V3.0 +keyestudio Uno R3+4pcs DRV8825 Driver / GRBL Compatible
Introduction
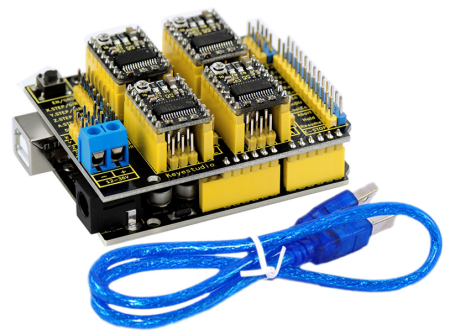
Keyestudio CNC Shield V3.0 can be used as driver expansion board for engraving machines. It has total 4 channel slots for DRV8825 stepper motor driver modules (not included) for driving 4 channel of stepper motors. Each channel of stepper motor only needs 2 IO ports, which means 6 IO ports is sufficient to manage 3 stepper motors. This shield can make quick work for managing stepper motors in your project.
Specification
1.Latest Keyestudio CNC Shield Version 3.0
2.GRBL 0.8c compatible. (Open source firmware that runs on an Arduino UNO that turns G-code commands into stepper signals)
3.4-Axis support (X, Y, Z , A-Can duplicate X,Y,Z or do a full 4th axis with custom firmware using pins D12 and D13)
4.2 x End stops for each axis (6 in total)
5.Spindle enable and direction
6.Coolant enable
7.Uses removable Pololu DRV8825 compatible stepper drivers. (A4988, DRV8825 and others)
8.Jumpers to set the Micro-Stepping for the stepper drivers. (Some drivers like the DRV8825 can do up to 1/32 micro-stepping )
9.Compact design.
10.Stepper Motors can be connected with 4 pin molex connectors or soldered in place.
11. Runs on 12-36V DC. (At the moment only the Pololu DRV8825 drivers can handle up to 36V so please consider the operation voltage when powering the board.)
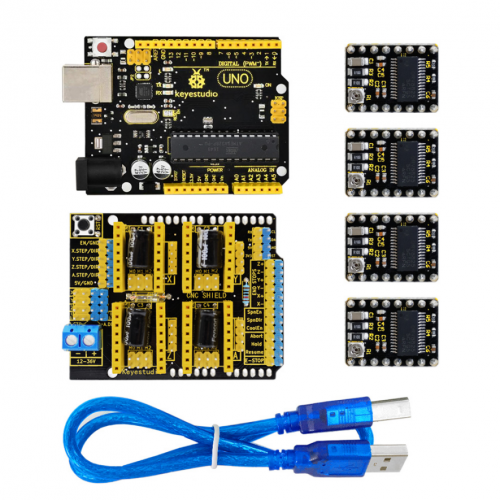
Kit List
- Keyestudio CNC Shield V3.0 *1
- Keyestudio Uno R3 Board *1
- DRV8825 Driver *4
- USB Cable *1
Connection Diagram
Install Driver Software and Development Environment Software IDE
Install Diver Software
For different operating system, there may be slight difference in installation method. Below is an example in WIN 7.
When you connect Arduino Uno to your computer at the first time, right click “Computer” —>“Properties”—> “Device manager”, you can see “Unknown devices”.
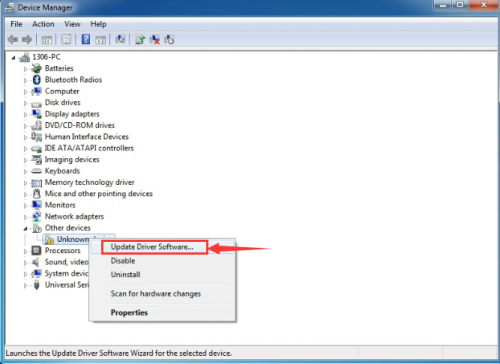
Click “Unknown devices”, select “Update Driver software”.
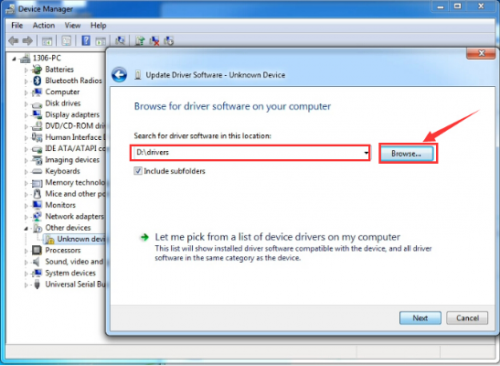
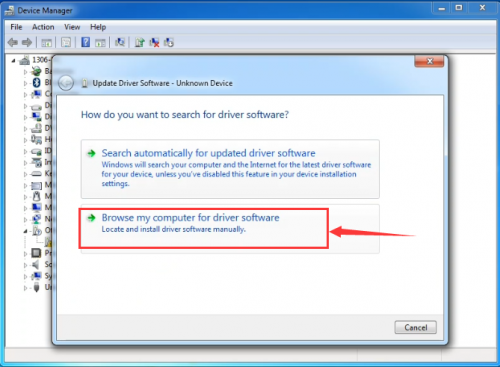
In this page, click “Browse my computer for driver software”.
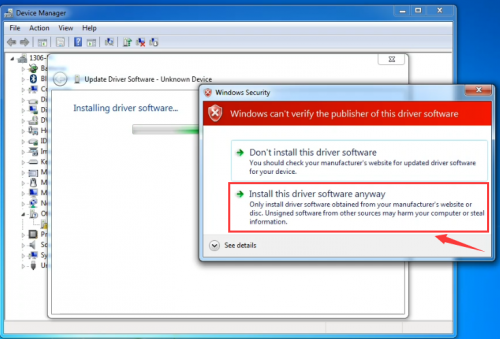
Click “Next”; select “Install this driver software anyway” to begin the installation.
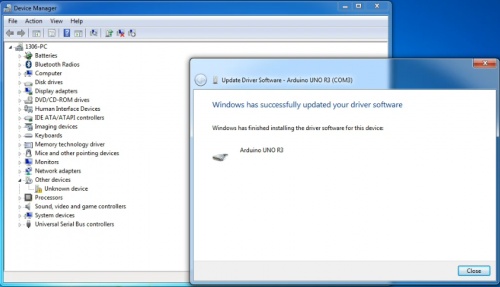
Installation completed; click “Close”.
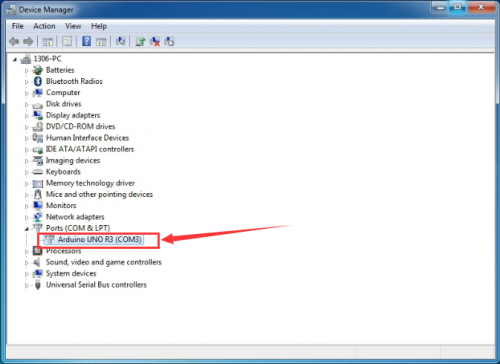
After driver is installed, go to “Device manager” again. right click “Computer” —> “Properties”—> “Device manager”, you can see UNO device as below figure shown, also the correct Com port.
Install Development Environment Software IDE
Double click arduino-1.5.6-r2-windows to start.
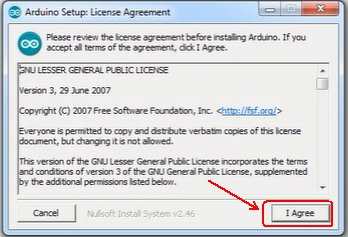
Select “I Agree”to accept license agreement.
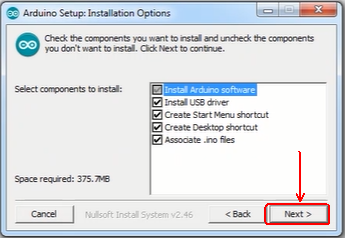
Select components to install and click “Next”.
Click “Browse” and select another folder. Click “Install” to start the installation.
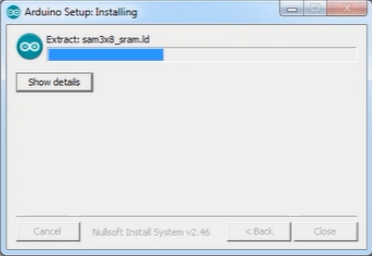
Finally, wait for a few minutes to finish it.
