Ks0315 Keyestudio SK6812 4x8 LED Matrix Shield for BBC micro bit: Difference between revisions
Keyestudio (talk | contribs) (Created page with " <br> == Keyestudio SK6812 4x8 LED Matrix Shield for micro:bit == <br>500px|frameless|thumb<br> <br> == Description == Keyestudio SK6812 4x8 LE...") |
Keyestudio (talk | contribs) |
||
| (10 intermediate revisions by the same user not shown) | |||
| Line 9: | Line 9: | ||
<br> | <br> | ||
== Description == | == Description == | ||
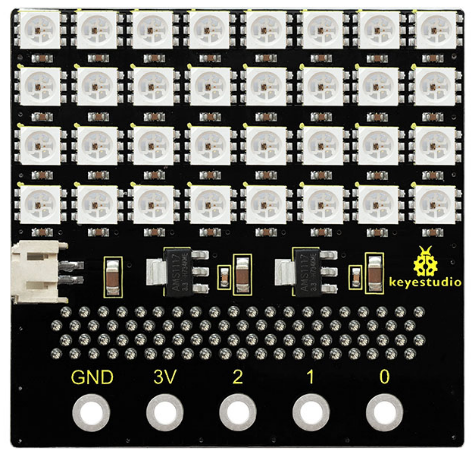
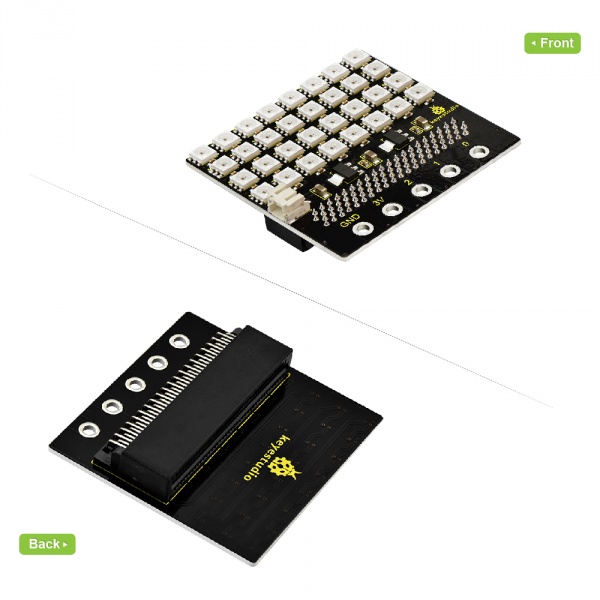
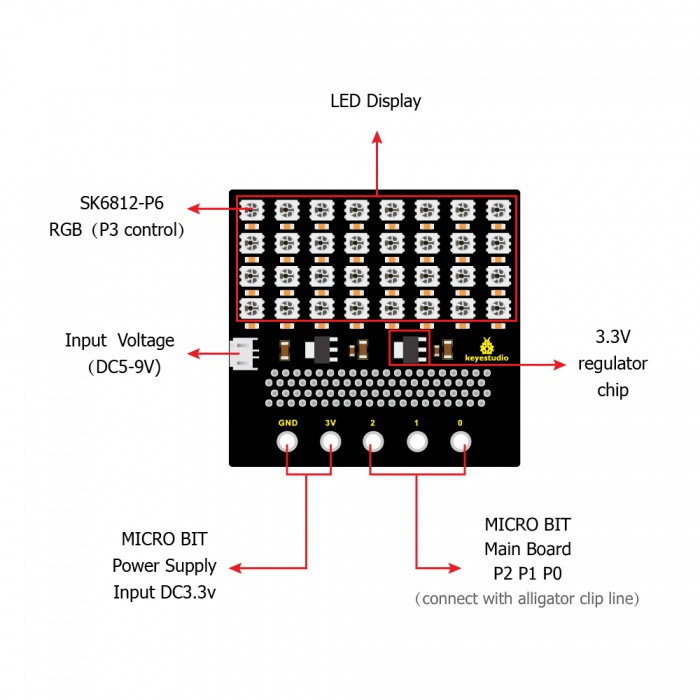
Keyestudio SK6812 4x8 LED matrix shield comes with 32 SK6812 LED lights, fully compatible with micro:bit control board. Onboard comes with two 3.3V regulator chips, one powers for the micro bit control board, the other powers for 32 SK6812 LED lights. | Keyestudio SK6812 4x8 LED matrix shield comes with 32 SK6812 LED lights, fully compatible with micro:bit control board. Onboard comes with two 3.3V regulator chips, one powers for the micro bit control board, the other powers for 32 SK6812 LED lights. | ||
When using it, just input DC 5-9V to the shield. You can upload the control code to the micro:bit control board, then insert the micro:bit into the shield, and supply DC5-9V power voltage on the shield, this way you can control 32 SK6812 LED lights to display multiple colors. | When using it, just input DC 5-9V to the shield. You can upload the control code to the micro:bit control board, then insert the micro:bit into the shield, and supply DC5-9V power voltage on the shield, this way you can control 32 SK6812 LED lights to display multiple colors. | ||
<br>[[File:KS0315.jpeg| | |||
<span style=color:red>Note: <big>'''we adopt V1.5 micro:bit in the whole tutorial, but our tutorial is also compatible with the latest version micro:bit. | |||
When doing experiment with latest micro:bit, you need to transfer code into Makecode online editor first, save code again then download it to micro:bit.'''</big></span> | |||
<br>[[File:KS0315.jpeg|600px|frameless|thumb]]<br> | |||
<br> | <br> | ||
== Specification == | == Specification == | ||
| Line 44: | Line 50: | ||
This SK6812 4X8 LED dot matrix shield should be used together with micro:bit main board. <br> | This SK6812 4X8 LED dot matrix shield should be used together with micro:bit main board. <br> | ||
Open the browser page to enter https://makecode.microbit.org/ pop up the interface shown as below. | Open the browser page to enter https://makecode.microbit.org/ pop up the interface shown as below. | ||
<br>[[File:KS0315 图片2.png| | <br>[[File:KS0315 图片2.png|600px|frameless|thumb]]<br> | ||
<br> | <br> | ||
Before type the test code, you need to add the package. First click Add Package, shown below. | Before type the test code, you need to add the package. First click Add Package, shown below. | ||
<br>[[File:KS0315 图片3.png| | <br>[[File:KS0315 图片3.png|600px|frameless|thumb]]<br> | ||
<br> | <br> | ||
Then, on the search bar enter neopixel, shown below. | Then, on the search bar enter neopixel, shown below. | ||
<br>[[File:KS0315 图片4.png| | <br>[[File:KS0315 图片4.png|600px|frameless|thumb]]<br> | ||
<br> | <br> | ||
Click the icon of neopixel to add the package: | Click the icon of neopixel to add the package: | ||
<br>[[File:KS0315 图片5.png| | <br>[[File:KS0315 图片5.png|600px|frameless|thumb]]<br> | ||
<br> | <br> | ||
Once neopixel package added successfully, you should see the Neopixel project display on the Edit bar. Shown below. | Once neopixel package added successfully, you should see the Neopixel project display on the Edit bar. Shown below. | ||
<br>[[File:KS0315 图片6.png| | <br>[[File:KS0315 图片6.png|600px|frameless|thumb]]<br> | ||
<br> | <br> | ||
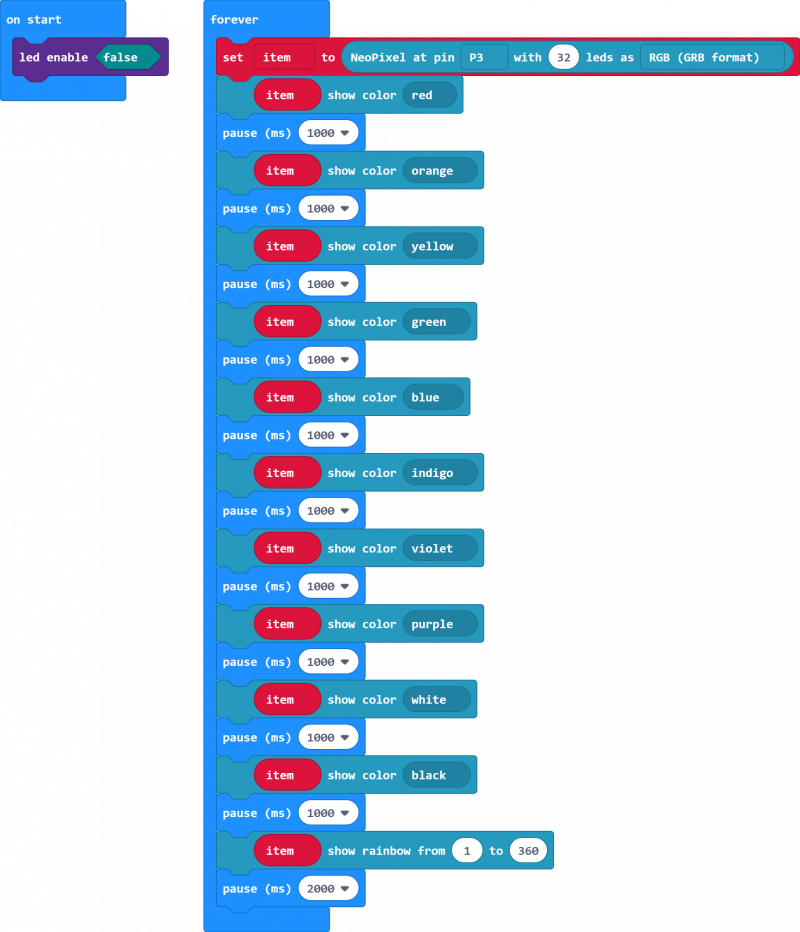
'''Test Code:''' | '''Test Code:''' | ||
<br>[[File: | <br>[[File:Microbit-screenshot.png|800px|frameless|thumb]]<br> | ||
<br> | <br> | ||
== What you will see?== | == What you will see?== | ||
Upload well the code to the micro:bit control board, then insert the micro:bit into shield, and supply the power DC 5-9V, finally you will see the LEDs on the shield display shiny colors. Shown below. | Upload well the code to the micro:bit control board, then insert the micro:bit into shield, and supply the power DC 5-9V, finally you will see the LEDs on the shield display shiny colors. Shown below. | ||
| Line 73: | Line 80: | ||
<br> | <br> | ||
== Resources == | == Resources == | ||
https://fs.keyestudio.com/KS0315 | |||
*[https:// | * [http://microbit.org/ BBC micro:bit website ] <br> | ||
* [https://makecode.microbit.org/ Micro:bit MakeCode Block Editor ]<br> | |||
* [http://microbit.org/guide/ Meet micro:bit starter programming] <br> | |||
* [http://microbit.org/guide/features/ BBC micro:bit Features Guide ] <br> | |||
* [http://microbit.org/guide/features/ BBC micro:bit Safety Warnings ] <br> | |||
* [http://microbit.org/guide/quick/ BBC micro:bit Quick Start Guide ] <br> | |||
* [http://microbit.org/guide/hardware/pins/ BBC micro:bit Pins ] | |||
| Line 82: | Line 95: | ||
== Buy From== | == Buy From== | ||
* | * [https://www.keyestudio.com/keyestudio-sk6812-4x8-32-bit-led-dot-matrix-shield-for-micro-bit-p0487-p0487.html '''Official website'''] | ||
* [https://www.aliexpress.com/store/product/Keyestudio-SK6812-4X8-32-Bit-LED-Dot-Matrix-Shield-For-Micro-Bit/1452162_32890045627.html?spm=2114.12010612.8148356.25.1e3c5f38Nsyds9 '''Shop on Aliexpress''' ] | |||
[[Category: Micro:bit ]] | [[Category: Micro:bit ]] | ||
Latest revision as of 11:11, 27 April 2021
Keyestudio SK6812 4x8 LED Matrix Shield for micro:bit
Description
Keyestudio SK6812 4x8 LED matrix shield comes with 32 SK6812 LED lights, fully compatible with micro:bit control board. Onboard comes with two 3.3V regulator chips, one powers for the micro bit control board, the other powers for 32 SK6812 LED lights.
When using it, just input DC 5-9V to the shield. You can upload the control code to the micro:bit control board, then insert the micro:bit into the shield, and supply DC5-9V power voltage on the shield, this way you can control 32 SK6812 LED lights to display multiple colors.
Note: we adopt V1.5 micro:bit in the whole tutorial, but our tutorial is also compatible with the latest version micro:bit. When doing experiment with latest micro:bit, you need to transfer code into Makecode online editor first, save code again then download it to micro:bit.
Specification
- Voltage Supply: DC 5-9V
- The number of SK6812 LED: 32
Interfaces
Features of SK6812 LED
- 1) Brightness: R: 400-500MCD; G:1000-1500MCD; B: 300-400MCD
- 2) Band: R: 620-625NM; G: 520-522.5NM; B: 467.5-470NM
- 3) The 5050 built-in SK6812 light bead has intelligent reverse connection protection, so don’t worry about IC damage due to the reverse connection of power supply.
- 4) The SK6812IC control circuit shares a common power supply with the LED light point source.
- 5) The control circuit and RGB chip are integrated in a 5050 package component, forming a complete external control pixel.
- 6) Built-in signal shaping circuit. After receiving the signal, any pixel point will access to waveform shaping and then output. Ensure that the waveform distortion of the circuit will not be accumulated.
- 7) Built-in power-on reset and power-down reset circuit.
- 8) The three primary colors of each pixel can realize 256-level brightness display, to complete the full color display of 16777216 kinds of colors. The scanning frequency is not lower than 400Hz/s.
- 9) Serial cascade interface. Able to complete the data receiving and decoding through a signal line.
- 10) Any two-point transmission distance does not need to add any circuit when the distance does not exceed 5 meters.
- 11) When the refresh rate is 30 frames/second, the number of cascades is not less than 1024 points.
- 12) Data transmission speed can reach up to 800Kbps.
- 13) The color of light is highly consistent and cost-effective.
How to test it ?
This SK6812 4X8 LED dot matrix shield should be used together with micro:bit main board.
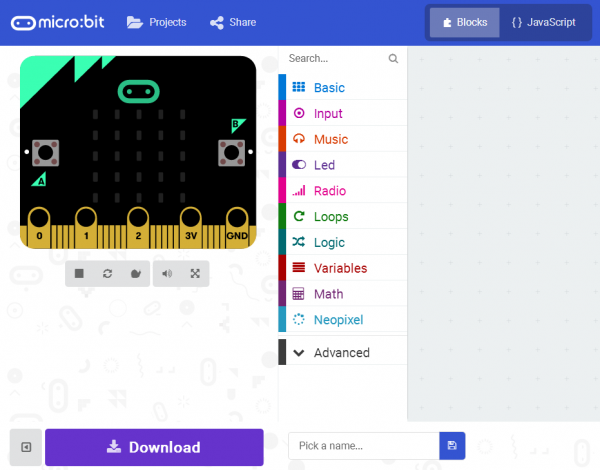
Open the browser page to enter https://makecode.microbit.org/ pop up the interface shown as below.
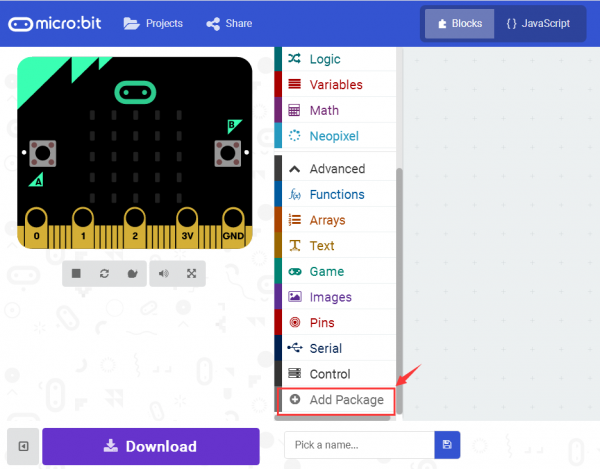
Before type the test code, you need to add the package. First click Add Package, shown below.
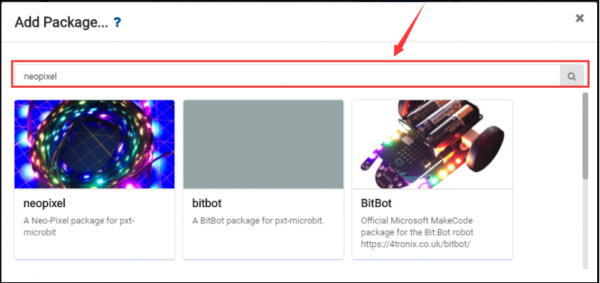
Then, on the search bar enter neopixel, shown below.
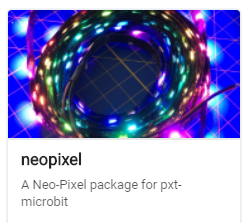
Click the icon of neopixel to add the package:
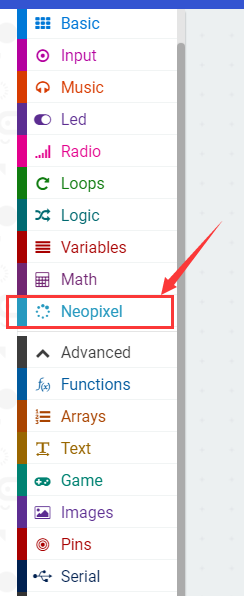
Once neopixel package added successfully, you should see the Neopixel project display on the Edit bar. Shown below.
What you will see?
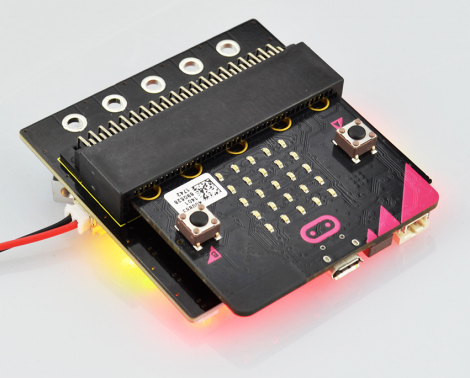
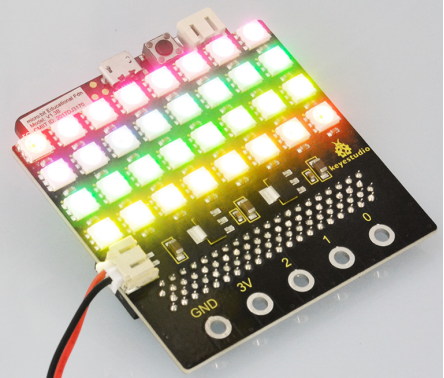
Upload well the code to the micro:bit control board, then insert the micro:bit into shield, and supply the power DC 5-9V, finally you will see the LEDs on the shield display shiny colors. Shown below.
Resources
https://fs.keyestudio.com/KS0315
- BBC micro:bit website
- Micro:bit MakeCode Block Editor
- Meet micro:bit starter programming
- BBC micro:bit Features Guide
- BBC micro:bit Safety Warnings
- BBC micro:bit Quick Start Guide
- BBC micro:bit Pins
Buy From
