How to Install Arduino Library: Difference between revisions
Jump to navigation
Jump to search
Keyestudio (talk | contribs) No edit summary |
Keyestudio (talk | contribs) No edit summary |
||
| Line 24: | Line 24: | ||
<br>[[Image:below.png|600px|frameless]]<br> | <br>[[Image:below.png|600px|frameless]]<br> | ||
<br> | <br> | ||
More reference please [[https://www.arduino.cc/en/Guide/Libraries]] | More reference please click here: [[https://www.arduino.cc/en/Guide/Libraries]] | ||
Revision as of 15:49, 25 January 2018
Once you are comfortable with the Arduino software, you may want to extend the library to meet your requirement.
Libraries are often distributed as a ZIP file or folder. The name of the folder is the name of the library. Inside the folder will be a .cpp file, a .h file and often a keywords.txt file, examples folder, and other files required by the library.
Take Arduino1.0.5 as an example, you can install a library in Arduino IDE. And do not unzip the downloaded library, leave it as is.
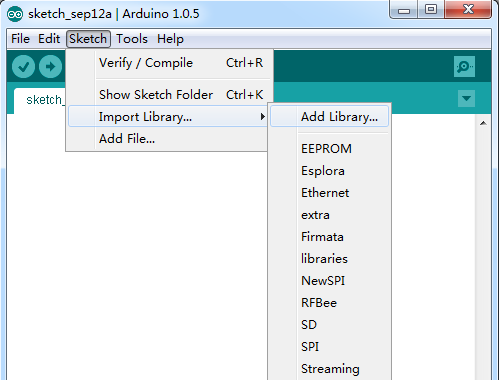
- In the Arduino IDE, click Skietch->Import Library. Select “Add Library...” at the top of the drop down list.
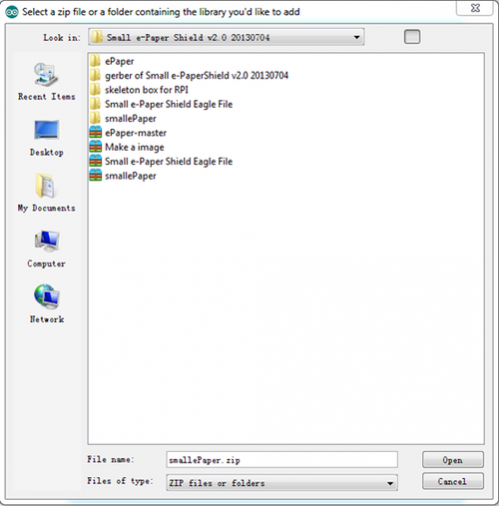
- You will be prompted to select the library you would like to add. Find the .zip file's location and open it. Here I select a library named smallePaper .
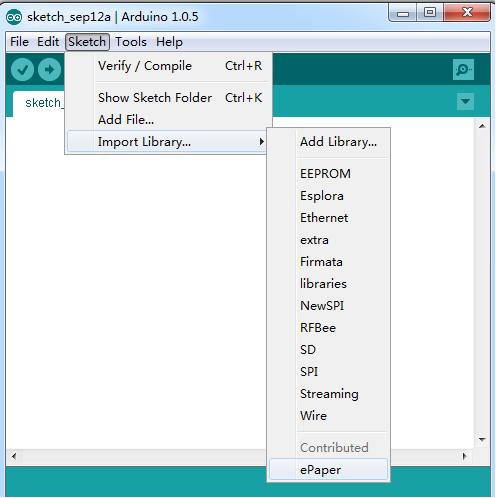
- Return to the Sketch > Import Library menu. You should now see the library at the bottom of the drop-down menu. It is ready to be used in your sketch.
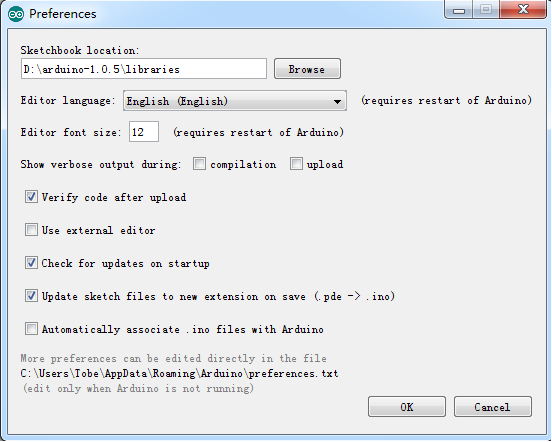
- Now the zip file has been installed in your Arduino sketches directory. You can see the location of the library: File->Preferences->Sketchbook location, and can change the location. Generally, we will change it as ….Arduino – 1.0.5\libraries as shown below.
More reference please click here: [[1]]
