Ks0160 keyestudio CNC Shield V3: Difference between revisions
Keyestudio (talk | contribs) No edit summary |
Keyestudio (talk | contribs) |
||
| (4 intermediate revisions by the same user not shown) | |||
| Line 9: | Line 9: | ||
It has total 4-way pin slots for stepper motor drive modules (Not Included) to drive 4-channel stepper motors. <br> | It has total 4-way pin slots for stepper motor drive modules (Not Included) to drive 4-channel stepper motors. <br> | ||
Each stepper motor only needs 2 IO ports, so 8 IO ports is enough to manage 4 stepper motors, very easy to use. This shield can make quick work for managing stepper motors in your project. <br> | Each stepper motor only needs 2 IO ports, so 8 IO ports is enough to manage 4 stepper motors, very easy to use. This shield can make quick work for managing stepper motors in your project. <br> | ||
'''Note:'''the three X/Y/Z-axis drive module headers have been connected by default, so just need to plug the modules onto the shield when using. But do not connect the circuit of drive module A, you should connect it to digital ports to control the rotating direction and speed of motor ( A_DIR ; A_STP). <br> | |||
To easily debug the operating mode of stepper motor driver board, there are 3 jumper caps under each pin slots. You can set the working mode by plugging or unplugging the jumper cap. <br> | To easily debug the operating mode of stepper motor driver board, there are 3 jumper caps under each pin slots. You can set the working mode by plugging or unplugging the jumper cap. <br> | ||
For example, connect the A4988 to the shield, unplug three jumpers, it is in full-step mode; if plug all the jumpers, it is 16-subdivision working mode.<br> | For example, connect the A4988 to the shield, unplug three jumpers, it is in full-step mode; if plug all the jumpers, it is 16-subdivision working mode.<br> | ||
Different kinds of interfaces are brought out on this shield, so you can connect some external devices as you like. | Different kinds of interfaces are brought out on this shield, so you can connect some external devices as you like. | ||
<br>[[Image:KS0160 图3.jpg|800px|frameless]]<br> | <br>[[Image:KS0160 图3.jpg|800px|frameless]]<br> | ||
==Check out these awesome specifications== | ==Check out these awesome specifications== | ||
| Line 42: | Line 41: | ||
For detailed use, refer to our [http://wiki.keyestudio.com/index.php/Ks0095_Arduino_CNC_Kit_/_CNC_Shield_V3.0_%2Bkeyestudio_Uno_R3%2B4pcs_a4988_Driver_/_GRBL_Compatible keyestudio CNC kit] on wiki website. | For detailed use, refer to our [http://wiki.keyestudio.com/index.php/Ks0095_Arduino_CNC_Kit_/_CNC_Shield_V3.0_%2Bkeyestudio_Uno_R3%2B4pcs_a4988_Driver_/_GRBL_Compatible keyestudio CNC kit] on wiki website. | ||
==Resources== | |||
'''Download the PDF:'''<br> | |||
https://fs.keyestudio.com/KS0160 | |||
==Get One Now == | ==Get One Now == | ||
* | * [https://www.keyestudio.com/free-shippingkeyestudio-cnc-shield-v3-engraver-for-engraving-machine-p0175-p0175.html '''Official Website''' ] | ||
* [https://www.ebay.com/itm/132720176092 Buy from eBay ] | * [https://www.ebay.com/itm/132720176092 Buy from eBay ] | ||
Latest revision as of 10:40, 29 April 2021
Introduction
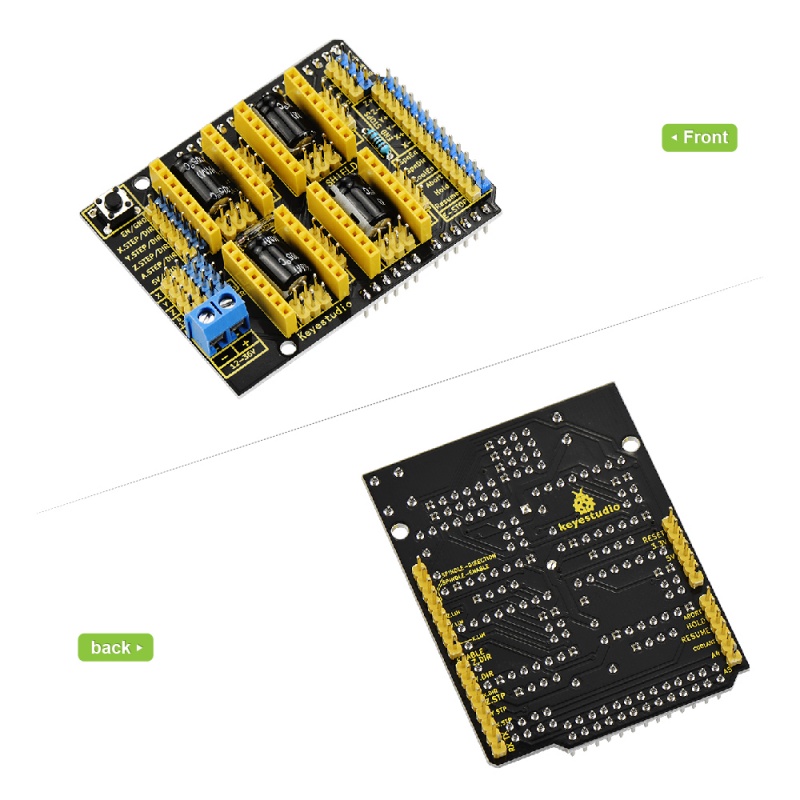
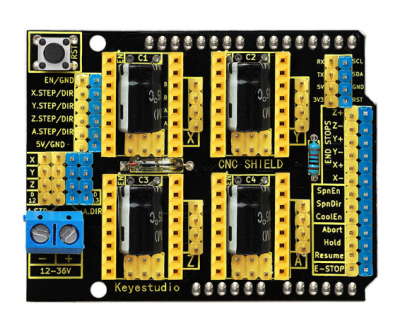
keyestudio CNC shield V3 is used as driving shield for engraving machines, fully compatible with UNO R3 . So you just need to stack it onto UNO R3 control board when using.
It has total 4-way pin slots for stepper motor drive modules (Not Included) to drive 4-channel stepper motors.
Each stepper motor only needs 2 IO ports, so 8 IO ports is enough to manage 4 stepper motors, very easy to use. This shield can make quick work for managing stepper motors in your project.
Note:the three X/Y/Z-axis drive module headers have been connected by default, so just need to plug the modules onto the shield when using. But do not connect the circuit of drive module A, you should connect it to digital ports to control the rotating direction and speed of motor ( A_DIR ; A_STP).
To easily debug the operating mode of stepper motor driver board, there are 3 jumper caps under each pin slots. You can set the working mode by plugging or unplugging the jumper cap.
For example, connect the A4988 to the shield, unplug three jumpers, it is in full-step mode; if plug all the jumpers, it is 16-subdivision working mode.
Different kinds of interfaces are brought out on this shield, so you can connect some external devices as you like.

Check out these awesome specifications
- UNO R3 control board compatible
- Supports the software GrblController361Setup
- Can drive the X/Y/Z-axis stepper motors (connected default), and step motor A (should connect to Digital ports).
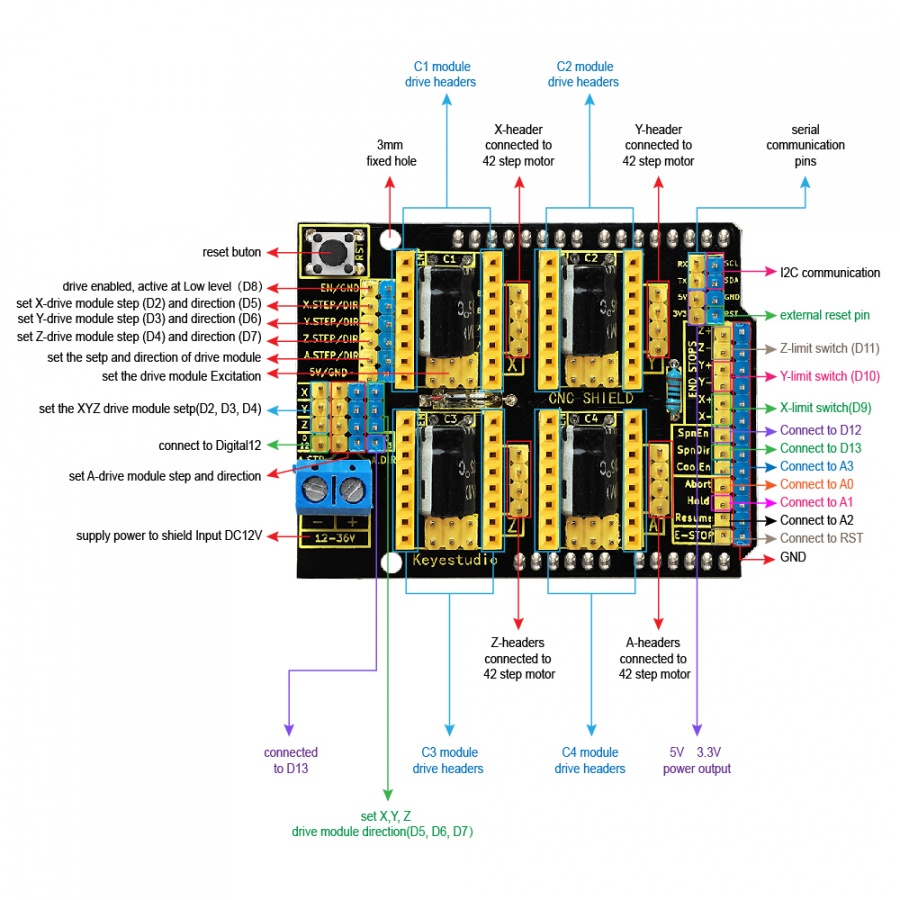
- X/Y/Z-axis drive module headers have connected the circuit, directly plug the drive module onto the shield when using. Default by X_STP (connected to D2); X_DIR (D5); Y_STP (D3); Y_DIR(D6); Z_STP (D4); Z_DIR(D7).
- Control the drive module via jumper cap. (Note: If connect the A4988 , unplug three jumpers, as full-step mode; if plug the jumpers, 16-subdivision working mode.)
- The enabled port (EN) of all drive modules has been connected to D8.
- Comes with three 4pin headers of 2.54mm pitch for 42 step motor connection.
- Can supply the 4 stepper motor drive modules with DC 12V voltage via the blue terminal blocks.
- Other communication ports, like the serial communication, I2C communication.
Technical Details
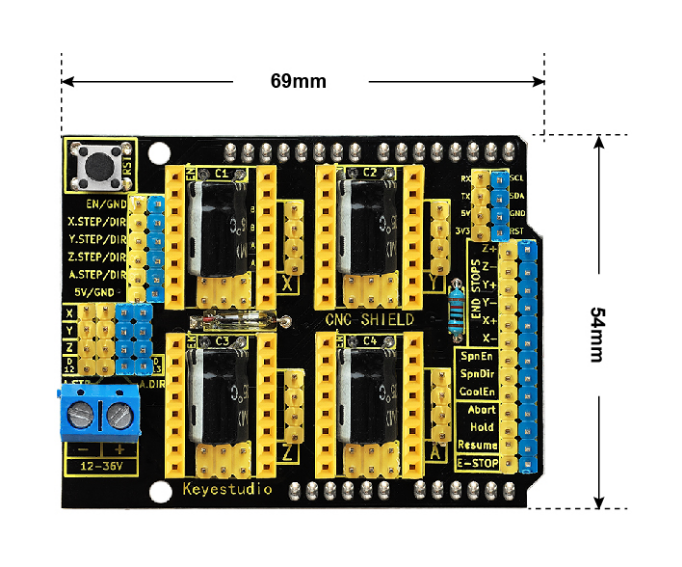
- Dimensions: 69mm x 54mm x15mm
- Weight: 31g
Pinout Instructions
Using Method
When using this shield, on the hardware, you need to use it with the control board (UNO R3), the drive board (such as A4988), the motor (42 stepper motor) and others. And you need to burn the firmware to the control board. So need to use the software Arduino IDE, and the special upper computer software, such as GrblController361Setup software.
For detailed use, refer to our keyestudio CNC kit on wiki website.
Resources
Download the PDF:
https://fs.keyestudio.com/KS0160


