Ks0111 keyestudio EASY plug Collision Sensor: Difference between revisions
Keyestudio (talk | contribs) No edit summary |
Keyestudio (talk | contribs) |
||
| (15 intermediate revisions by the same user not shown) | |||
| Line 1: | Line 1: | ||
[[image: | [[image:ks0111图.jpg|thumb|600px|right|Keyestudio EASY plug Crash Sensor]] | ||
==Introduction== | ==Introduction== | ||
| Line 5: | Line 5: | ||
It is a digital on-off input module necessary for elementary electronic.<br> | It is a digital on-off input module necessary for elementary electronic.<br> | ||
By programming, it can be used for the light, sound device, key function of LCD display, 3D Printer position feedback, or other devices. <br> | By programming, it can be used for the light, sound device, key function of LCD display, 3D Printer position feedback, or other devices. <br> | ||
This sensor needs to be used together with EASY plug control board. </span><br> | |||
<span style=color:red> '''Special Note:''' <br> | |||
The sensor/module is equipped with the RJ11 6P6C interface, compatible with our keyestudio EASY plug Control Board with RJ11 6P6C interface. <br> If you have the control board of other brands, it is also equipped with the RJ11 6P6C interface but has different internal line sequence, can’t be used compatibly with our sensor/module. </span><br> | |||
<br> | <br> | ||
==Specification== | ==Specification== | ||
* Connector: Easy plug | * Connector: Easy plug | ||
| Line 21: | Line 24: | ||
<br> | <br> | ||
==Connect It Up == | ==Connect It Up == | ||
Connect the EASY Plug | Connect the EASY Plug Crash sensor and LED module to control board using RJ11 cable. <br> | ||
<br>[[File: | <br>[[File:Led碰撞.png|500px|frameless|thumb]]<br> | ||
<br> | <br> | ||
==Upload the Code== | ==Upload the Code== | ||
Below is an example code. Open or drag below code to [https://wiki.keyestudio.com/Getting_Started_with_Mixly Mixly Blocks] and upload. <br> | |||
< | <br>[[File:ks0397 6.1.png|500px|frameless|thumb]]<br> | ||
< | |||
<br> | <br> | ||
==What You Should See== | ==What You Should See== | ||
When an object crashes the metal switch of the sensor, the | <br>[[File:ks0397 6-1.png|500px|frameless|thumb]]<br> | ||
<br>[[File: | <br> | ||
When an object crashes the metal switch of the sensor, the LED is turned off. If no crash happened, LED is turned on. | |||
<br>[[File:ks0397 6-3.png|500px|frameless|thumb]]<br> | |||
<br>[[File:ks0397 6-4.png|500px|frameless|thumb]]<br> | |||
<br> | |||
You should be able to see the value printing on the monitor. | |||
<br>[[File:ks0397 6-2.png|500px|frameless|thumb]]<br> | |||
<br> | |||
==Extension Experiment == | |||
<span style="color: brown"> <big>'''Switch Controlling Relay'''</big></span><br> | |||
'''Hookup Guide'''<br> | |||
Connect the EASY Plug Crash sensor and relay module to control board using an RJ11 cable. | |||
<br>[[File:继电器碰撞.jpg|500px|frameless|thumb]]<br> | |||
<br> | |||
'''Upload the Code'''<br> | |||
Below is an example code. | |||
<br>[[File:ks0397 6.2.png|500px|frameless|thumb]]<br> | |||
<br> | <br> | ||
'''What You Should See'''<br> | |||
<br>[[File:ks0397 6-5.png|500px|frameless|thumb]]<br> | |||
<br> | |||
If crash the limit switch, the LED on the relay module is turned on. | |||
<br>[[File:ks0397 6-6.png|500px|frameless|thumb]]<br> | |||
<br> | |||
<span style="color: red">'''Troubleshooting:'''</span> | |||
* '''Program Not Uploading?'''<br> | |||
This happens sometimes, the most likely case is a confused Board and serial port, you should firstly select your proper board and port. <br> | |||
If it doesn’t, make sure you have assembled the circuit correctly and verified and uploaded the code to your board. | |||
<br> | |||
<br> | |||
==Resources == | ==Resources == | ||
https:// | https://fs.keyestudio.com/KS0111 | ||
<br> | <br> | ||
==Buy from == | ==Buy from == | ||
'''Official Website''' | *[https://www.keyestudio.com/keyestudio-rj11-easy-plug-collision-crash-sensor-module-for-arduino-steam-p0092.html '''Official Website''' ] | ||
*[https://www.aliexpress.com/store/product/2016-New-Keyestudio-EASY-plug-Collision-Crash-Sensor-Module-for-Arduino/1452162_32643659215.html?spm=2114.12010612.8148356.26.4f5f484elrtsGa Shop on aliexpress ] | |||
[[category:EASY Plug]] | [[category:EASY Plug]] | ||
Latest revision as of 16:08, 7 January 2021
Introduction
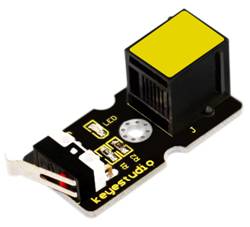
Crash sensor, also known as snap-action switch, is an electric switch that is actuated by very little physical force.
It is a digital on-off input module necessary for elementary electronic.
By programming, it can be used for the light, sound device, key function of LCD display, 3D Printer position feedback, or other devices.
This sensor needs to be used together with EASY plug control board.
Special Note:
The sensor/module is equipped with the RJ11 6P6C interface, compatible with our keyestudio EASY plug Control Board with RJ11 6P6C interface.
If you have the control board of other brands, it is also equipped with the RJ11 6P6C interface but has different internal line sequence, can’t be used compatibly with our sensor/module.
Specification
- Connector: Easy plug
- Onboard status indicator LED
- M3 mounting hole, convenient for fixation on other devices.
- If collision happened, outputs LOW level signal; no collision, outputs HIGH level signal.
Technical Details
- Dimensions: 44mm*20mm*18mm
- Weight: 5.5g
Connect It Up
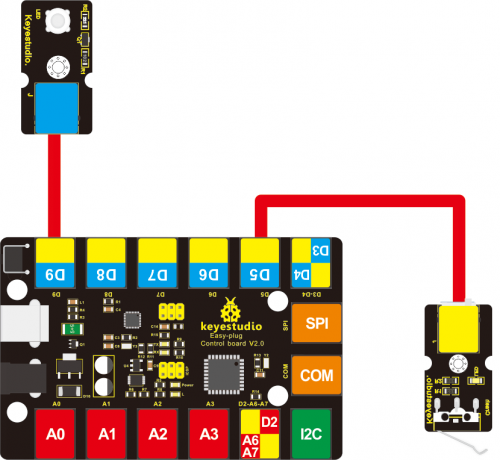
Connect the EASY Plug Crash sensor and LED module to control board using RJ11 cable.
Upload the Code
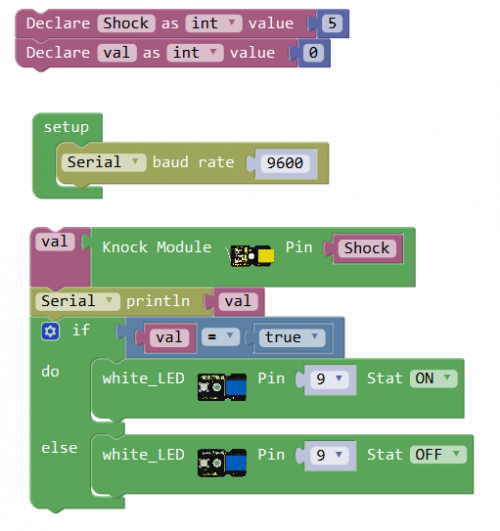
Below is an example code. Open or drag below code to Mixly Blocks and upload.
What You Should See
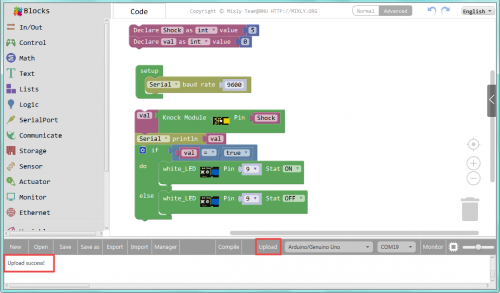
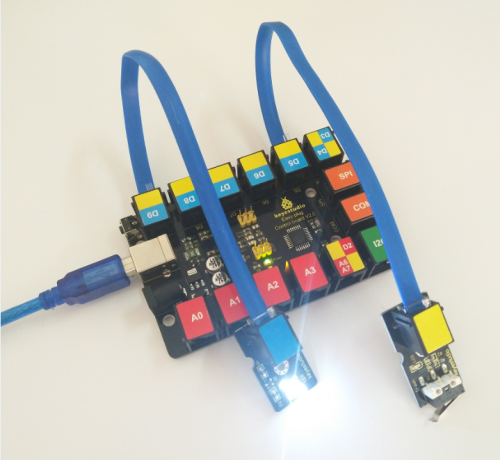
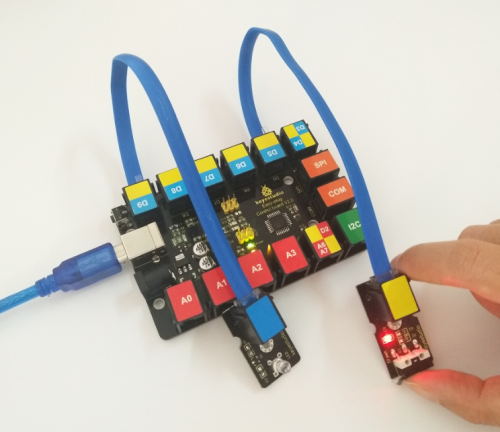
When an object crashes the metal switch of the sensor, the LED is turned off. If no crash happened, LED is turned on.
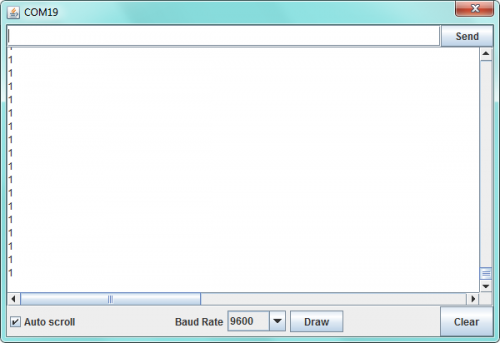
You should be able to see the value printing on the monitor.
Extension Experiment
Switch Controlling Relay
Hookup Guide
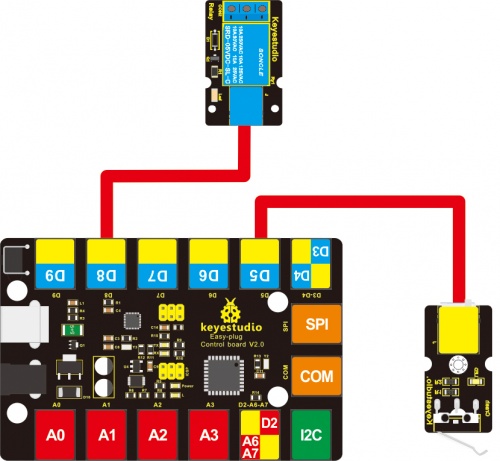
Connect the EASY Plug Crash sensor and relay module to control board using an RJ11 cable.
Upload the Code
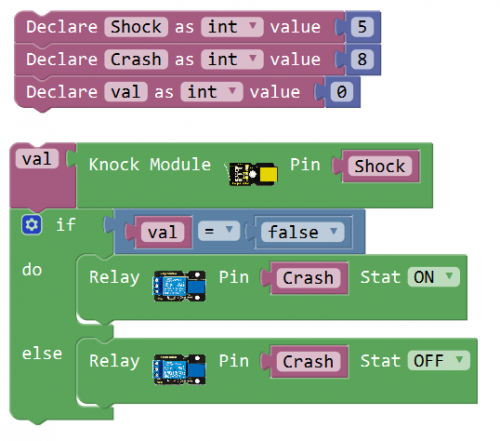
Below is an example code.
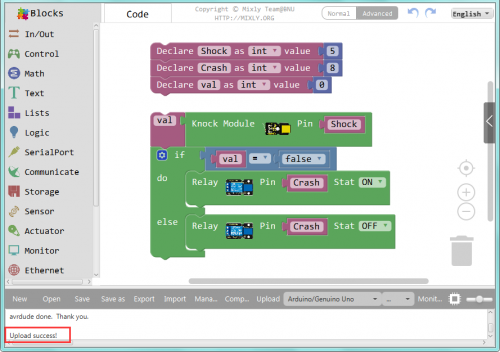
What You Should See
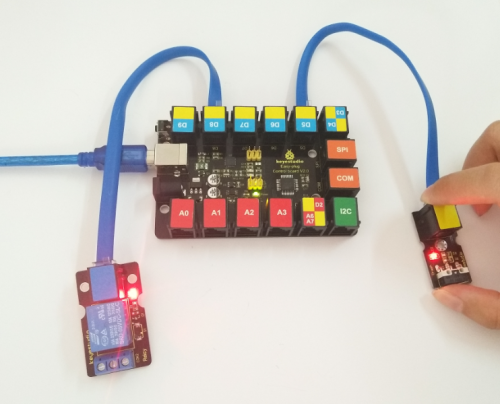
If crash the limit switch, the LED on the relay module is turned on.
Troubleshooting:
- Program Not Uploading?
This happens sometimes, the most likely case is a confused Board and serial port, you should firstly select your proper board and port.
If it doesn’t, make sure you have assembled the circuit correctly and verified and uploaded the code to your board.
Resources
https://fs.keyestudio.com/KS0111
