Ks0019 keyestudio Passive Buzzer module: Difference between revisions
Jump to navigation
Jump to search
Keyestudio (talk | contribs) |
Keyestudio (talk | contribs) |
||
| (14 intermediate revisions by the same user not shown) | |||
| Line 1: | Line 1: | ||
==Passive Buzzer | ==Passive Buzzer Module== | ||
<br>[[File: | <br>[[File:KS0019 (4).jpg|300px|frameless|thumb]]<br> | ||
<br> | |||
==Introduction== | ==Introduction== | ||
We can use Arduino to make many interactive works of which the most commonly used is acoustic-optic display. | We can use Arduino to make many interactive works of which the most commonly used is acoustic-optic display. <br> | ||
The circuit in this experiment can produce sound. Normally, the experiment is done with a buzzer or a speaker while buzzer is simpler and easier to use. <br> | |||
The buzzer we introduced here is a passive buzzer. It cannot be actuated by itself, but by external pulse frequencies. Different frequencies produce different sounds. <br> | |||
We can use Arduino to code the melody of a song, which is quite fun and simple. | |||
<br> | |||
==Specification== | ==Specification== | ||
* Working voltage: 3.3-5v | * Working voltage: 3.3-5v | ||
* Interface type: digital | * Interface type: digital | ||
<br> | |||
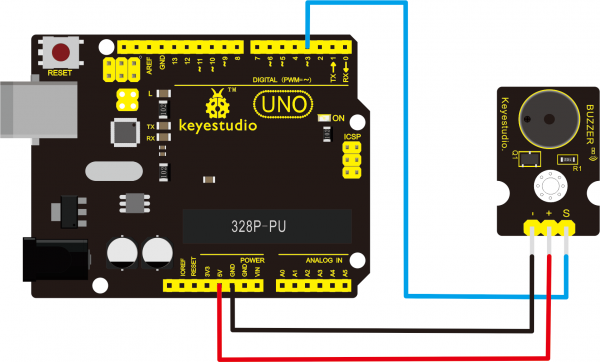
==Connection Diagram == | ==Connection Diagram == | ||
<br>[[File: | <br>[[File:0019.png|600px|frameless|thumb]]<br> | ||
<br> | |||
==Sample Code== | ==Sample Code== | ||
<pre> | <pre> | ||
int buzzer=3;//set digital IO pin of the buzzer | |||
void setup() | void setup() | ||
{ | { | ||
| Line 41: | Line 44: | ||
} | } | ||
</pre> | </pre> | ||
After downloading the program, buzzer experiment is | <br> | ||
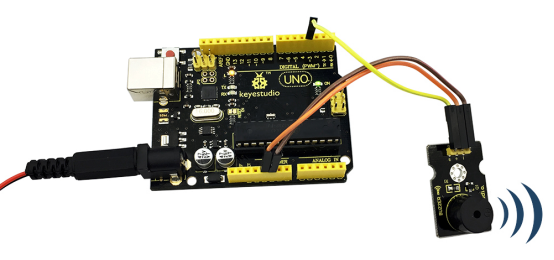
After downloading the program, buzzer experiment is complete. You should hear the buzzer ringing. | |||
<br>[[File:Ks0019-1-.png|600px|frameless|thumb]]<br> | |||
<br> | |||
==Resources == | ==Resources == | ||
'''Video''' | * '''Video'''<br> | ||
http://video.keyestudio.com/ks0019/ | |||
* '''Datasheet'''<br> | |||
https://fs.keyestudio.com/KS0019 | |||
<br> | |||
==Buy from == | ==Buy from == | ||
''' | *[https://www.keyestudio.com/free-shipping-keyestudio-passive-buzzer-alarm-module-for-arduino-p0158.html '''Official Website''' ] | ||
https:// | *[https://ru.aliexpress.com/store/product/Free-shipping-Keyestudio-Passive-Buzzer-Alarm-Sensor-Module-for-Arduino-CE-FCC/4247007_32887250232.html?spm=a2g0v.12010615.8148356.9.6d4a6c9b9Ib3uF '''Shop on aliexpress'''] | ||
[[category:Module]] | [[category:Module]] | ||
Latest revision as of 11:25, 8 January 2021
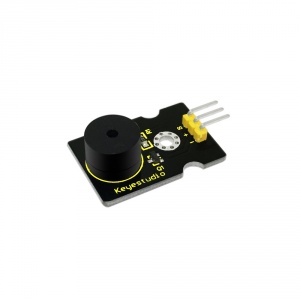
Passive Buzzer Module
Introduction
We can use Arduino to make many interactive works of which the most commonly used is acoustic-optic display.
The circuit in this experiment can produce sound. Normally, the experiment is done with a buzzer or a speaker while buzzer is simpler and easier to use.
The buzzer we introduced here is a passive buzzer. It cannot be actuated by itself, but by external pulse frequencies. Different frequencies produce different sounds.
We can use Arduino to code the melody of a song, which is quite fun and simple.
Specification
- Working voltage: 3.3-5v
- Interface type: digital
Connection Diagram
Sample Code
int buzzer=3;//set digital IO pin of the buzzer
void setup()
{
pinMode(buzzer,OUTPUT);// set digital IO pin pattern, OUTPUT to be output
}
void loop()
{ unsigned char i,j;//define variable
while(1)
{ for(i=0;i<80;i++)// output a frequency sound
{ digitalWrite(buzzer,HIGH);// sound
delay(1);//delay1ms
digitalWrite(buzzer,LOW);//not sound
delay(1);//ms delay
}
for(i=0;i<100;i++)// output a frequency sound
{
digitalWrite(buzzer,HIGH);// sound
digitalWrite(buzzer,LOW);//not sound
delay(2);//2ms delay
}
}
}
After downloading the program, buzzer experiment is complete. You should hear the buzzer ringing.

Resources
- Video
http://video.keyestudio.com/ks0019/
- Datasheet
https://fs.keyestudio.com/KS0019

