Ks0229 keyestudio EASY plug Digital Green LED Module: Difference between revisions
Keyestudio (talk | contribs) |
Keyestudio (talk | contribs) No edit summary |
||
| Line 1: | Line 1: | ||
[[image:KS0101图.jpg|thumb|600px|right|Keyestudio EASY plug Digital Green LED Module]] | |||
<br> | |||
==Introduction== | ==Introduction== | ||
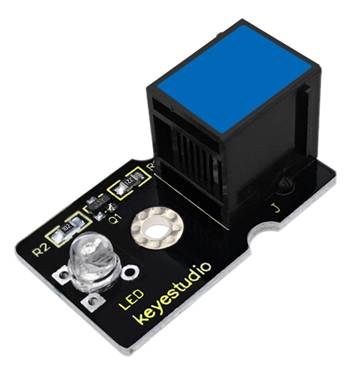
The LED light module has a shiny color, ideal for emitting green light. It can be easily connected to Arduino IO/Sensor shield.<br> | |||
Note: this module needs to be used together with EASY plug control board. You can also choose other LED to emit different color | <span style="color: red">'''Note: ''' </span> this module needs to be used together with EASY plug control board.You can also choose other LED modules to emit different light color like blue, green, yellow and white.<br> | ||
<br> | |||
==Specification== | ==Specification== | ||
* Interface: Easy plug | * Interface: Easy plug | ||
* Sensor | * Sensor type: Digital | ||
* PH2.54 socket | * PH2.54 socket | ||
* | * Easy to use | ||
* | * Useful for light projects | ||
== | <br> | ||
<br>[[File: | == Connect It Up == | ||
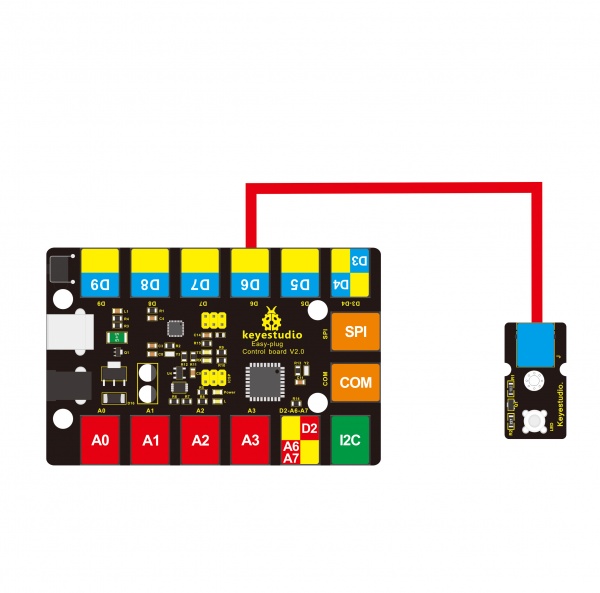
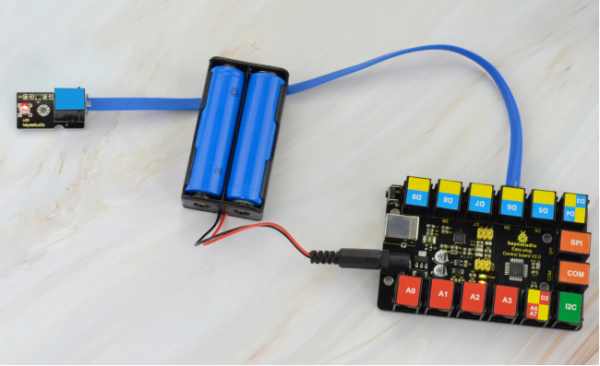
Connect the EASY Plug LED module to control board using an RJ11 cable. Then connect the control board to your PC with a USB cable. | |||
<br>[[File:Ks0228.jpg|600px|frameless|thumb]]<br> | |||
<br> | |||
==Sample Code== | ==Sample Code== | ||
Copy and paste below code to [http://wiki.keyestudio.com/index.php/How_to_Download_Arduino_IDE Arduino IDE] and upload. | |||
<pre> | <pre> | ||
int led = | int led =6; | ||
void setup() | void setup() | ||
{ | { | ||
pinMode(led, OUTPUT);//Set Pin6 as output | |||
} | } | ||
void loop() | void loop() | ||
{ | { | ||
digitalWrite(led, HIGH);//Turn led on | |||
delay(2000); | |||
digitalWrite(led, LOW);//Turn led off | |||
delay(2000); | |||
} | } | ||
</pre> | </pre> | ||
<br> | |||
==What You Should See== | |||
The LED will flash on for two seconds, then off for two seconds. If it doesn’t, make sure you have assembled the circuit correctly and verified and uploaded the code to your board. | |||
<br>[[File:Ks0228 red.png|600px|frameless|thumb]]<br> | |||
<br> | |||
==Resources == | ==Resources == | ||
'''PDF''' | '''Download the PDF:'''<br> | ||
https://drive.google.com/open?id=1FcoeYNpAbLmZMNY_LEqy6tQnWlBLxTxt | |||
<br> | |||
==Buy from == | ==Buy from == | ||
'''Official Website''' | *'''Official Website:''' http://www.keyestudio.com/ks0229.html | ||
[[category:EASY Plug]] | [[category: EASY Plug]] | ||
Revision as of 09:37, 28 November 2018
Introduction
The LED light module has a shiny color, ideal for emitting green light. It can be easily connected to Arduino IO/Sensor shield.
Note: this module needs to be used together with EASY plug control board.You can also choose other LED modules to emit different light color like blue, green, yellow and white.
Specification
- Interface: Easy plug
- Sensor type: Digital
- PH2.54 socket
- Easy to use
- Useful for light projects
Connect It Up
Connect the EASY Plug LED module to control board using an RJ11 cable. Then connect the control board to your PC with a USB cable.

Sample Code
Copy and paste below code to Arduino IDE and upload.
int led =6;
void setup()
{
pinMode(led, OUTPUT);//Set Pin6 as output
}
void loop()
{
digitalWrite(led, HIGH);//Turn led on
delay(2000);
digitalWrite(led, LOW);//Turn led off
delay(2000);
}
What You Should See
The LED will flash on for two seconds, then off for two seconds. If it doesn’t, make sure you have assembled the circuit correctly and verified and uploaded the code to your board.

Resources
Download the PDF:
https://drive.google.com/open?id=1FcoeYNpAbLmZMNY_LEqy6tQnWlBLxTxt
Buy from
- Official Website: http://www.keyestudio.com/ks0229.html
