Ks0102 keyestudio EASY plug Active Buzzer Module: Difference between revisions
Keyestudio (talk | contribs) No edit summary |
Keyestudio (talk | contribs) No edit summary |
||
| Line 1: | Line 1: | ||
[[image: | [[image:Ks0102-.png|thumb|600px|right|EASY plug Active Buzzer Module]] | ||
<br> | <br> | ||
| Line 25: | Line 25: | ||
== Connect It Up == | == Connect It Up == | ||
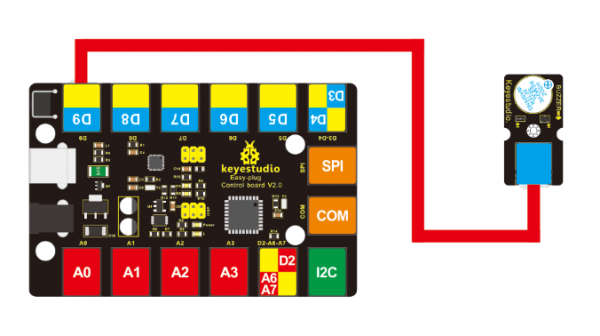
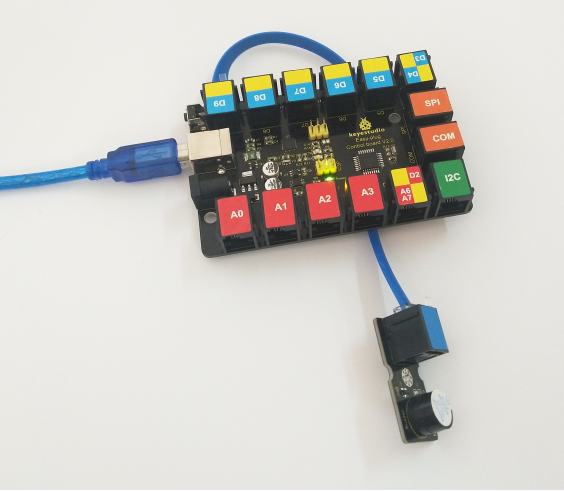
Connect the EASY Plug active buzzer module to control board using an RJ11 cable. Then connect the control board to your PC with a USB cable. | Connect the EASY Plug active buzzer module to control board using an RJ11 cable. Then connect the control board to your PC with a USB cable. | ||
<br>[[File: | <br>[[File:Ks0102-2-.png|600px|frameless|thumb]]<br> | ||
<br> | <br> | ||
| Line 31: | Line 31: | ||
Copy and paste below code to [http://wiki.keyestudio.com/index.php/How_to_Download_Arduino_IDE Arduino IDE] and upload. | Copy and paste below code to [http://wiki.keyestudio.com/index.php/How_to_Download_Arduino_IDE Arduino IDE] and upload. | ||
<pre> | <pre> | ||
int | int buzzPin =9; //Connect Buzzer on Digital Pin 9 | ||
void setup() | void setup() | ||
{ | { | ||
pinMode(buzzPin, OUTPUT); | |||
} | } | ||
void loop() | |||
{ | { | ||
digitalWrite(buzzPin, HIGH); | |||
delay(1); | |||
digitalWrite(buzzPin, LOW); | |||
delay(1); | |||
} | } | ||
</pre> | </pre> | ||
| Line 57: | Line 47: | ||
<br> | <br> | ||
==What You Should See== | ==What You Should See== | ||
Done uploading the code, you should be able to hear | Done uploading the code, you should be able to hear an audible beep. | ||
<br>[[File: | <br>[[File:Ks0102-3.png|600px|frameless|thumb]]<br> | ||
<br> | <br> | ||
| Line 73: | Line 63: | ||
==Buy from == | ==Buy from == | ||
*'''Official Website:''' http://www.keyestudio.com/ | *'''Official Website:''' http://www.keyestudio.com/ks0102.html | ||
*[https://www.aliexpress.com/store/product/2016NEW-Keyestudio-EASY-plug-Passive-Buzzer-Module-for-Arduino/1452162_32637357831.html?spm=2114.12010612.8148356.11.43b8484e8Kd7LP Shop on aliexpress ] | *[https://www.aliexpress.com/store/product/2016NEW-Keyestudio-EASY-plug-Passive-Buzzer-Module-for-Arduino/1452162_32637357831.html?spm=2114.12010612.8148356.11.43b8484e8Kd7LP Shop on aliexpress ] | ||
Revision as of 16:01, 27 November 2018
Introduction
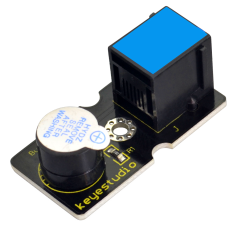
Hey want to hear a really loud noise? Apply 3.3V to 5V to this buzzer module and you'll be rewarded with a loud beep.
Here is the simplest sound making module. You can use high/low level to drive it. Just change the frequency it buzzes, you can hear different sound.
It is really great for integrating into projects with this small but useful module. Have a try! You will find the electronic sound it creates so fascinating.
This module is widely used on your daily appliance, like PC, refrigerator, phones, etc.
Note: this module should be used together with EASY plug control board.
Specification
- Sensor type: Digital
- Working voltage: 3.3-5V
- Icons to simply illustrate module function
- High quality connector
Technical Details
- Dimensions: 39mm*20mm*18mm
- Weight: 6g
Connect It Up
Connect the EASY Plug active buzzer module to control board using an RJ11 cable. Then connect the control board to your PC with a USB cable.

Sample Code
Copy and paste below code to Arduino IDE and upload.
int buzzPin =9; //Connect Buzzer on Digital Pin 9
void setup()
{
 pinMode(buzzPin, OUTPUT);
}
void loop()
{
 digitalWrite(buzzPin, HIGH);
 delay(1);
 digitalWrite(buzzPin, LOW);
 delay(1);
}
What You Should See
Done uploading the code, you should be able to hear an audible beep.

Resources
Download the PDF:
https://drive.google.com/open?id=1pQj561dWpMkzIBY1siyFwDCJgOCjXUPi
Download the Code:
https://drive.google.com/open?id=1PBnazbkjn06xvLcIw2G4GqYJiH5W4Xsf
Buy from
- Official Website: http://www.keyestudio.com/ks0102.html
