Ks0087 keyestudio DIY Electronic Scale: Difference between revisions
Keyestudio (talk | contribs) No edit summary |
Keyestudio (talk | contribs) No edit summary |
||
| Line 102: | Line 102: | ||
| align="center" | Self-adhesion 3M Crashproof Transparent Colloidal Particle∮10*5(4 Granules) | | align="center" | Self-adhesion 3M Crashproof Transparent Colloidal Particle∮10*5(4 Granules) | ||
| align="center" | 1 | | align="center" | 1 | ||
| align="center" | <br>[[File: | | align="center" | <br>[[File:8715.png|500px|frameless|thumb]]<br> | ||
|- | |- | ||
| Line 108: | Line 108: | ||
| align="center" | M3*6MM Round Head Screw | | align="center" | M3*6MM Round Head Screw | ||
| align="center" | 23 | | align="center" | 23 | ||
| align="center" | <br>[[File: | | align="center" | <br>[[File:8716.png|500px|frameless|thumb]]<br> | ||
|- | |- | ||
| Line 114: | Line 114: | ||
| align="center" | M3 Nickeling Nut | | align="center" | M3 Nickeling Nut | ||
| align="center" | 2 | | align="center" | 2 | ||
| align="center" | [[File: | | align="center" | [[File:8717.png|500px|frameless|thumb]][[File:8718.png|500px|frameless|thumb]] | ||
|- | |- | ||
| Line 120: | Line 120: | ||
| align="center" | M4*10MM Round Head Screw | | align="center" | M4*10MM Round Head Screw | ||
| align="center" | 2 | | align="center" | 2 | ||
| align="center" | [[File: | | align="center" | [[File:8719.png|500px|frameless|thumb]][[File:8720.png|500px|frameless|thumb]] | ||
|- | |- | ||
| Line 126: | Line 126: | ||
| align="center" | Hexagonal Copper Fistular M3*10MM | | align="center" | Hexagonal Copper Fistular M3*10MM | ||
| align="center" | 8 | | align="center" | 8 | ||
| align="center" | <br>[[File: | | align="center" | <br>[[File:8721.png|500px|frameless|thumb]]<br> | ||
|- | |- | ||
| Line 132: | Line 132: | ||
| align="center" | Hexagonal Copper Fistular M3*40MM | | align="center" | Hexagonal Copper Fistular M3*40MM | ||
| align="center" | 1 | | align="center" | 1 | ||
| align="center" | [[File: | | align="center" | [[File:8722.png|500px|frameless|thumb]][[File:8723.png|500px|frameless|thumb]][[File:8724.png|500px|frameless|thumb]] | ||
|- | |- | ||
| Line 138: | Line 138: | ||
| align="center" | Female to Female Dupont Line15CM | | align="center" | Female to Female Dupont Line15CM | ||
| align="center" | 20 | | align="center" | 20 | ||
| align="center" | <br>[[File: | | align="center" | <br>[[File:8725.png|500px|frameless|thumb]]<br> | ||
|- | |- | ||
| Line 144: | Line 144: | ||
| align="center" | USB Cable | | align="center" | USB Cable | ||
| align="center" | 1 | | align="center" | 1 | ||
| align="center" | <br>[[File: | | align="center" | <br>[[File:8726.png|500px|frameless|thumb]]<br> | ||
|- | |- | ||
| Line 150: | Line 150: | ||
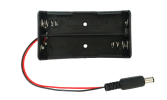
| align="center" | 18650 Battery Case | | align="center" | 18650 Battery Case | ||
| align="center" | 1 | | align="center" | 1 | ||
| align="center" | <br>[[File: | | align="center" | <br>[[File:8727.png|500px|frameless|thumb]]<br> | ||
|- | |- | ||
|} | |} | ||
Revision as of 14:39, 22 September 2016
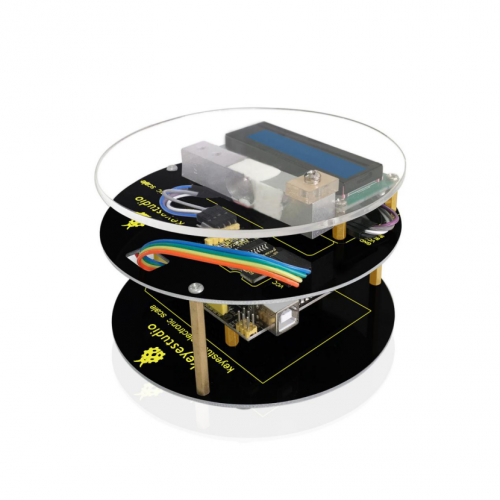
keyestudio DIY Electronic Scale
Introduction
Electronic scale is commonly seen in our daily life, with function of weighting. Professional scales on market have more functions and its precision is higher. Is there any possibility for enthusiasts to DIY their own electronic scale with what they have learned? Absolutely you can! It is easy to make an open source electronic scale. You just need a weighting module, an AD chip (hx711) specialized in weighting, and Arduino with corresponding library. Everything becomes so easy!
Principle
Electronic scale weigh force according to slight deformation causing by pressing metal. It uses the most commonly used strain gauge to measure deformation. In a typical application, utilize the strain gauge adhered on face of this sensor, to measure the force bore by the sensor. HX711 is a chip of 24 bit A\D converter, designed for high precision weighing sensor. Compared with other same-type chips, this chip features high integration, quick response and strong anti-interference, integrated external circuit needed by other chips including stabilized voltage supply and on-chip clock oscillator. It decreases cost of complete machine of the scale, and in the same time improve its performance and reliability. The interface and programs of this chip and MCU chip are very simple. All control signals are driven by pins, without programming register of inner chip. Input and select switch to choose arbitrarily channel A or B, connecting it to a low-noise programmable amplifier. The gain in channel A is 128 or 64 bit, and its corresponding amplitude of different input signals in full loaded is respectively ±20mV or ±40mV. The gain in channel B is fixed 32, used to detect system parameters. Stabilized voltage supply offered by chip can directly supply power for external sensor and A\D converter, there no need for additional analog power on main board. Clock oscillator doesn't need any external device. Automatic reset simplifies initialization when opening up.
Features
Channel A or B can choose different input.
The gain is 64 or 128 in the low-noise programmable amplifier.
Stabilized voltage supply offered by chip can directly supply power for external sensor and A\D converter.
Clock oscillator doesn't need any external device. If necessary, it can use external crystal oscillator or clock.
Automatic reset function
All control signals are driven by pins, without programming register of inner chip.
Alternative 10Hz or 80Hz of output data rate
