Ks0033 keyestudio Analog Temperature Sensor: Difference between revisions
Keyestudio (talk | contribs) No edit summary |
Keyestudio (talk | contribs) No edit summary |
||
| Line 16: | Line 16: | ||
<br> | <br> | ||
==Connection Diagram == | ==Connection Diagram == | ||
<br>[[File: | <br>[[File:Ks0033-.png|600px|frameless|thumb]]<br> | ||
<br> | <br> | ||
| Line 55: | Line 55: | ||
</pre> | </pre> | ||
<br> | <br> | ||
== Result == | == Result == | ||
<br>[[File:KS0349 19-2.png|800px|frameless|thumb]]<br> | <br>[[File:KS0349 19-2.png|800px|frameless|thumb]]<br> | ||
Done wiring and powered up, upload well the code, then open the serial monitor, you will see the current temperature value. Shown below. | Done wiring and powered up, upload well the code, then open the serial monitor, you will see the current temperature value. Shown below.<br> | ||
<br>[[File:KS0349 19-3.png|900px|frameless|thumb]]<br> | <br>[[File:KS0349 19-3.png|900px|frameless|thumb]]<br> | ||
<br> | |||
==Resources == | ==Resources == | ||
Revision as of 09:47, 15 April 2019
Introduction
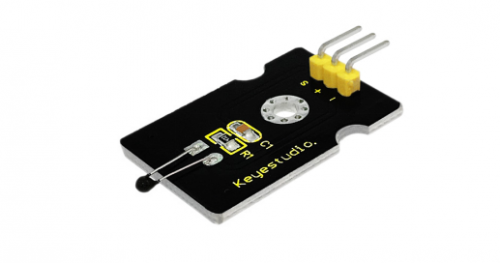
This module is based on the working principle of a thermistor (resistance varies with temperature change in the environment).
It can sense temperature change in its surrounding and send the data to the analog IO in the Arduino board.
All we need to do is to convert the sensor output data into degrees Celsius temperature via simple programming, finally to display it.
It's both convenient and effective, thus it is widely applied in gardening, home alarm system and other devices.

Specification
- Interface Type: analog
- Working Voltage: 5V
- Temperature Range: -55℃~315℃
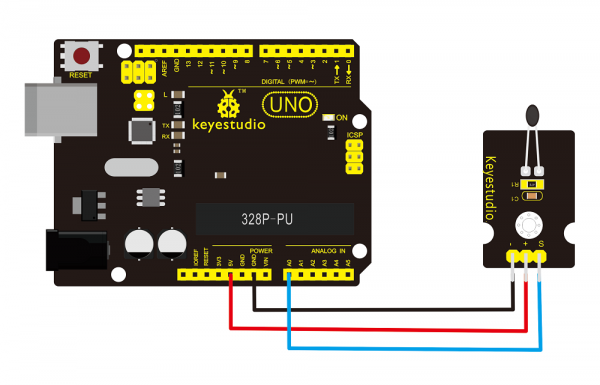
Connection Diagram
Sample Code
Copy and paste the below code to Arduino software.
void setup()
{Serial.begin(9600);
}
// the loop routine runs over and over again forever:
void loop()
{int sensorValue = analogRead(A0);
Serial.println(sensorValue);
  delay(1); }
The above code is only for analog value.
You can see that the analog value is changing according to the temperature change in the environment. But it’s not very obvious.
Let’s solve this by using the following equation. Then upload the code below to the Arduino board. The value read from the serial port is similar to normal temperature.
e.g. The temperature right now is 30°C.
#include <math.h>
void setup()
{
   Serial.begin(9600);
}
void loop()
{
  double val=analogRead(0);
  double fenya=(val/1023)*5;
  double r=(5-fenya)/fenya*4700;
  Serial.println( 1/(  log(r/10000) /3950 + 1/(25+273.15))-273.15);
  delay(1000);
}
Result

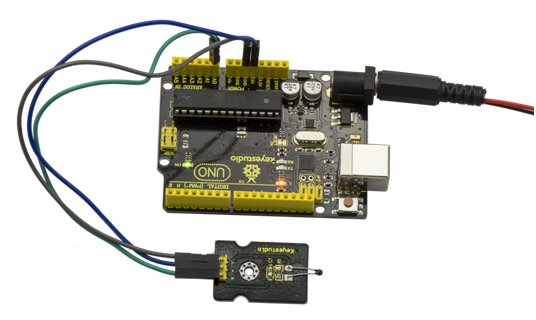
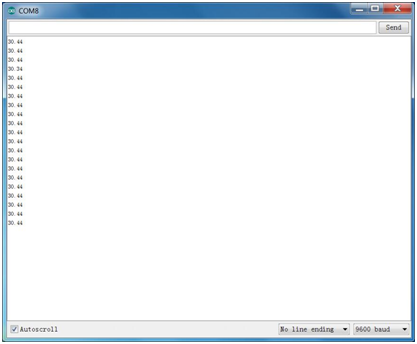
Done wiring and powered up, upload well the code, then open the serial monitor, you will see the current temperature value. Shown below.

Resources
Video
http://video.keyestudio.com/ks0033/
PDF
https://drive.google.com/open?id=1RLgiaOSsJxZ6TxaOc6YjAQALESPXhR9E
