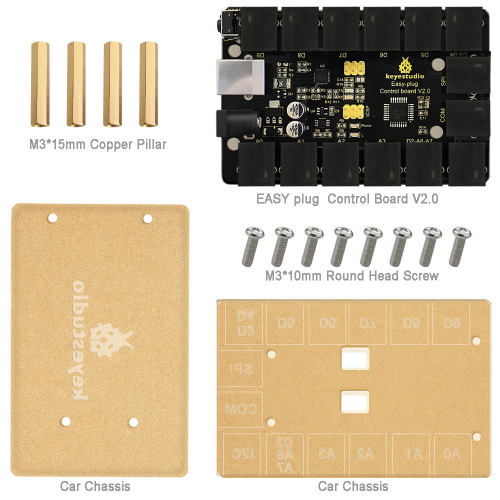
Ks0240 keyestudio EASY plug V2.0 Control Board: Difference between revisions
Keyestudio (talk | contribs) |
Keyestudio (talk | contribs) |
||
| Line 41: | Line 41: | ||
<pre> | <pre> | ||
int val; | int val; | ||
int ledpin=13 | int ledpin=13; | ||
void setup() | void setup() | ||
{ | { | ||
Revision as of 08:58, 31 July 2018
EASY plug V2.0 Control Board
Introduction
The processor core of the EASY plug Control board V2.0 Control board is ATmega328.
Development board IO port with crystal head leads, and couples with power supply interface can allows you to connect external sensors and module with a line, so you don't worry that the wrong wiring will damage the external wiring products.
The development board leads to five digital ports input/output (including three PWM outputs), four analog input interfaces, one dual-digital interface, one SPI communication interface, one serial port communication interface, one IIC communication interface and one joystick module interface.
Specification
- Microcontroller core: ATmega328P-PU
- Working voltage: +5V
- External input voltage:+7V~+12V(suggest)
- External input voltage ( extremum ): +6V≤ Vin ≤ +20V
- Digital signal I/O interface: 5 (of which 3provide PWM output)
- Analog signal input interface: 4
- DCI/O interface current: 20mA
- FlashMemory: 32KB (ATmega328) of which 0.5 KB used by bootloader
- SRAM static storage capacity:2KB
- EEPROM storage capacity: 1KB
- Clock frequency:16MHZ
Board test
Following is a board test example called “Hello World!”.
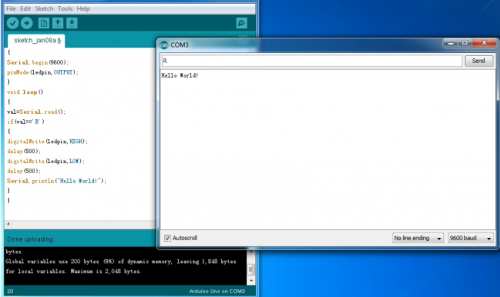
First, open Arduino IDE. In this example sketch, we program Arduino to display “Hello World!” in serial monitor when it receives a specific character string “R”; At the same time, the on-board D13 LED will blink once each time it receives “R”.
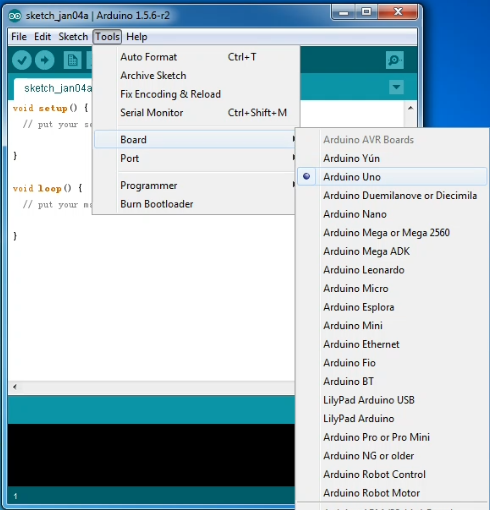
First, set up board; In “Tools”, select “Arduino Uno”.
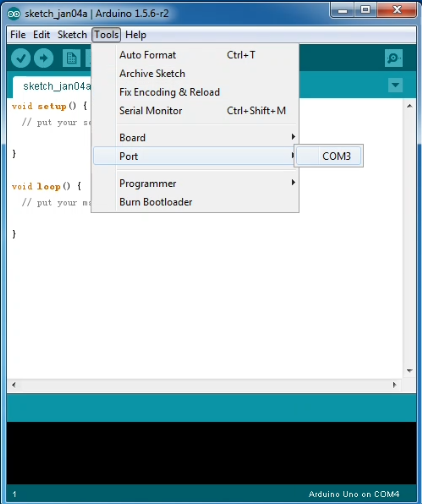
Next, set up COM port; In “Tools”, select “COM3”.
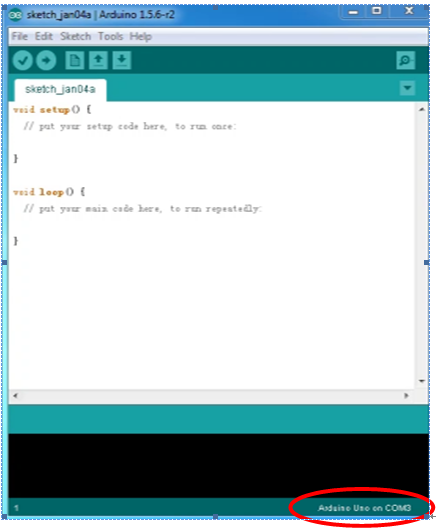
After selection, you can see that indicated area is the same with settings in “Device manager”.
Copy the example sketch and paste it to the IDE; then click “Verify ![]() ” to check compiling mistakes; click “Upload
” to check compiling mistakes; click “Upload ![]() ” to upload the program on the board.
” to upload the program on the board.

After uploading is done, open “serial monitor![]() ”; enter “R”; click “Send”, the serial monitor will display “Hello World!” and the D13 LED will blink once.
”; enter “R”; click “Send”, the serial monitor will display “Hello World!” and the D13 LED will blink once.
Sample Code
int val;
int ledpin=13;
void setup()
{
Serial.begin(9600);
pinMode(ledpin,OUTPUT);
}
void loop()
{
val=Serial.read();
if(val=='R')
{
digitalWrite(ledpin,HIGH);
delay(500);
digitalWrite(ledpin,LOW);
delay(500);
Serial.println("Hello World!");
}
}
Resources
Datasheet Download:
https://drive.google.com/open?id=1uNuMtWmYw55fxP6lKMd_oA8UKLbl-b8H
Buy from
Official Website
