Ks0120 keyestudio EASY plug Infrared Obstacle Avoidance Sensor: Difference between revisions
Keyestudio (talk | contribs) |
Keyestudio (talk | contribs) No edit summary |
||
| Line 1: | Line 1: | ||
[[image:ks0120图.jpg|thumb|600px|right|EASY plug Obstacle Avoidance Sensor]] | |||
==Introduction== | ==Introduction== | ||
Infrared obstacle avoidance sensor is equipped with distance adjustment function and is especially designed for wheeled robots. This sensor has strong adaptability to ambient light and is of high precision. It has a pair of infrared transmitting and receiving tube. When infrared ray launched by the transmitting tube encounters an obstacle (its reflector), the infrared ray is reflected to the receiving tube, | Infrared obstacle avoidance sensor is equipped with distance adjustment function and is especially designed for wheeled robots.<br> | ||
Note: this module | This sensor has strong adaptability to ambient light and is of high precision. It has a pair of infrared transmitting and receiving tube. <br> | ||
When infrared ray launched by the transmitting tube encounters an obstacle (its reflector), the infrared ray is reflected to the receiving tube, after a comparator circuit processing, the indicator will light up. <br> | |||
You can adjust the detection distance by rotating the potentiometer knob, the effective distance range of 2~40cm. <br> | |||
They can be widely used in robot obstacle avoidance, avoidance car, line count, and black and white line tracking and many other occasions.<br> | |||
<span style="color: red">'''Note: ''' this module should be used together with EASY plug control board. | |||
<br> | |||
==Specification== | ==Specification== | ||
* Working voltage: DC 3.3V-5V | * Working voltage: DC 3.3V-5V | ||
* Working current: ≥20mA | * Working current: ≥20mA | ||
* Working temperature: | * Working temperature: -10℃ to+50℃ | ||
* Detection distance: 2 | * Detection distance: 2~40cm | ||
* Output signal: TTL voltage | * Output signal: TTL voltage | ||
* Effective Angle: 35° | * Effective Angle: 35° | ||
<br> | |||
==Technical Details== | |||
* Dimensions: 52mm*17mm*18mm | |||
* Weight: 6.2g | |||
== | <br> | ||
<br>[[File:ks0120 | ==Connect It Up== | ||
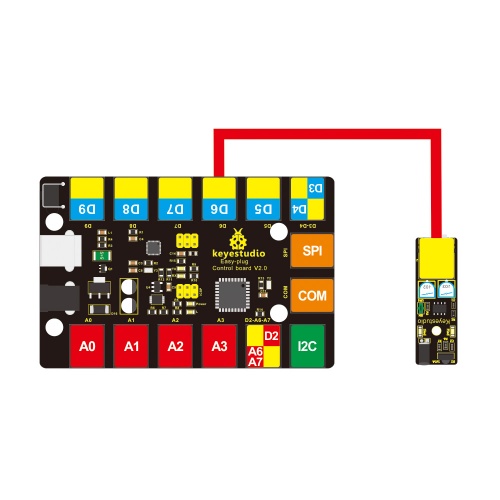
Connect the EASY Plug obstacle detector sensor to control board using an RJ11 cable. Then connect the control board to your PC with a USB cable. | |||
<br>[[File:ks0120.jpg|500px|frameless|thumb]]<br> | |||
<br> | |||
== | ==Upload the Code== | ||
Copy and paste below code to[http://wiki.keyestudio.com/index.php/How_to_Download_Arduino_IDE Arduino IDE] and upload. | |||
<pre> | <pre> | ||
const int sensorPin = | const int sensorPin=6;// the sensor pin | ||
const int ledPin = | const int ledPin=13;// the LED pin | ||
int sensorState = 0; | int sensorState=0;// variable for reading the sensor status | ||
void setup() { | void setup(){ | ||
pinMode(ledPin,OUTPUT); | |||
pinMode(sensorPin,INPUT); | |||
void loop(){ | } | ||
void loop() { | |||
// read the state of the sensor value: | |||
sensorState=digitalRead(sensorPin); | |||
// if it is, the sensorState is HIGH: | |||
if(sensorState==HIGH){ | |||
digitalWrite(ledPin,HIGH); | |||
} | |||
else{ | |||
digitalWrite(ledPin,LOW); | |||
}} | |||
</pre> | |||
< | <br> | ||
==What You Should See== | |||
Done uploading the code, when the sensor detects an obstacle, the led is turned on. | |||
<br>[[File:ks0120 Result.png|500px|frameless|thumb]] [[File:ks0120 Result1.png|500px|frameless|thumb]]<br> | |||
<br> | |||
==Resources == | ==Resources == | ||
'''PDF'''<br> | |||
'''PDF''' | |||
https://drive.google.com/open?id=1CfudUxfXcDV7kbMPmSvEVgnUe9ERA3jw | https://drive.google.com/open?id=1CfudUxfXcDV7kbMPmSvEVgnUe9ERA3jw | ||
<br> | |||
==Buy from == | ==Buy from == | ||
'''Official Website''' | '''Official Website'''<br> | ||
http://www.keyestudio.com/keyestudio-easy-plug-infrared-obstacle-avoidance-sensor-module-for-arduino-starter.html | http://www.keyestudio.com/keyestudio-easy-plug-infrared-obstacle-avoidance-sensor-module-for-arduino-starter.html | ||
Revision as of 10:24, 23 November 2018
Introduction
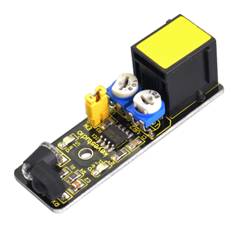
Infrared obstacle avoidance sensor is equipped with distance adjustment function and is especially designed for wheeled robots.
This sensor has strong adaptability to ambient light and is of high precision. It has a pair of infrared transmitting and receiving tube.
When infrared ray launched by the transmitting tube encounters an obstacle (its reflector), the infrared ray is reflected to the receiving tube, after a comparator circuit processing, the indicator will light up.
You can adjust the detection distance by rotating the potentiometer knob, the effective distance range of 2~40cm.
They can be widely used in robot obstacle avoidance, avoidance car, line count, and black and white line tracking and many other occasions.
Note: this module should be used together with EASY plug control board.
Specification
- Working voltage: DC 3.3V-5V
- Working current: ≥20mA
- Working temperature: -10℃ to+50℃
- Detection distance: 2~40cm
- Output signal: TTL voltage
- Effective Angle: 35°
Technical Details
- Dimensions: 52mm*17mm*18mm
- Weight: 6.2g
Connect It Up
Connect the EASY Plug obstacle detector sensor to control board using an RJ11 cable. Then connect the control board to your PC with a USB cable.

Upload the Code
Copy and paste below code toArduino IDE and upload.
const int sensorPin=6;// the sensor pin
const int ledPin=13;// the LED pin
int sensorState=0;// variable for reading the sensor status
void setup(){
pinMode(ledPin,OUTPUT);
pinMode(sensorPin,INPUT);
}
void loop() {
// read the state of the sensor value:
sensorState=digitalRead(sensorPin);
// if it is, the sensorState is HIGH:
if(sensorState==HIGH){
digitalWrite(ledPin,HIGH);
}
else{
digitalWrite(ledPin,LOW);
}}
What You Should See
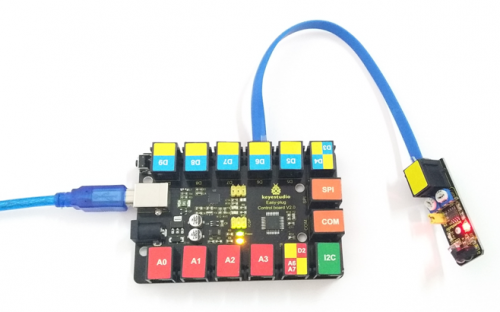
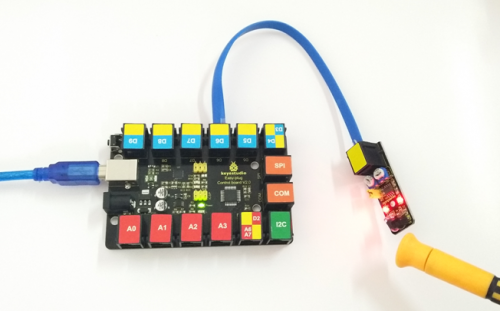
Done uploading the code, when the sensor detects an obstacle, the led is turned on.


Resources
PDF
https://drive.google.com/open?id=1CfudUxfXcDV7kbMPmSvEVgnUe9ERA3jw
Buy from
Official Website
http://www.keyestudio.com/keyestudio-easy-plug-infrared-obstacle-avoidance-sensor-module-for-arduino-starter.html
