Ks0009 keyestudio Photo Interrupter Module: Difference between revisions
Jump to navigation
Jump to search
Keyestudio (talk | contribs) No edit summary |
Keyestudio (talk | contribs) |
||
| Line 48: | Line 48: | ||
'''PDF and Code''' <br> | '''PDF and Code''' <br> | ||
https://drive.google.com/open?id= | https://drive.google.com/open?id=19IwmZJPiyDU_C4S26nGo8IiNeeX_R9xC | ||
<br> | <br> | ||
==Get One Now == | ==Get One Now == | ||
*[https://www.keyestudio.com/keyestudio-photo-interrupter-module-for-arduino-uno-r3-mega-2560-r3-video-p0400-p0400.html '''Get From Official Website''' ] | *[https://www.keyestudio.com/keyestudio-photo-interrupter-module-for-arduino-uno-r3-mega-2560-r3-video-p0400-p0400.html '''Get From Official Website''' ] | ||
Revision as of 10:30, 12 April 2019
Introduction
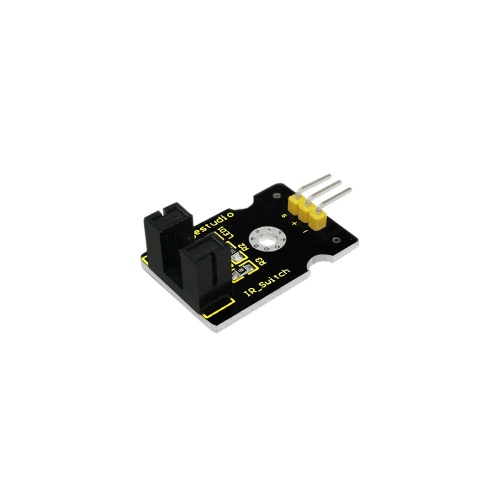
Upright part of this sensor is an infrared emitter and on the other side, it’s a shielded infrared detector. By emitting a beam of infrared light from one end to other end, the sensor can detect an object when it passes through the beam. It is used for many applications including optical limit switches, pellet dispensing, general object detection, etc.

Specification
- Supply Voltage: 3.3V to 5V
- Interface: Digital
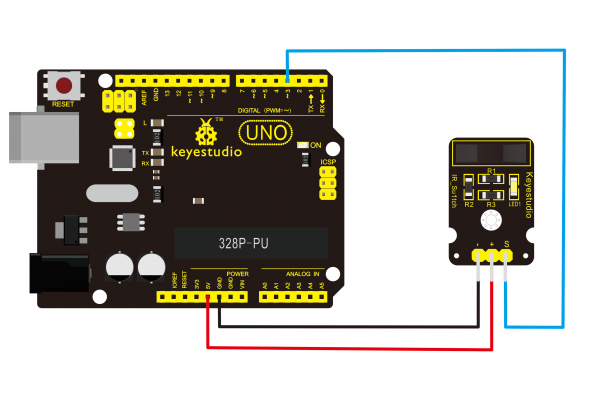
Connection Diagram
Sample Code
// photo interrupter module

int Led = 13 ;// define LED Interface
int buttonpin = 3; // define the photo interrupter sensor interface
int val ;// define numeric variables val
void setup ()
{
  pinMode (Led, OUTPUT) ;// define LED as output interface
  pinMode (buttonpin, INPUT) ;// define the photo interrupter sensor output interface
}
void loop ()
{
  val = digitalRead (buttonpin) ;// digital interface will be assigned a value of 3 to read val
  if (val == HIGH) // When the light sensor detects a signal is interrupted, LED flashes
  {
    digitalWrite (Led, HIGH);
  }
  else
  {
    digitalWrite (Led, LOW);
  }
}
Resources
Video
http://video.keyestudio.com/ks0009/
PDF and Code
https://drive.google.com/open?id=19IwmZJPiyDU_C4S26nGo8IiNeeX_R9xC
