KS0348 Keyestudio SHT31 Temperature and Humidity Module: Difference between revisions
Keyestudio (talk | contribs) |
Keyestudio (talk | contribs) |
||
| Line 1: | Line 1: | ||
== Overview == | == Overview == | ||
Revision as of 08:25, 29 May 2019
Overview
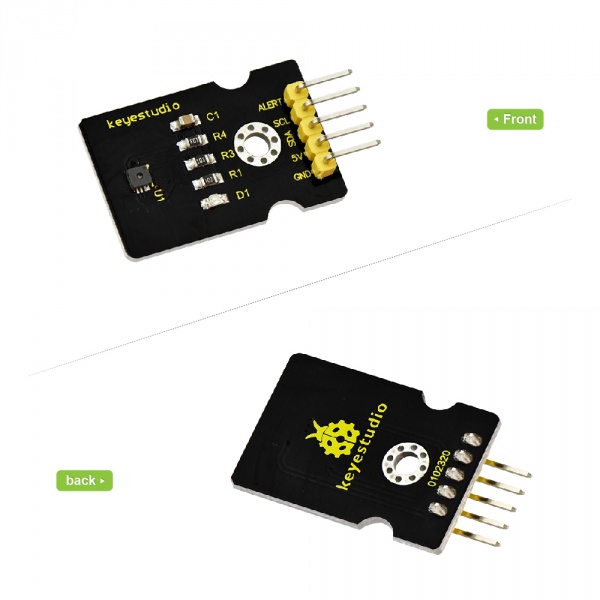
This module mainly uses the SHT31 temperature and humidity sensor, which belongs to the SHT3X series temperature and humidity sensor. Compared with the temperature and humidity sensor of SHT2X series, the SHT3X series performs smarter, more reliable, and more accurate. They have access to more stronger functionality and higher signal processing capabilities.
At the same time, the SHT3X series offers some new features, such as enhanced signal processing, two unique and user-selectable I2C addresses, an alarm mode with programmable temperature and humidity limits, and communication speeds up to 1 MHz.

Features
- Using SHT31 temperature and humidity sensor
- High reliability and long stability
- Reliable technology
- High signal processing capability
- Low signal noise
- Adapted to variety of applications
Specifications
- Operating voltage: 3.3 - 5 V
- Output: I2C interface output
- Humidity Operating Range: 0 - 100% RH
- Temperature Operating Range: -40℃ to 125℃ (-40°F to 257°F)
- Humidity accuracy: ±2% RH (0 - 100% RH)
- Temperature accuracy: ±0.2°C (-40℃ to 90℃)
- Humidity response time: 8 seconds (tau63%)
Connection Diagram
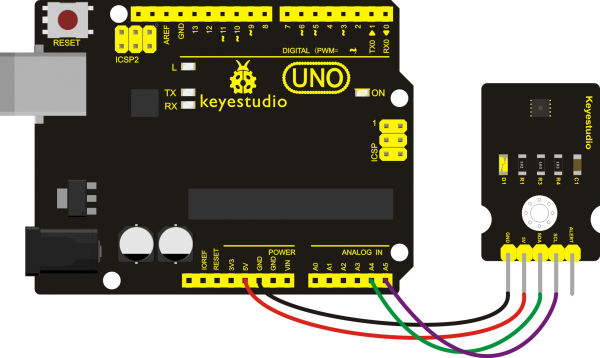
You can connect this module to UNO board to test it. Connect the SLC pin to A5, SDA pin to A4, 5V to 5V, GND to GND. Shown below.

Example Code
Below is the test code, you can upload it to the Arduino board:
// Distributed with a free-will license.
// Use it any way you want, profit or free, provided it fits in the licenses of its associated works.
// SHT30
// This code is designed to work with the SHT30_I2CS I2C Mini Module available from ControlEverything.com.
// https://www.controleverything.com/content/Humidity?sku=SHT30_I2CS#tabs-0-product_tabset-2

#include <Wire.h>

// SHT30 I2C address is 0x44(68)
#define Addr 0x44

void setup()
{
  // Initialise I2C communication as MASTER
  Wire.begin();
  // Initialise serial communication, set baud rate = 9600
  Serial.begin(9600);
  delay(300);
}

void loop()
{
  unsigned int data[6];

  // Start I2C Transmission
  Wire.beginTransmission(Addr);
  // Send measurement command
  Wire.write(0x2C);
  Wire.write(0x06);
  // Stop I2C transmission
  Wire.endTransmission();
  delay(500);

  // Request 6 bytes of data
  Wire.requestFrom(Addr, 6);

  // Read 6 bytes of data
  // cTemp msb, cTemp lsb, cTemp crc, humidity msb, humidity lsb, humidity crc
  if (Wire.available() == 6)
  {
    data[0] = Wire.read();
    data[1] = Wire.read();
    data[2] = Wire.read();
    data[3] = Wire.read();
    data[4] = Wire.read();
    data[5] = Wire.read();
  }

  // Convert the data
  float cTemp = ((((data[0] * 256.0) + data[1]) * 175) / 65535.0) - 45;
  //float fTemp = (cTemp * 1.8) + 32;
  float fTemp = ((((data[0] * 256.0) + data[1]) * 315) / 65535.0) - 49;
  float humidity = ((((data[3] * 256.0) + data[4]) * 100) / 65535.0);

  // Output data to serial monitor
  Serial.print("Relative Humidity : ");
  Serial.print(humidity);
  Serial.println(" %RH");
  Serial.print("Temperature in Celsius : ");
  Serial.print(cTemp);
  Serial.println(" C");
  Serial.print("Temperature in Fahrenheit : ");
  Serial.print(fTemp);
  Serial.println(" F");
  delay(500);
}
Example Result
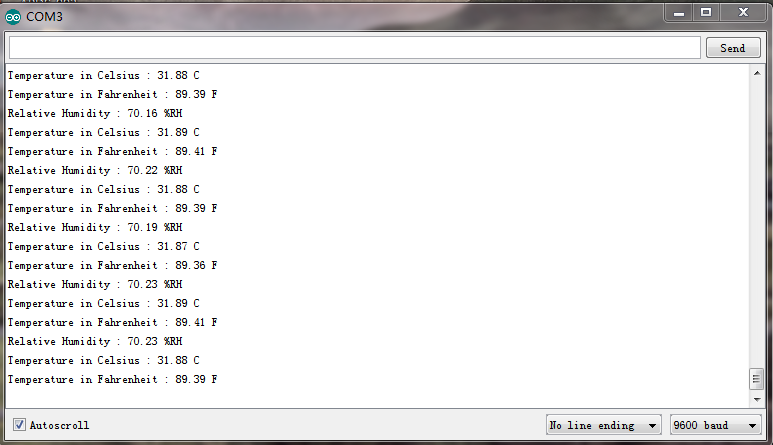
After wiring, upload the code to the board, then open the serial monitor of Arduino IDE and set the baud rate as 9600, finally you should see the current temperature and humidity value shown on the monitor. Shown below. Note that the data will vary with different ambient.

Extension
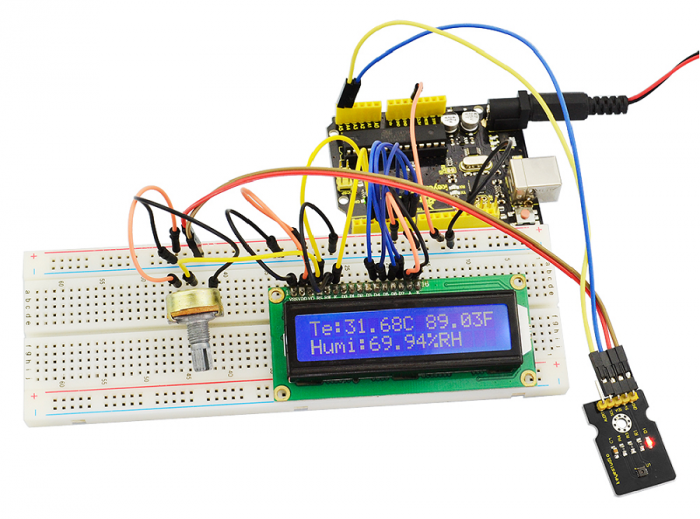
You can add a 1602 LCD to show the measured data.

Resources