KS0488X Keyestudio 4DOF Robot Arm Arduino Learning Kit”: Difference between revisions
Keyestudio (talk | contribs) (Created blank page) |
Keyestudio (talk | contribs) No edit summary |
||
| Line 1: | Line 1: | ||
== Introduction == | |||
On the Internet, we often see DIY robotic arm complete various actions. Do you want to have one? I believe that you’ll make your own robotic arm by learning our projects.<br> | |||
This kit includes Arduino single-chip microcomputer, 2 joystick modules and 4 servos and so on. Next, we’ll teach you how to install and debug the robotic arm.<br> | |||
There are three methods to control it as follows:<br> | |||
First, we can a wired home-made joystick controller (included in the kit); secondly, the App control is adapted; thirdly, we also can use a wireless PS2 joystick(not included in kit) .<br> | |||
The detailed codes and projects are provided for you.<br> | |||
Come and let’s get started with this kit.<br> | |||
Note: You must connect a DC 7-15V power to VIN port of shield when wiring servo to shield.<br> | |||
== Features == | |||
* Detailed installation method | |||
* Detailed debugging methods, even you’re a beginner | |||
* 3 control methods: wired joystick control, Bluetooth control, wireless PS2 joystick control. | |||
* Relevant information provided | |||
== Specification == | |||
* Keyestudio servo motor driver shield: | |||
* VIN voltage: VIN = DC 7-15V | |||
* VIN current: 5A | |||
* Size: 73 * 53.34mm | |||
* 2-channel 5V output: 5V / 3A | |||
* PS2 interface: compatible with Sony PS2 receiver, can be plugged directly into the shield. | |||
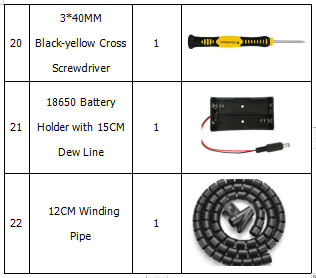
== Component List == | |||
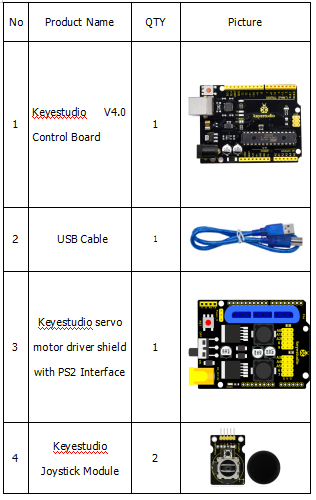
<br>[[File:QQ图片2022051016271.png|700px|frameless|thumb]]<br> | |||
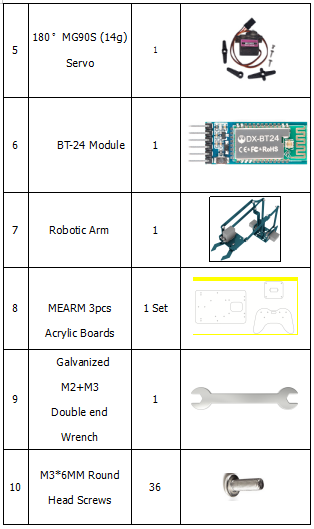
<br>[[File:QQ图片2022051016272.png|700px|frameless|thumb]]<br> | |||
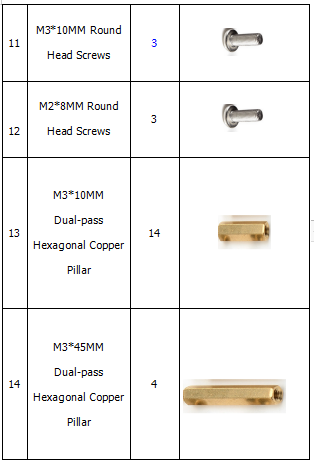
<br>[[File:QQ图片2022051016273.png|700px|frameless|thumb]]<br> | |||
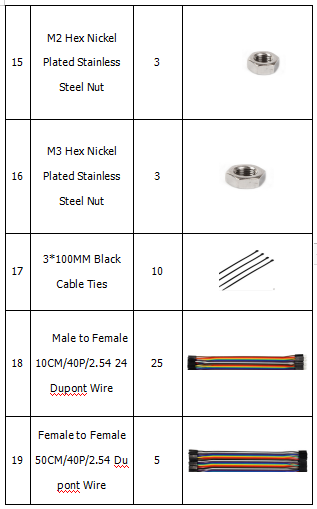
<br>[[File:QQ图片2022051016274.png|700px|frameless|thumb]]<br> | |||
<br>[[File:QQ图片2022051016275.png|700px|frameless|thumb]]<br> | |||
== Resources == | |||
Download the code, complete files in the link: | |||
https://fs.keyestudio.com/KS0488-X | |||
Latest revision as of 10:47, 16 May 2022
Introduction
On the Internet, we often see DIY robotic arm complete various actions. Do you want to have one? I believe that you’ll make your own robotic arm by learning our projects.
This kit includes Arduino single-chip microcomputer, 2 joystick modules and 4 servos and so on. Next, we’ll teach you how to install and debug the robotic arm.
There are three methods to control it as follows:
First, we can a wired home-made joystick controller (included in the kit); secondly, the App control is adapted; thirdly, we also can use a wireless PS2 joystick(not included in kit) .
The detailed codes and projects are provided for you.
Come and let’s get started with this kit.
Note: You must connect a DC 7-15V power to VIN port of shield when wiring servo to shield.
Features
- Detailed installation method
- Detailed debugging methods, even you’re a beginner
- 3 control methods: wired joystick control, Bluetooth control, wireless PS2 joystick control.
- Relevant information provided
Specification
- Keyestudio servo motor driver shield:
- VIN voltage: VIN = DC 7-15V
- VIN current: 5A
- Size: 73 * 53.34mm
- 2-channel 5V output: 5V / 3A
- PS2 interface: compatible with Sony PS2 receiver, can be plugged directly into the shield.
Component List
Resources
Download the code, complete files in the link:
