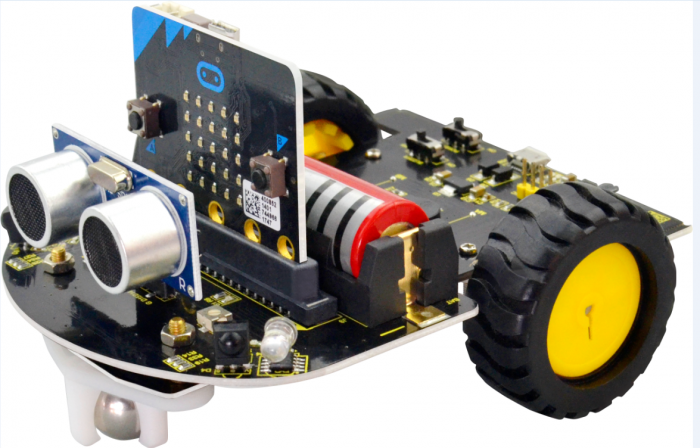
Ks0356 keyestudio Micro:bit Mini Smart Robot Car
Product Description
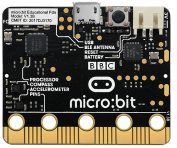
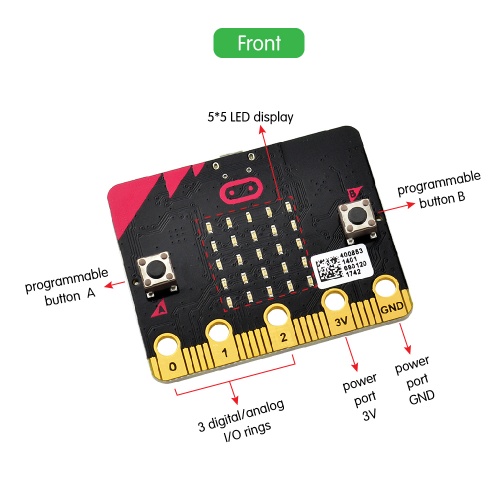
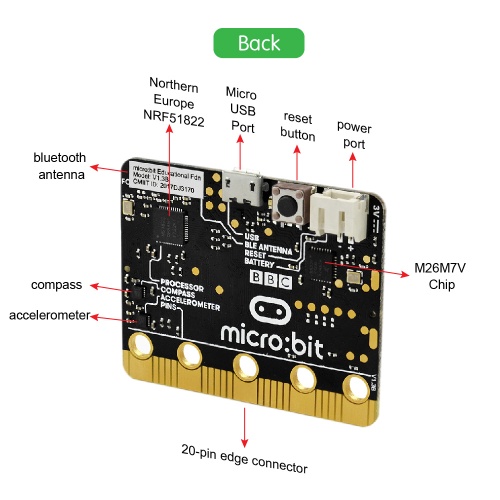
Here comes the educational robot based on Micro:bit programming. Micro: bit is an ARM structure microcontroller designed by BBC. It is only half size of a credit card, onboard comes with Bluetooth, accelerometer, compass, three buttons, 5x5 LED matrix, mainly used for teens programming education.
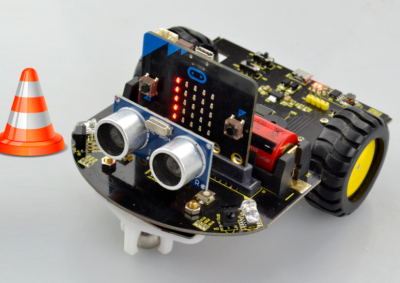
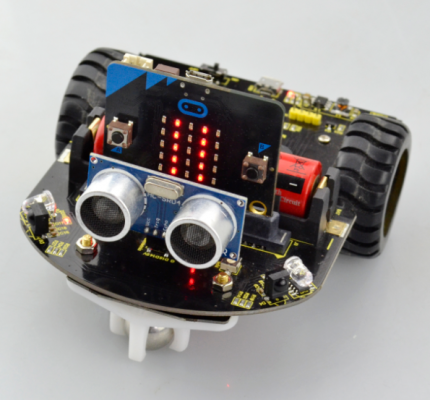
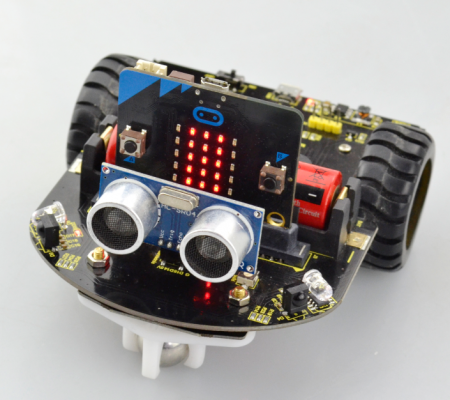
The Micro:bit Mini Smart Robot Car integrates ultrasonic and infrared obstacle avoidance as well as line following. Also comes with a passive buzzer for playing music.
Moreover, supply the power by 18650 batteries, supporting charge when run out of power. You will be able to adjust the motor speed.
This micro:bit robot is a perfect toy for kids to start learning robotics. The plug-and-play allow children to quickly learn graphic programming in entertaining, nurturing children's interest in science and logical thinking.
Note: we adopt V1.5 micro:bit in the whole tutorial, but our tutorial is also compatible with the latest version micro:bit. When doing experiment with latest micro:bit, you need to transfer code into Makecode online editor first, save code again then download it to micro:bit.
Specifications
- Voltage: 4.2-5.5V
- Current: USB power supply or power supply with a capacity greater than or equal to 1A
- Maximum power: maximum output power is 5W
- Operating temperature range: 0-50 degrees Celsius
- Dimensions: 120*90.7mm
- Environmental attributes: ROHS
Packing List
Installation Method
a. Firstly prepare all the assembly components. Place them together before install the micro:bit robot car.
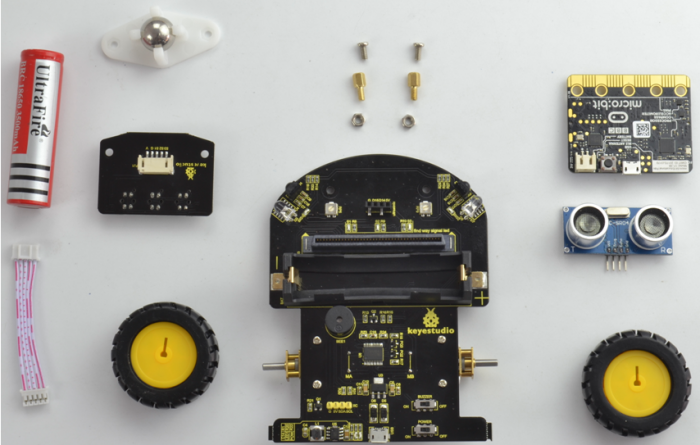
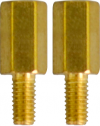
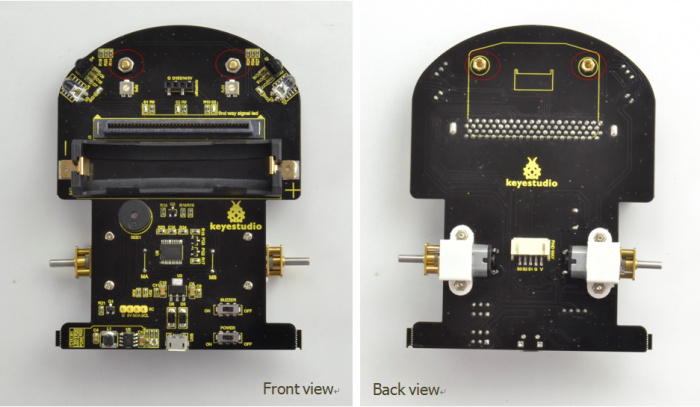
b. The first step should mount 2pcs hex copper pillar and 2pcs M3 Nickel plated nut on the front of car shield.
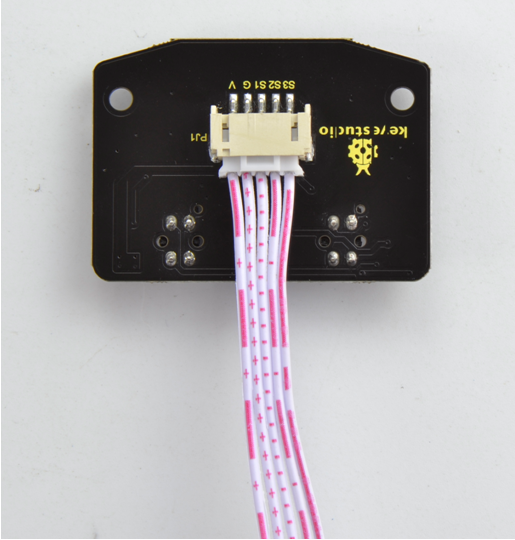
c. Connect the JST PH2.0MM-5PIN double-head cable to line tracking sensor.
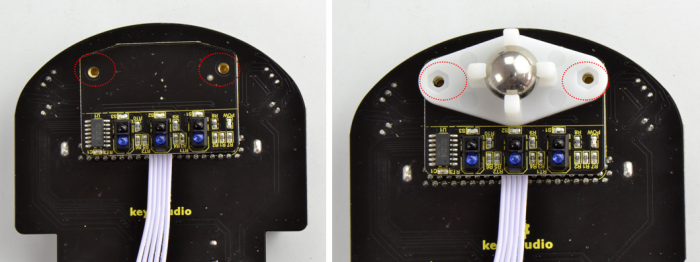
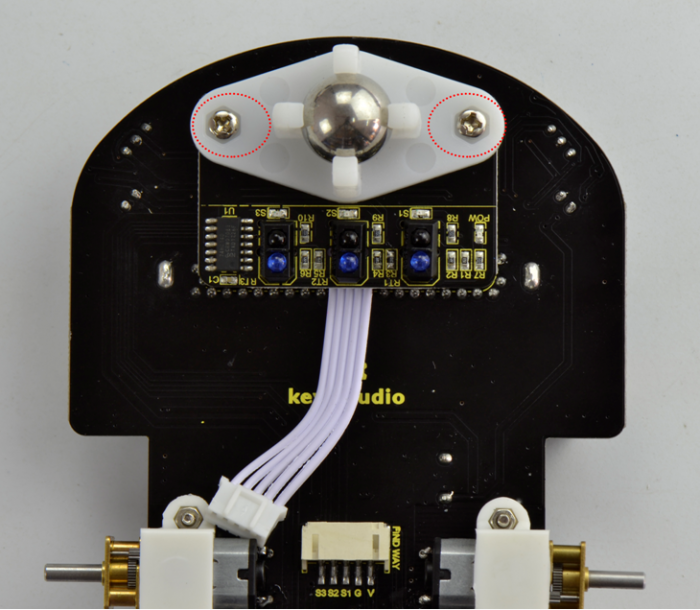
d. Then fix the line tracking sensor and W420 steel universal wheel onto the hex copper pillar on the car shield using 2pcs M3*6MM round-head screws.
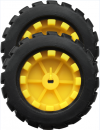
e. After that, mount the 2pcs N20 motor wheels into the DC motor.
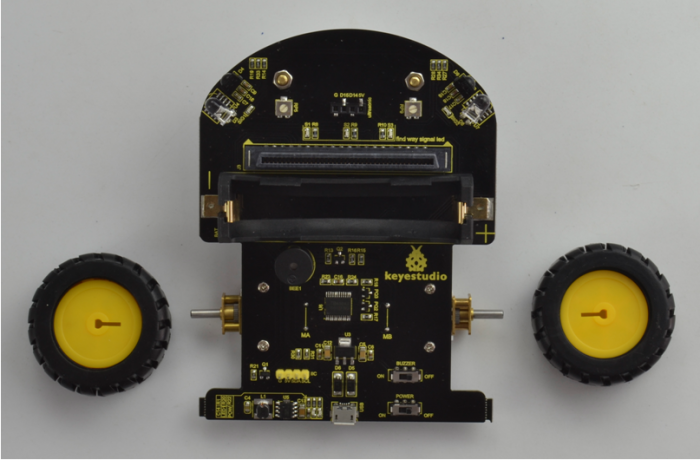
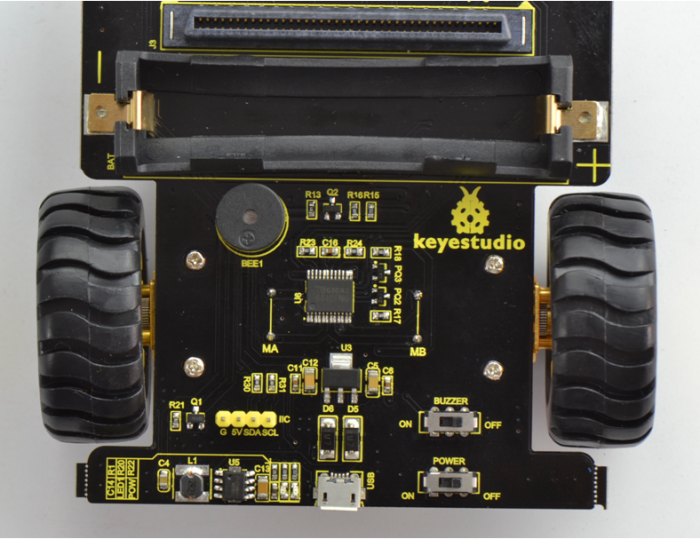
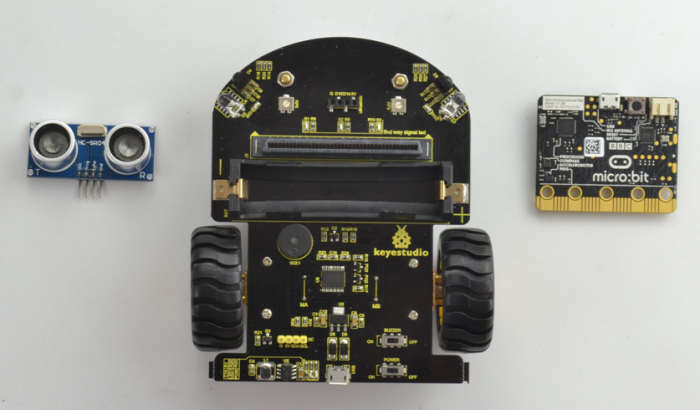
f. Now, we insert the ultrasonic sensor and micro:bit main board into the car shield.
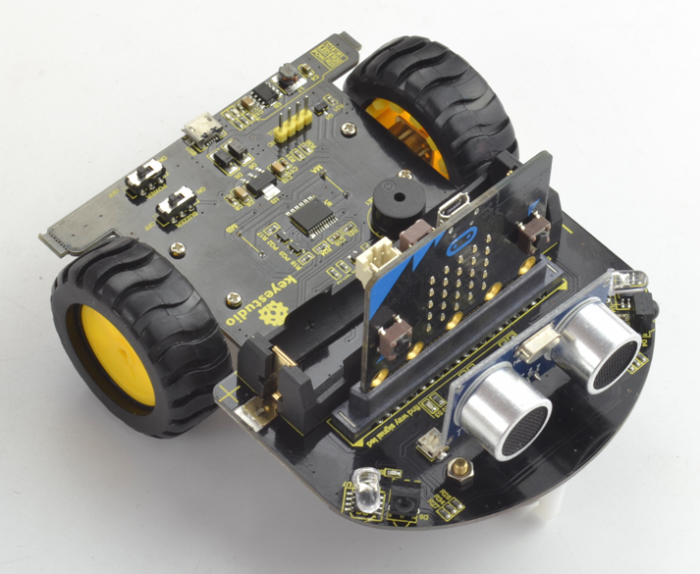
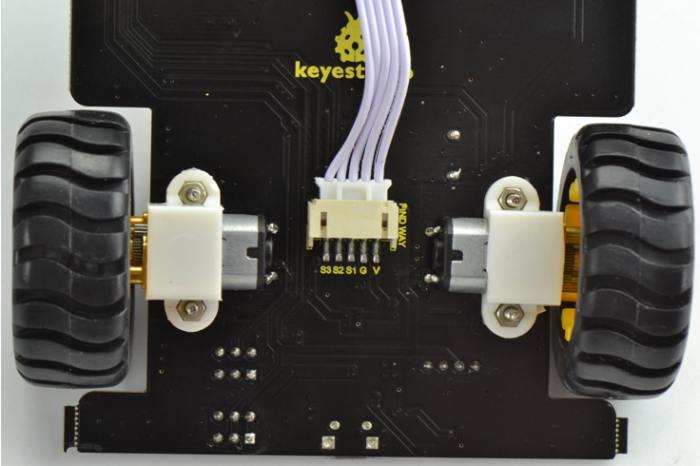
g. Connect the JST PH2.0MM-5PIN cable connected to line tracking sensor to the car shield.
h. Finally, insert the 18650 battery into the car shield.
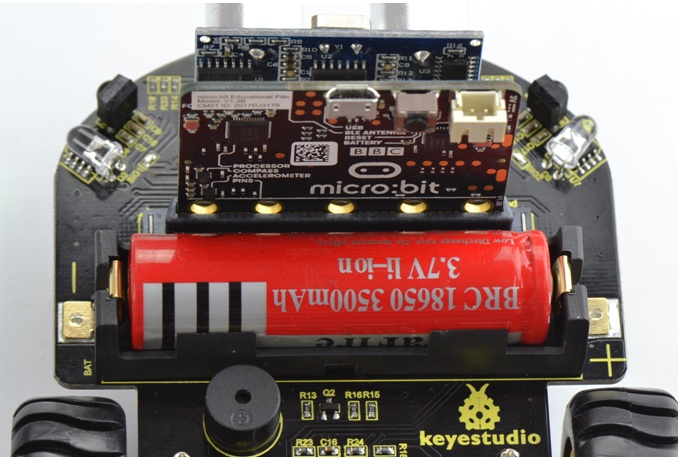
i. Congrats! The mini micro:bit robot car is installed well. Pretty simple.
micro:bit Driver Installation
Next, let’s install the driver for micro:bit main board.
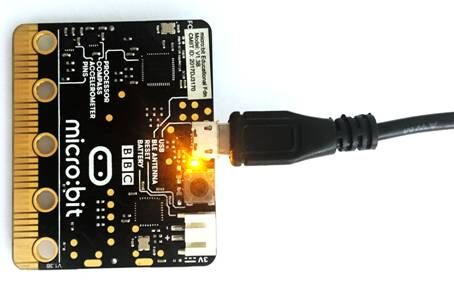
1) First of all, connect the micro:bit to your computer using a USB cable.
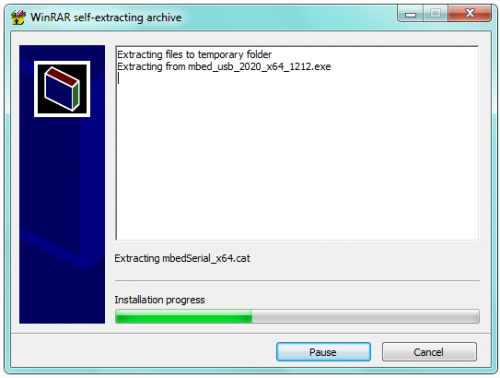
2)Then, double click the driver software to install it. Here you can click the icon below to download it.
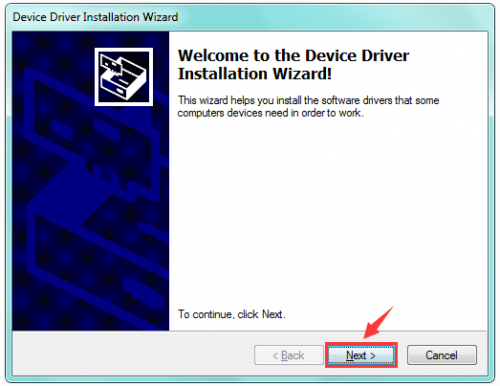
3) After that, click Next to continue the installation.
4) Wait the driver installing finished.
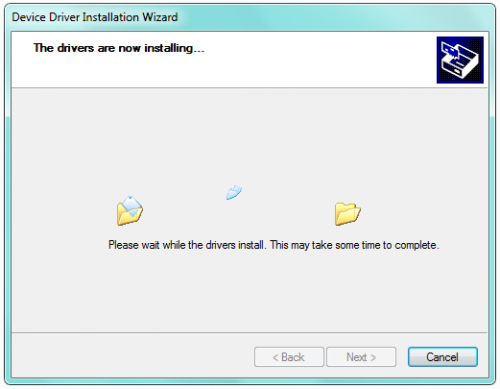
5) Wait the driver installing finished.
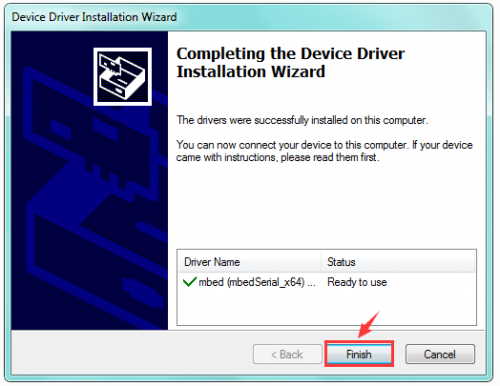
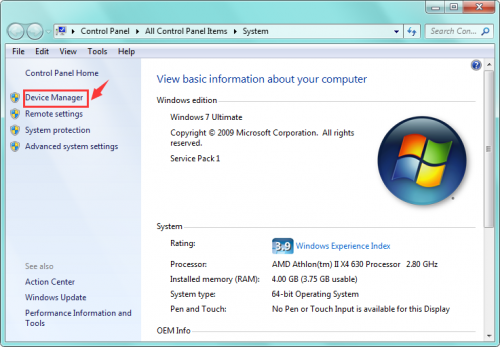
6) Driver installation completed, then you can right click the “Computer” —> “Properties”—> “Device Manager”.
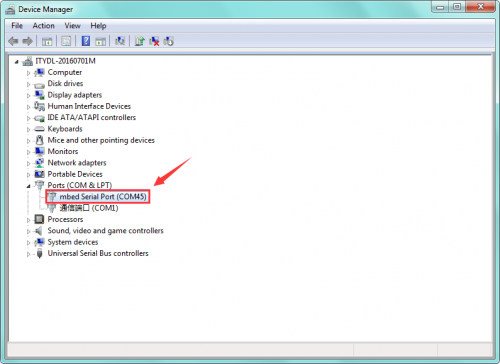
You can check the detailed Ports information shown as below.
micro:bit Example Use
Step 1: Connect It
Connect the micro:bit to your computer via a micro USB cable. Your micro:bit will show up on your computer as a drive called 'MICROBIT'.
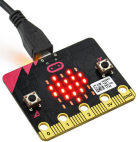
Step 2: Program It
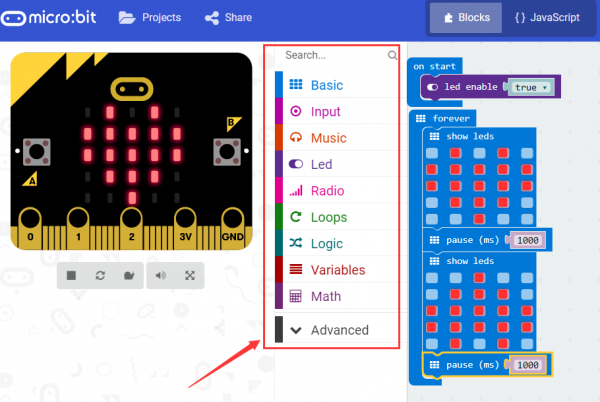
Using micro bit MakeCode Block editor https://makecode.microbit.org/, write your first micro:bit code.
You can drag and drop some example blocks and try your program on the Simulator in the Javascript Blocks Editor, like in the image below.
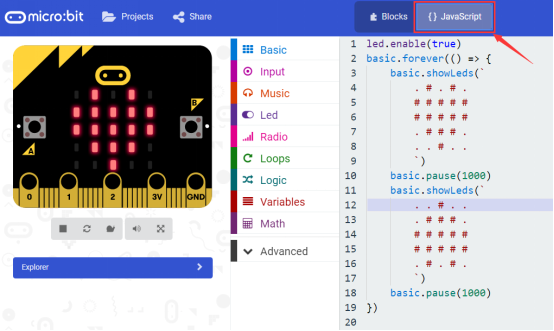
Click the JavaScript, you can see the corresponding program code. Shown as below figure.
Step 3: Download It
Click the Download button in the editor. This will download a 'hex' file, which is a compact format of your program that your micro:bit can read.
Here you can name the project as LED1, then click “Save”. Shown below.

Once the hex file has downloaded, copy it to your micro:bit just like copying a file to a USB drive. On Windows find the microbit-LED1 file, you can right click and choose "Send To→MICROBIT."


Step 4: Play It
The micro:bit will pause and the yellow 5*5 LED on the back of the micro:bit will display the images while your code is programmed.

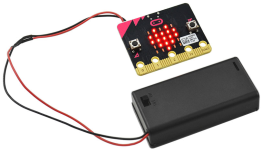
You can power it using USB cable or battery. The battery holder need to connect two 1.5V AA batteries. Shown below.
micro:bit Pins
Before getting started with the following projects, first need to figure out each pin of micro:bit main board. Please refer to the reference diagram shown below.
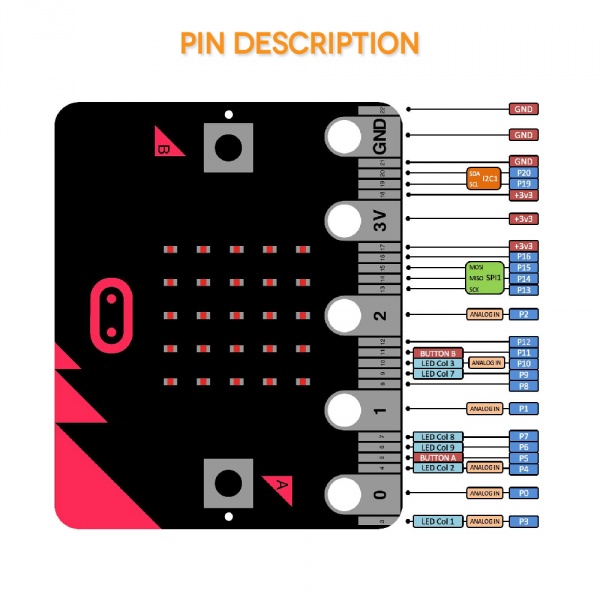
The BBC micro:bit has 25 external connections on the edge connector of the board, which we refer to as ‘pins’. The edge connector is the grey area on the right side of the figure above. There are five large pins, that are also connected to holes in the board labelled: 0, 1, 2, 3V, and GND. And along the same edge, there are 20 small pins that you can use when plugging the BBC micro:bit into an edge connector.
Note that it read from the BBC micro:bit official website. More reference you can click the link below:
BBC micro bit Pins: http://microbit.org/guide/hardware/pins/
BBC micro:bit website: http://microbit.org/
Micro bit MakeCode Block Editor: https://makecode.microbit.org/
Meet micro:bit starter programming: http://microbit.org/guide/
BBC micro:bit Features Guide: http://microbit.org/guide/features/
BBC micro:bit Safety Warnings: http://microbit.org/guide/features/
BBC micro:bit Quick Start Guide: http://microbit.org/guide/quick/
Learning Projects
Playing Music
Description
Buzzers can be categorized as active and passive ones.
The difference between the two is that an active buzzer has a built-in oscillating source, so it will generate a sound when electrified.
A passive buzzer does not have such a source, so DC signal cannot drive it beep. Instead, you need to use square waves whose frequency is between 2K and 5K to drive it.
Different frequencies produce different sounds. You can use micro:bit to code the melody of a song, quite fun and simple.
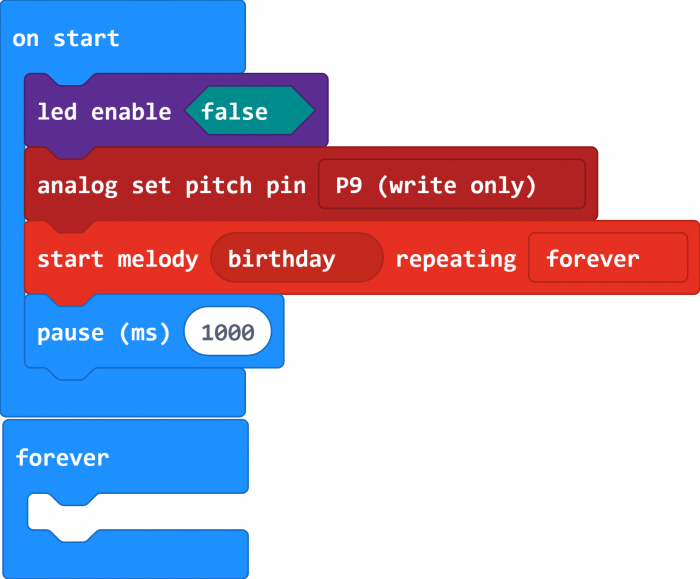
The keyestudio Micro:bit robot shield comes with a passive buzzer element. The signal terminal of buzzer is connected to the P9 interface of micro:bit main board.
In the experiment, we make use of the software built-in library to drive the passive buzzer play a song of Happy Birthday.
Test Result
Send well the test code to micro:bit main board, then insert the micro:bit main board into the micro:bit robot shield. Connect a 18650 battery to the shield, and turn the POWER and BUZZER switch ON.
You should hear the micro:bit robot shield playing a song of《Happy Birthday》
Micro:bit LED Matrix Display
Description
LED stands for Light Emitting Diode. The micro:bit has 25 individually-programmable LEDs, allowing you to display text, numbers, and images.
The micro:bit MakeCode Block editor has built-in library. So you can use it to control the 25 LED lights on and off, showing the different images.
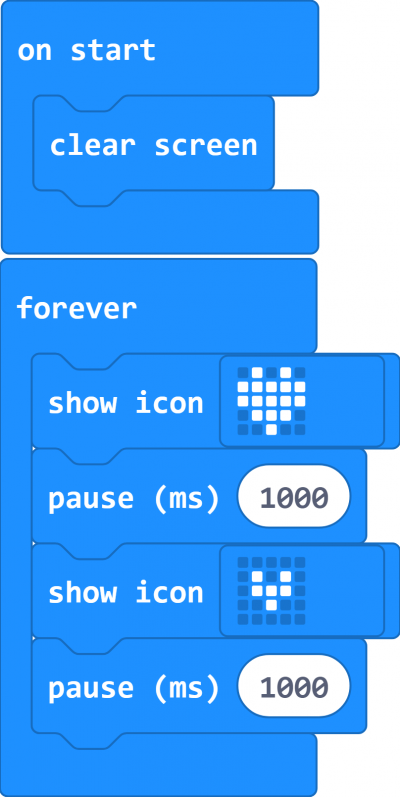
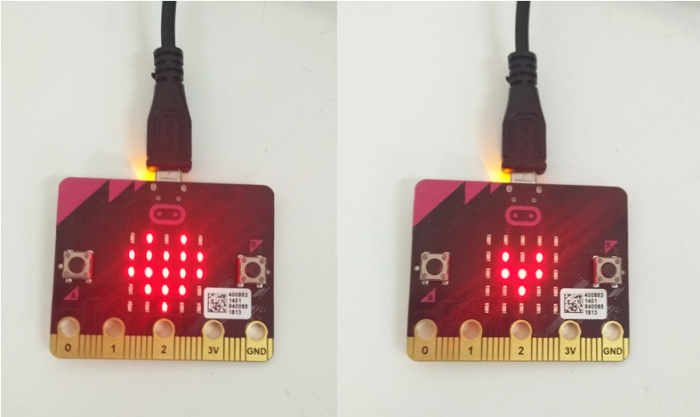
In the experiment, we drive the 25 LED lights show a big heart and a small heart images.
Motor Driving
Description
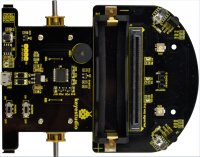
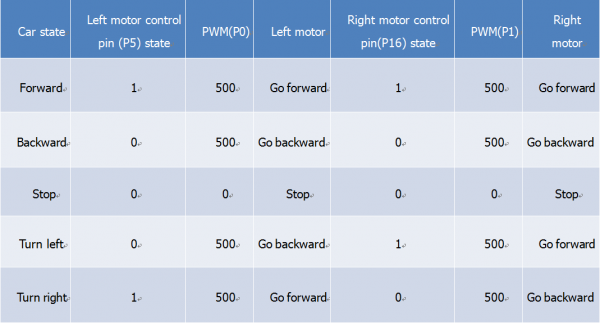
The micro:bit robot shield has a built-in TB6612FNG chip. When using, you just need to insert the micro:bit main board into the shield, and send the test code to micro:bit main board. Insert well the 18650 battery into the shield to control the two motors rotate, thus control the micro:bit car run.
Below is a table of TB6612FNG chip pins (PWM range of 0~1023)
Test Code
Test Result
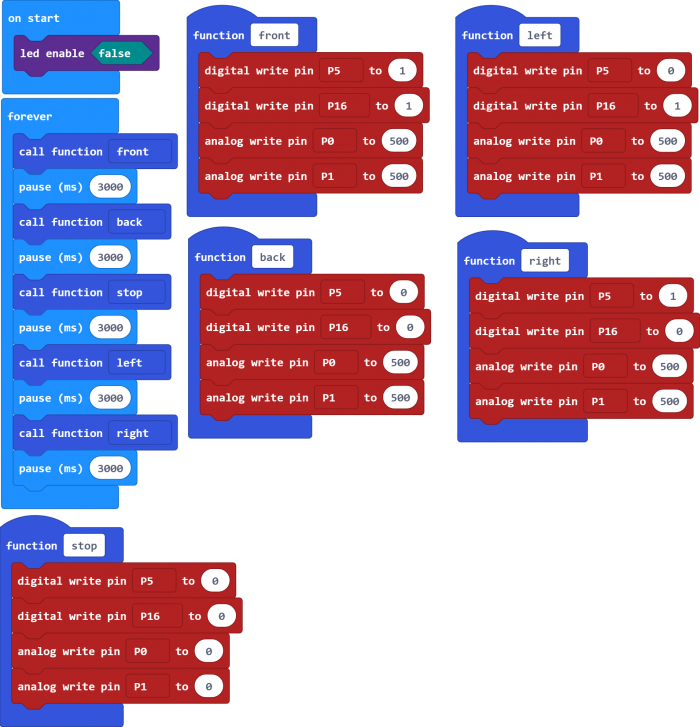
Send well the test code to micro:bit main board, then insert the micro:bit main board into the car shield, and connect a 18650 battery into the car shield.
Turn the POWER switch ON. The micro:bit car will go forward for 3 seconds, backward for 3 seconds, stop for 3 seconds, turn left for 3 seconds and turn right for 3 seconds, repeatedly.
Line Tracking
Test the tracking sensor
Description
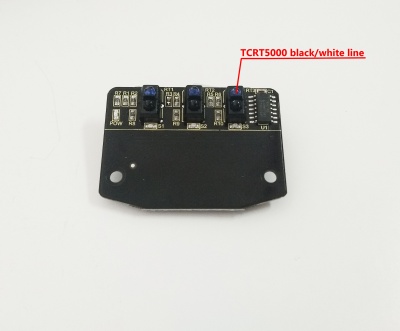
The tracking sensor is actually an infrared sensor. The component used here is the TCRT5000 infrared tube.
Its working principle is to use the different reflectivity of infrared light to the color, then convert the strength of the reflected signal into a current signal.
During the process of detection, black is active at LOW level, but white is active at High level.
The following picture is our keyestudio line tracking sensor designed for Micro:bit robot car. We have integrated 3 sets of TCRT5000 infrared tube on a single board, pretty convenient for wiring and controlling.
TECH SPECS
- Operating Voltage: 3.3-5V(DC)
- Interface: 5Pin connector
- Output Signal: digital signal
Test Result
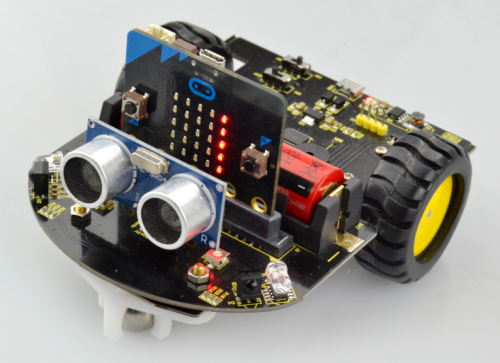
Send the test code to micro:bit main board, then insert the micro:bit main board into the car shield and connect a 18650 battery, turn the POWER switch ON.
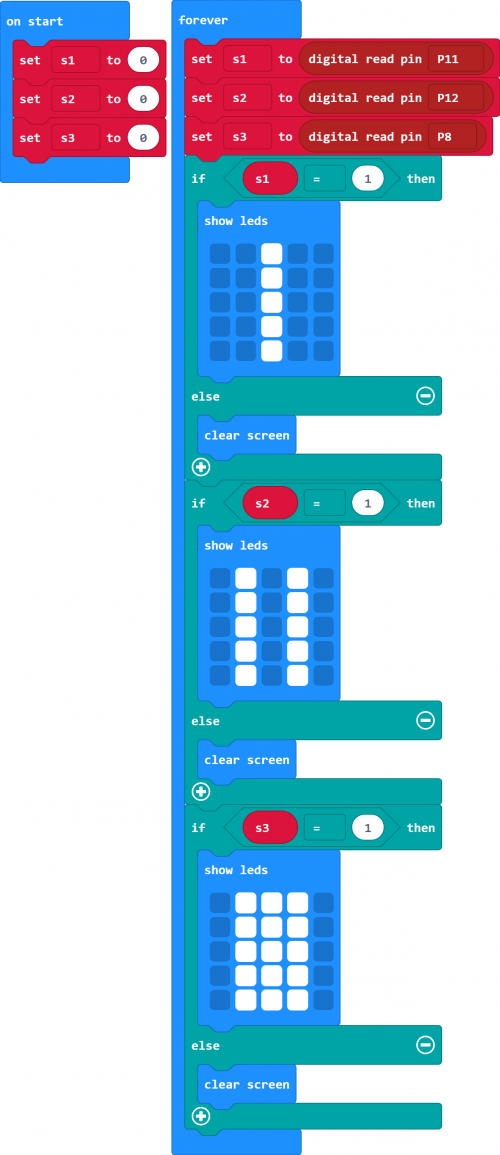
At this moment, the micro:bit LED matric has no display.
But if approach your finger to the first tracking sensor (S1), the LED matrix will show Ⅰin the middle;
Approach your finger to the second tracking sensor (S2), the LED matrix will show Ⅱ;
Approach your finger to the third tracking sensor (S3), the LED matrix will show Ⅲ;
Line Tracking Car
Description
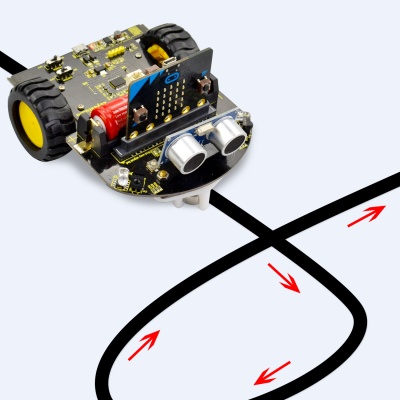
In the previous section, we have introduced the principle and application of line tracking module and motor driving. After that, combine the tracking sensor and module to build a line following car.
So at first what does line tracking mean? It refers to follow the line trajectory. You might often see some robots always follow or track a black line.
How does it work?
It uses the tracking sensor to detect the black track on the pavement, and detection signal will feed back to the micro:bit main board. Then micro:bit main board will analyze and judge the collected signals to control and drive the motor in time, thus can adjust the car’s turning direction.
That is why the micro:bit car can automatically follow the black track, achieving the automatic line tracking function.
Programming Thinking
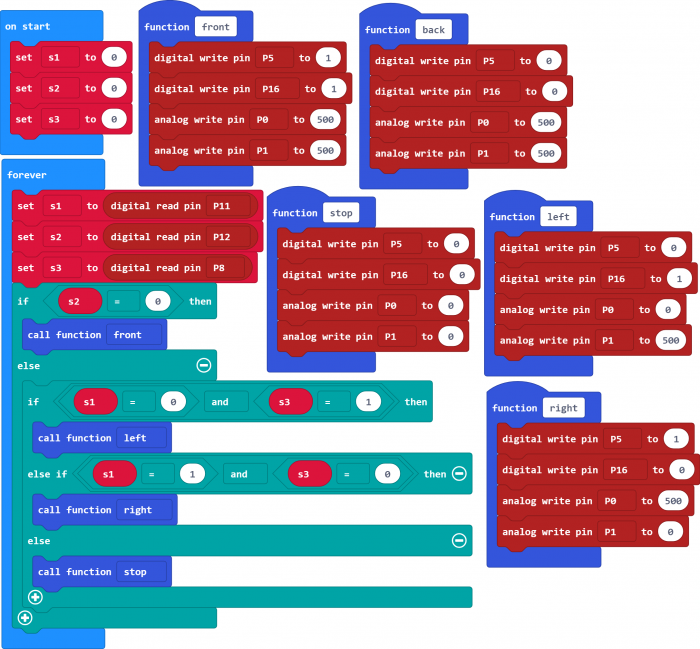
①At first judge the middle tracking sensor. If it detects a black line, no matter detect a black line on either side, the micro:bit car always goes forward.
②If the middle tracking sensor does not detect a black line, then judge the sensor on both sides.
If the left sensor detects a black line, but the right sensor doesn’t, the micro:bit car will turn left;
If the right sensor detects a black line, but the left sensor doesn’t, the micro:bit car will turn right;
If all three sensors do not detect a black line, the micro:bit car will stop.
Test Result
Send the test code to micro:bit main board, then insert the micro:bit main board into the car shield and connect a 18650 battery, turn the POWER switch ON.
At this moment, the micro:bit mini robot car will follow a black line.
Special Note:
When testing the car, do not test it under the sun. During the test, if go wrong, you can try to test it in a darker environment.
Ultrasonic Avoiding Obstacles
Ultrasonic Ranging
Description
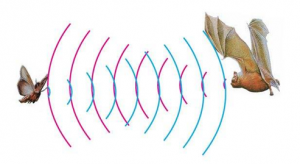
There is an animal called bat in nature. The bats can fly at night, not depend on its eyes, but on its ears and vocal organs. When the bat flies, it will emit a scream, an ultrasonic signal that humans cannot hear because of its high audio frequency. If these ultrasonic signals hit other objects on the flight path, they will be reflected back immediately. After receive the returned information, the bats complete the whole process of listening, seeing, calculating and bypassing obstacles during the flutter.
The principle of the ultrasonic module is as the same as the above principle.
The ultrasonic module will emit the ultrasonic waves after trigger signal. When the ultrasonic waves encounter the object and are reflected back, the ultrasonic module outputs an echo signal, so it can determine the distance of object from the time difference between trigger signal and echo signal.
Ultrasonic sensor has a wide range of sensitivity, no blind area, and no interference with obstacles.
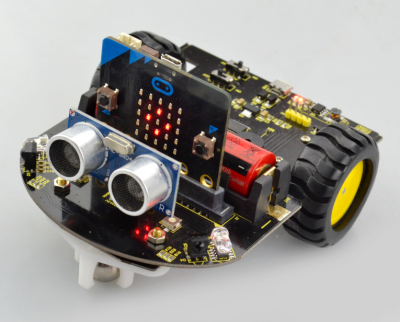
As the following picture shown, it is our keyestudio ultrasonic module. It has two somethings like eyes.
One is transmitting end, the other is receiving end.

TECH SPECS
- Operating Voltage: 5V(DC)
- Operating Current: 15mA
- Operating Frequency: 40khz
- Maximum Detection Distance: 3-5m
- Minimum Detection Distance: 3-4cm
- Sensing Angle: less than 15 degrees
Test Result
Send the test code to micro:bit main board, then insert the micro:bit main board into the car shield and connect a 18650 battery, turn the POWER switch ON.
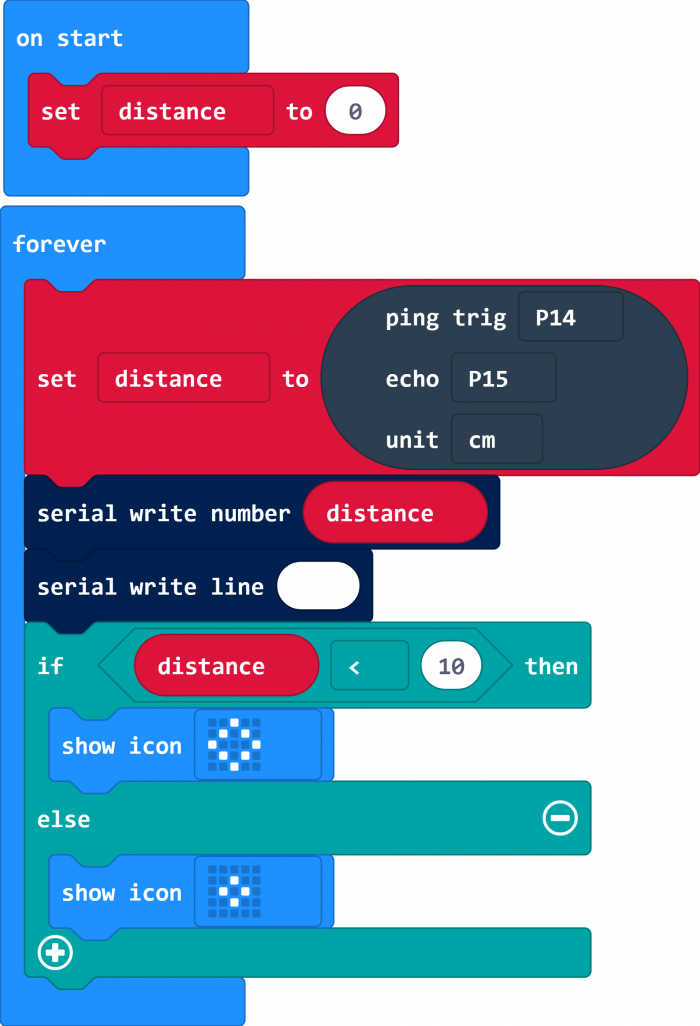
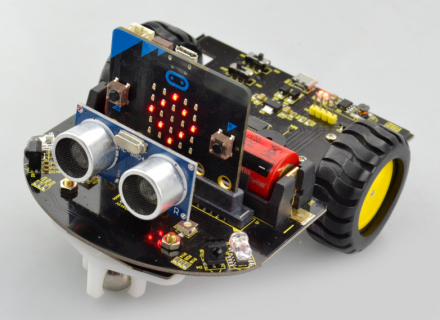
At this moment, when the micro:bit mini robot car detects an obstacle ahead, the measured result will be showed on the micro:bit LED matrix.
If the measured distance between an obstacle and ultrasonic module is less than 10cm, the micro:bit LED matrix will show a big prismatic image;
If the measured distance is greater than 10cm, the micro:bit LED matrix will show a small prismatic image.
Ultrasonic Obstacle Avoiding Car
Description
In the previous project, we have combined a tracking sensor and micro:bit car shield to build a line tracking car.
Here we combine a ultrasonic module and micro:bit car shield to build an ultrasonic obstacle avoiding car.
How does it work?
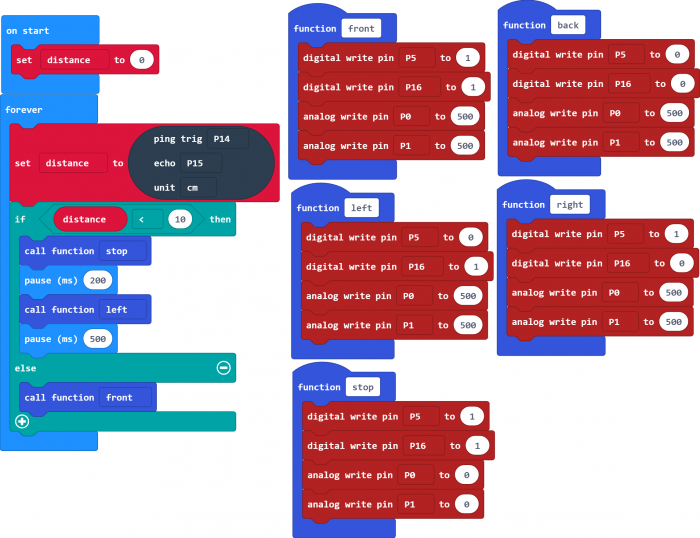
We have introduced the principle of ultrasonic module before. We can use a ultrasonic module to measure the distance between the micro:bit car and an obstacle ahead. Then control the running state of micro:bit robot car according to the measured distance.

Programming Thinking
①At first, use a ultrasonic module to measure the distance between the micro:bit car and an obstacle ahead.
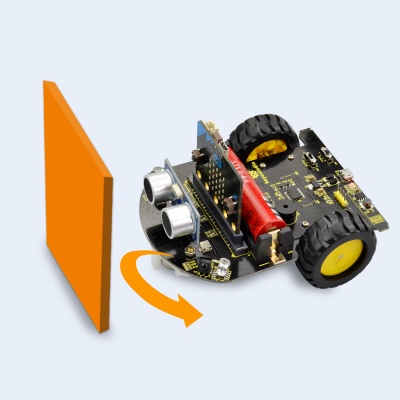
②When the measured distance is less than 10cm, the micro:bit car stops for 0.2 second, then turns left for 0.5 second and then goes forward. If the measured distance is greater than or equal to 10cm, the micro:bit car will directly go forward.
Test Result
Send the test code to micro:bit main board, then insert the micro:bit main board into the car shield and connect a 18650 battery, turn the POWER switch ON.
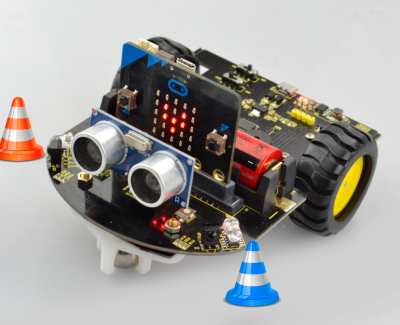
At this moment, if the micro:bit robot car encounters an obstacle ahead, it will turn left to a certain angle, then go forward.
Infrared Avoiding Obstacles
Infrared Detection
Description
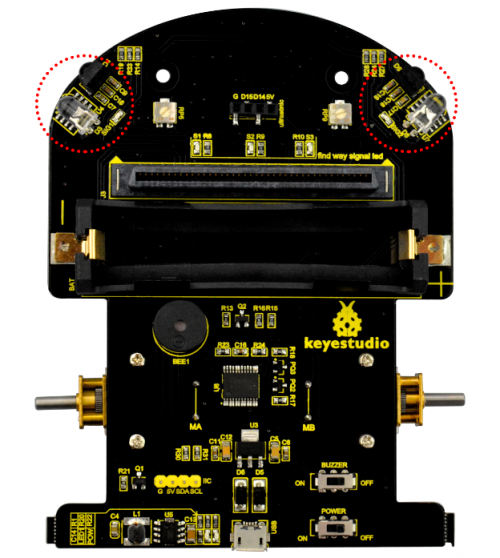
The micro:bit robot car shield comes with two infrared obstacle detector sensors. It is actually designed for infrared obstacle avoidance robot.
The infrared obstacle detector sensor has a pair of infrared transmitting and receiving tubes.
The transmitter emits an infrared rays of a certain frequency. When the detection direction encounters an obstacle (reflecting surface), the infrared rays are reflected back, and receiving tube will receive it.
At this time, the indicator (SIG1/SIG2 LED) lights up. After processed by the circuit, the signal output terminal will output Digital signal.
You can rotate the potentiometer on the shield to adjust the detection distance. It is better to adjust the potentiometer to make the SIG1/SIG2 LED in a state between on and off. The detection distance is the best, almost 10cm.
Test Result
Send the test code to micro:bit main board, then insert the micro:bit main board into the car shield and connect a 18650 battery, turn the POWER switch ON.
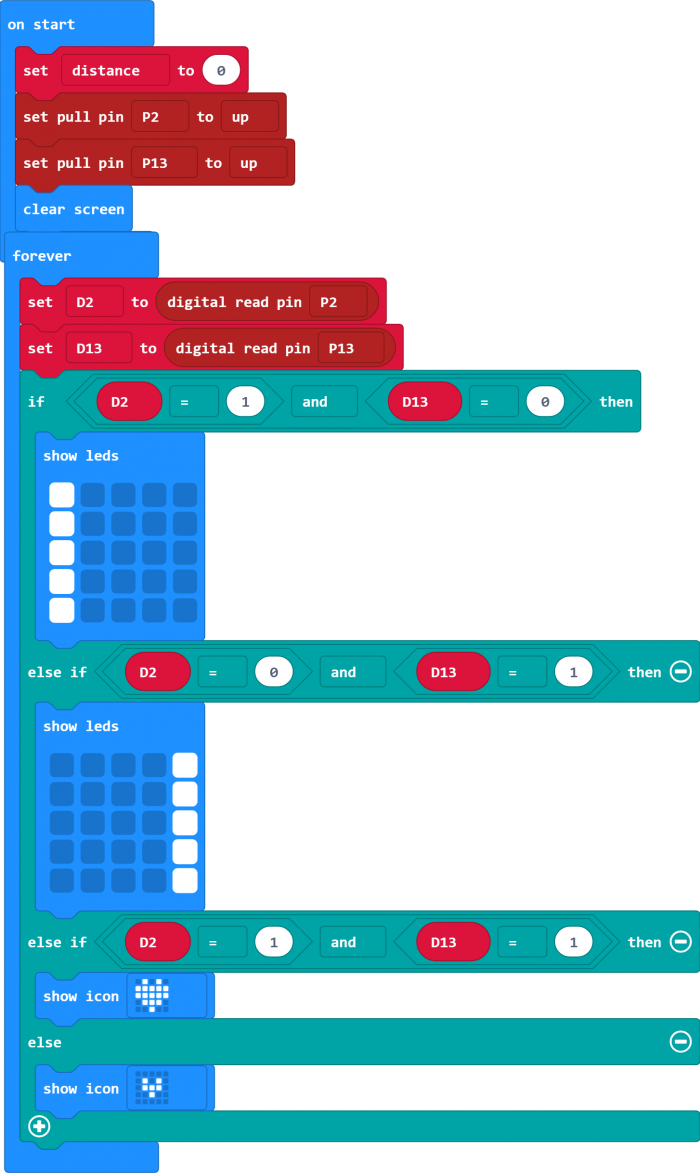
The two infrared obstacle detector sensors on the micro:bit mini robot car can used to detect an obstacle ahead.
- If the infrared sensors on both side do not detect an obstacle, the LED matrix will show a big heart image.
- If the infrared sensors on both side detect an obstacle, the LED matrix will show a small heart image.
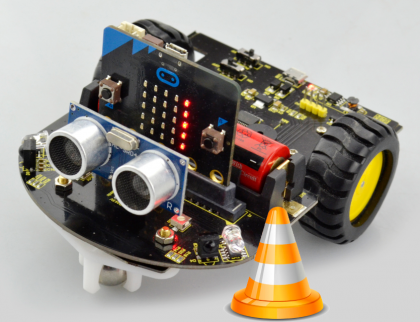
- If the left infrared sensor detects an obstacle, but the right sensor doesn’t, the left column of LED matrix will light up.
- If the right infrared sensor detects an obstacle, but the left sensor doesn’t, the right column of LED matrix will light up.
Infrared Obstacle Avoiding Car
Description
In the previous project, we have combined sensor and micro:bit car shield to build a specific function car.
Now, we use an infrared obstacle detector module and motor driving circuit on the micro:bit car shield to build an infrared obstacle avoiding car.
How does it work?
We have introduced the principle of infrared obstacle detector module before. We can make use of two infrared obstacle detector modules integrated on the car shield to detect whether have obstacles on the both sides of micro:bit car. Thus control the car’s running state according to the testing interface.
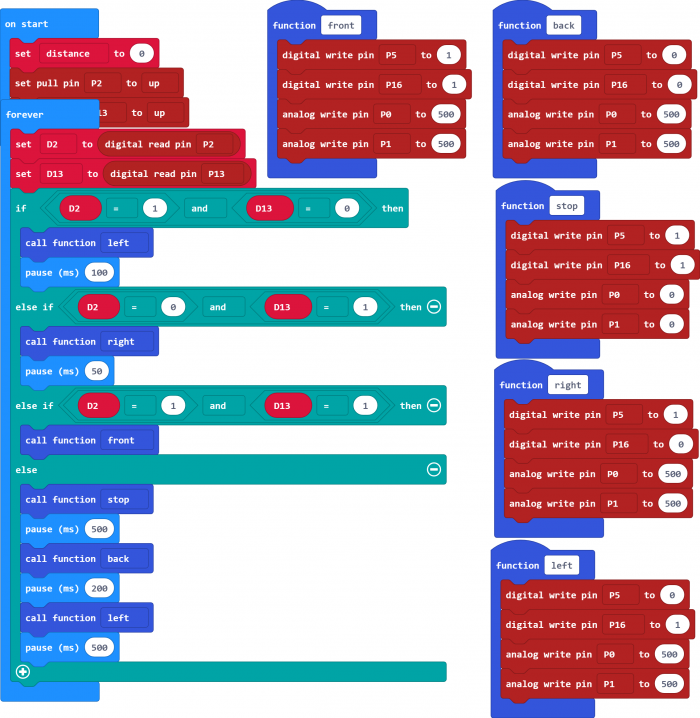
Programming Thinking
①If detects an obstacle on the left side but not on the right side, the car will turn right for 0.05 second.
②If detects an obstacle on the right side but not on the left side, the car will turn left for 0.1 second.
③If detects no obstacle at both sides, the car will go forward.
④If detects obstacles at both sides, the car will stop for 0.5 second, then go backward for 0.2 second and then turn left for 0.5 second.
Test Result
Send the test code to micro:bit main board, then insert the micro:bit main board into the car shield and connect a 18650 battery, turn the POWER switch ON.
The left infrared sensor on the car shield detects an obstacle, the car will turn right at a certain angle and then go forward.
The right infrared sensor on the car shield detects an obstacle, the car will turn left at a certain angle and then go forward.
If both of them detect no obstacle, the car will go forward.
If both of them detect obstacles, the car will stop, then go backward, turn left at a certain angle and then go forward.
Ultrasonic and Infrared Avoiding Obstacles
Description
In the previous sections, we have introduced ultrasonic obstacle avoiding car and infrared obstacle avoiding car. To be more accurate, this lesson we combine both ultrasonic module and infrared obstacle detector sensors to build an obstacle avoiding car.
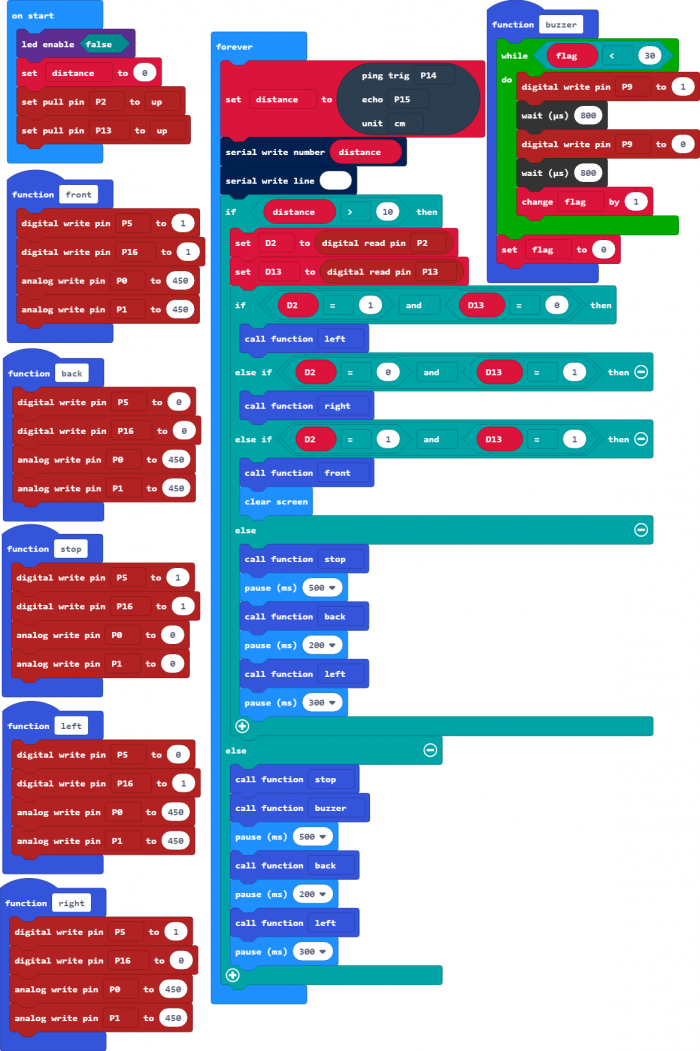
Programming Thinking
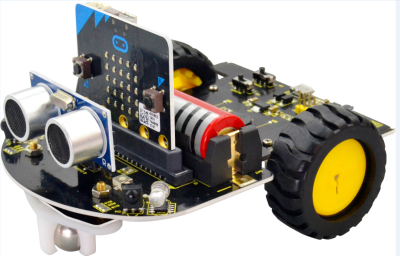
① When the distance between the car and front obstacle is less than or equal to 10cm, the robot car will stop, passive buzzer beeps for 0.5 second, mini car will go backward for 0.2 second, and then turn left for 0.3 second.
② When the distance between the car and front obstacle is greater than 10cm, use two infrared obstacle detector modules on the car shield to detect whether there is obstacles on the front left or on the front right.
- If detects an obstacle on the left side but not on the right side, the car will turn right.
- If detects an obstacle on the right side but not on the left side, the car will turn left.
- If detects no obstacle at both sides, the car will go forward.
- If detects obstacles at both sides, the car will stop, passive buzzer will beep for 0.5 second, then robot car goes backward for 0.2 second and then turns left for 0.3 second.
Test Result
Send the test code to micro:bit main board, then insert the micro:bit main board into the car shield and connect a 18650 battery, turn the POWER switch ON.
①When the front obstacle distance measured by ultrasonic sensor is greater than 10cm.
- If detects an obstacle on the left side but not on the right side, the car will turn right at a certain angle then go forward.
- If detects an obstacle on the right side but not on the left side, the car will turn left at a certain angle then go forward.
- If detects no obstacle at both sides, the car will go forward.
- If detects obstacles at both sides, the car will stop, passive buzzer will produce an audible beep, after 500ms, robot car goes backward, after 200ms, turns left at a certain angle and then goes forward.
②When the front obstacle distance measured by ultrasonic sensor is less than or equal to 10cm, the car will stop, passive buzzer will produce an audible beep, after 500ms, robot car goes backward, after 200ms, turns left at a certain angle and then goes forward.
Bluetooth Controlled Car
Bluetooth Test
Description
The micro:bit robot car shield comes with a Bluetooth module. We can use the built-in Bluetooth module to communicate with your phone’s APP, thus control the external devices connected to micro:bit control board using APP.
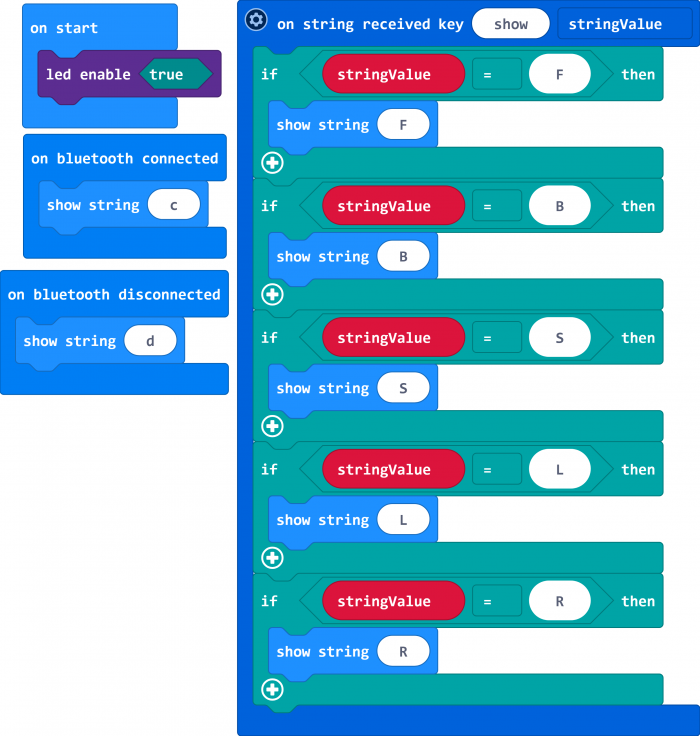
In the experiment, we only use the phone’s APP to control the LED matrix on the micro:bit main board, showing the different characters.
(note that when controlled by Bluetooth, use leds show matrix drawing module, easy to crash.)
Library link settings
The micro:bit robot car shield comes with a Bluetooth module.
Before sending the test code, we should add the library to micro:bit on the browser. The method is as below.
Connect the micro:bit main board to your computer using a USB cable.

Open micro:bit MakeCode Block editor: https://makecode.microbit.org/#editor.
Firstly click the Extensions.
thumb
Then click the Bluetooth.
![]()
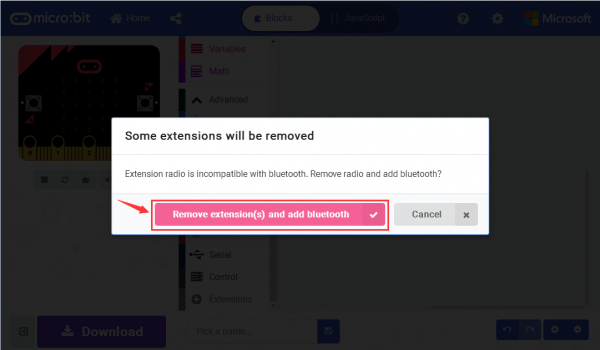
TAP Remove extensions and add Bluetooth.
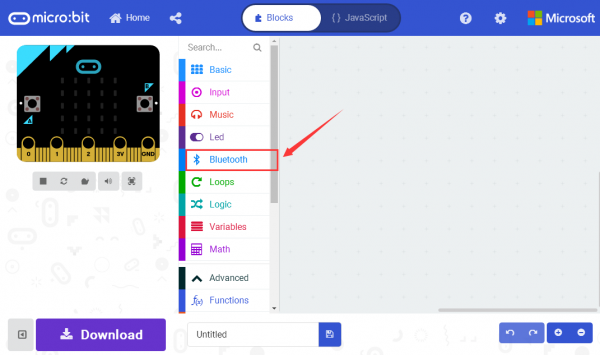
Finally, you should see the Bluetooth is added well.
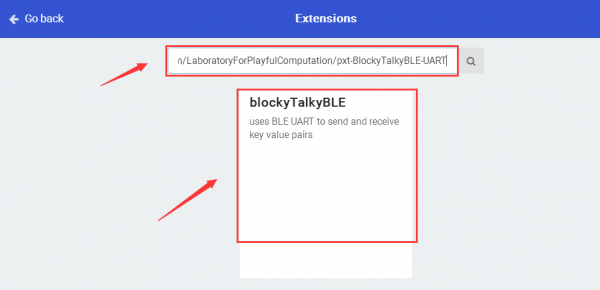
Then click the Extensions again, enter the library link below and search:
https://github.com/LaboratoryForPlayfulComputation/pxt-BlockyTalkyBLE-UART
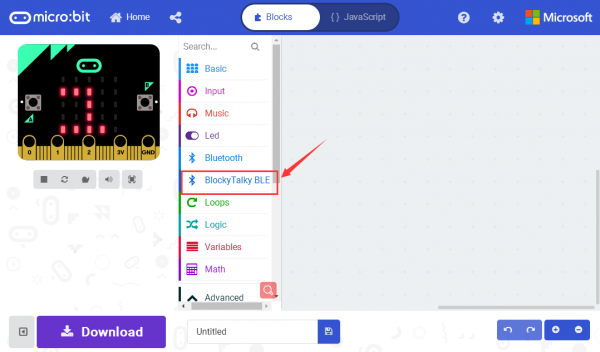
Finally, you should see the library blocky Talky BLE is added successfully.
Bluetooth APP Use
After add the library and send the test code to micro:bit main board, power on the micro:bit main board.

Click the link to download the Bluetooth APP:
https://drive.google.com/open?id=17jJB--GKxPytDyPuqqhs6B2NUCCu7kST
Installed the APP, click the APP icon to open it. 
When your phone detects the Bluetooth module on the micro:bit main board, the APP will prompt to open the Bluetooth. Choose to open the Bluetooth. Pop up the interface below.
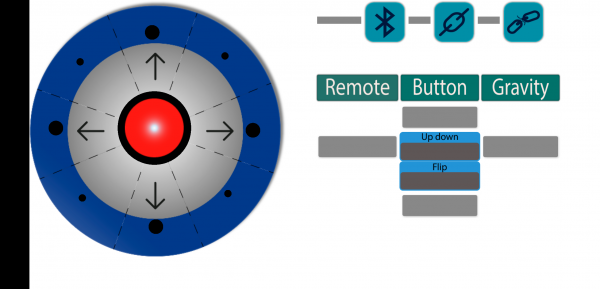
Then click the Bluetooth icon  , it will pop up the micro:bit information.
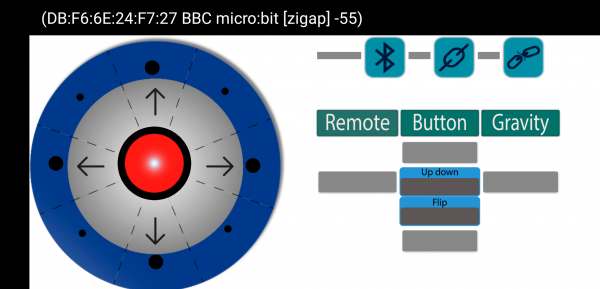
Then click ![]() to connect the micro:bit Bluetooth.
to connect the micro:bit Bluetooth.
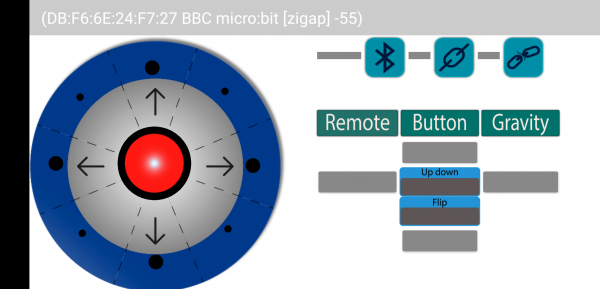
After that, click  for connection, pop up the interface shown below.
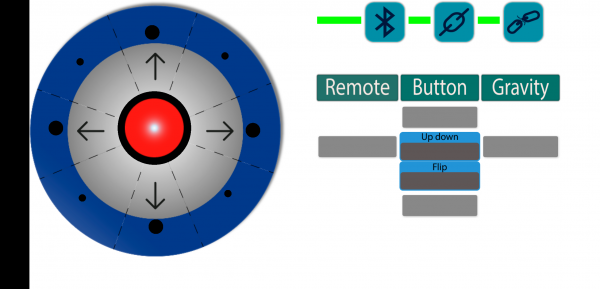
Here the Bluetooth is connected successfully, you can use the APP to control your micro:bit car. The options are shown on the right side.
You can click the  to disconnect the Bluetooth. Shown below.
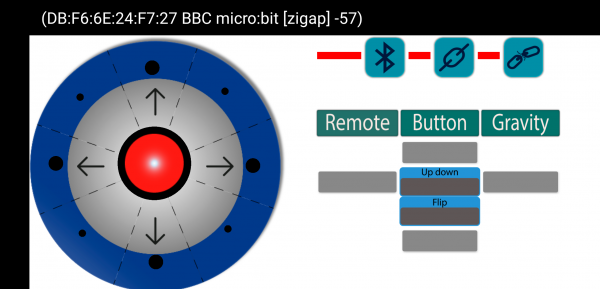
Test Result
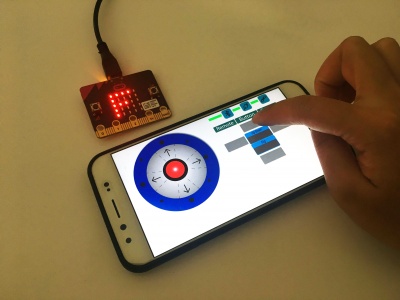
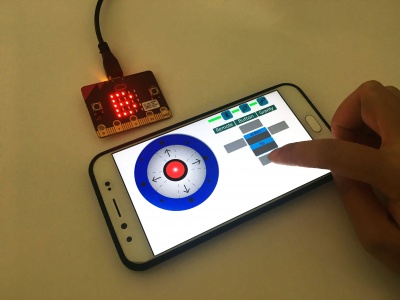
Send well the test code to micro:bit main board, and power on the micro:bit main board. Follow the method mentioned above, connect the Bluetooth on the micro:bit main board using your phone’s APP.
Connected, click the right icons on the APP, the LED matrix on the micro:bit main board should show different letters.
Bluetooth Controlled Car
Description
In the previous projects, we have combined the sensors and robot shield to make the specific function car. In this project, we use the shield’s motor driving circuit and Bluetooth module to build a Bluetooth controlling car.
How does it work?
Connect well the Bluetooth module using phone’s APP, when the Bluetooth module receives the characters sent by APP, it will control the motion state of robot car based on the received data.
Programming Thinking
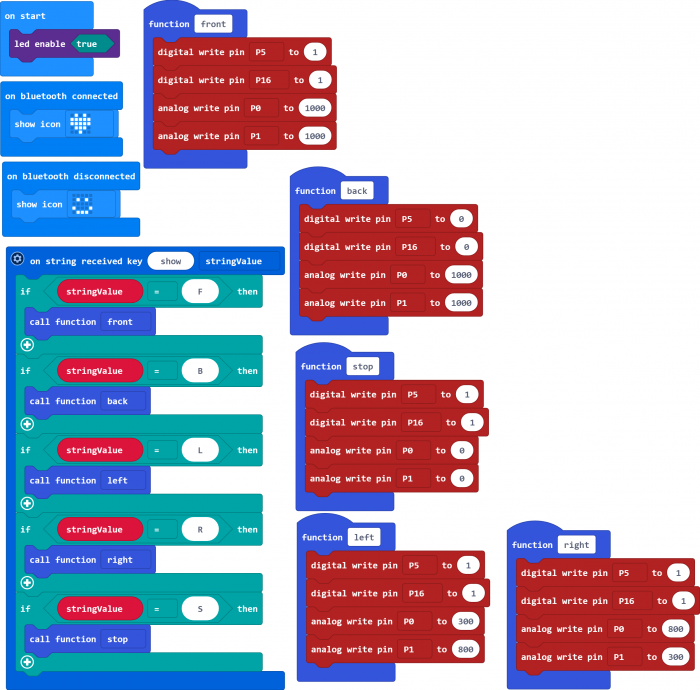
① When your phone’s APP is connected to Bluetooth module, the built-in LED matrix on the micro:bit main board should show the heart shape. If connection failed, it will show a smile face.
② Bluetooth connected, click front, the APP will send the char “F”, controlling the car forward; if click back, it will send the char “B”, controlling the car backward; if click left, it will send the char “L”, controlling the car turn left; if click right, it will send the char “R”, controlling the car turn right; if click stop, it will send the char “S”, controlling the car stop.
Test Result
Send the test code to micro:bit main board, then insert the micro:bit main board into the car shield and connect a 18650 battery, turn the POWER switch ON.
When your phone’s APP is connected to Bluetooth module, the built-in LED matrix on the micro:bit main board should show the heart shape. If connection failed, it will show a smile face.
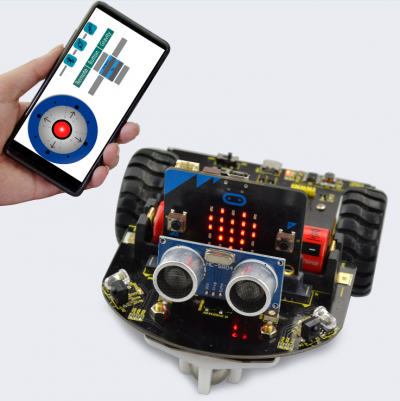
Bluetooth connected, you should be able to control the movement of micro:bit robot car using APP.
Wireless Gamepad Control
Description
Apart from the Android APP controlling Bluetooth mentioned above, you can also control the micro:bit through IOS Bluetooth wireless programming and control.
Pay close attention to:
When open the MakeCode Editor, click the icon  , select the project settings, shown below.
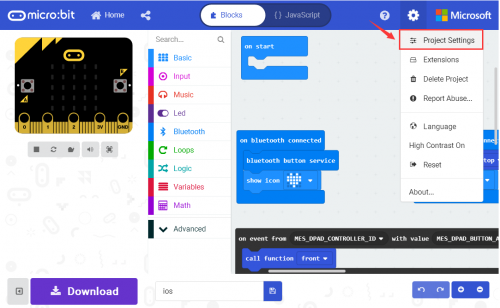
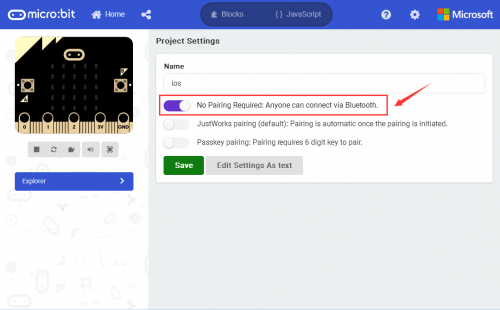
How to control the car through IOS Bluetooth programming?
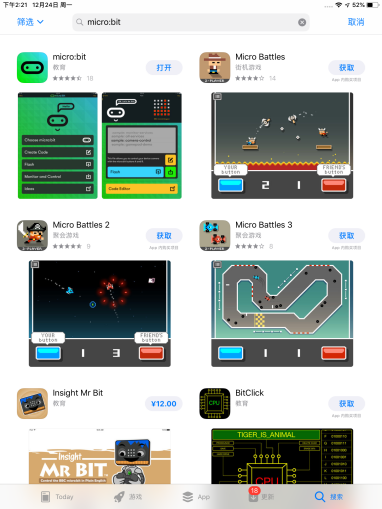
Step 1: Open the App store on your ipad/iPhone.
Step 2: Search the micro:bit to download and install.
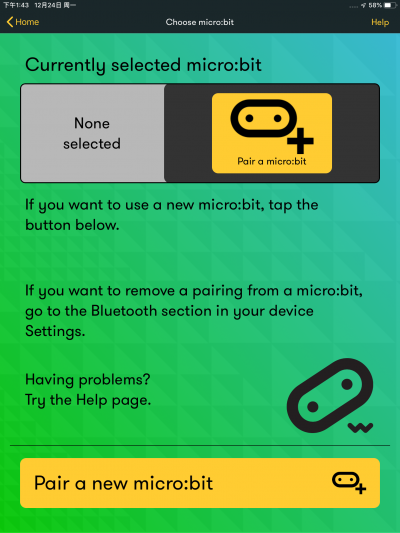
Step 3: open the micro:bit interface, click Choose micro:bit.
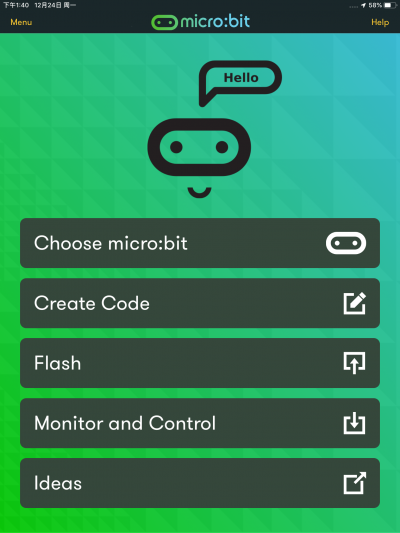
Then click Pair a micro:bit, and click Next.
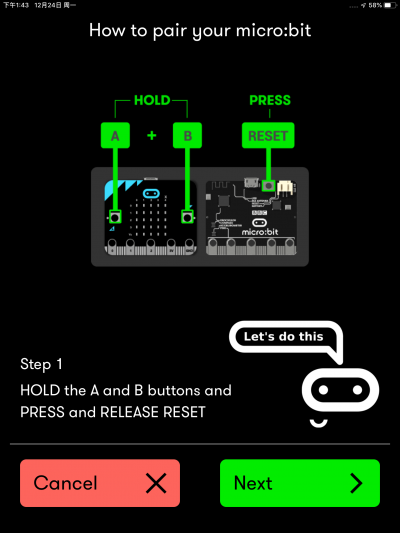
Step 4: power on the micro:bit main board, HOLD the A and B buttons, then press and release RESET button. The micro:bit main board will enter the Bluetooth pairing mode.
You should see an image showing on the LED matrix.
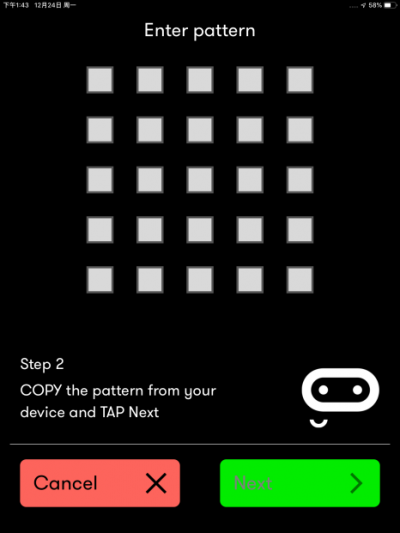
Step 5: copy the pattern from your micro:bit device and tap Next.
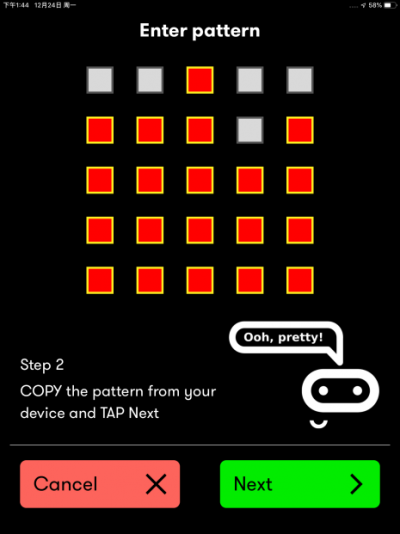
Continue to tap Next to pair.
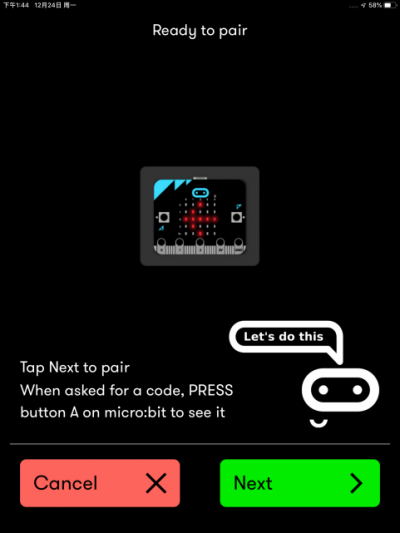
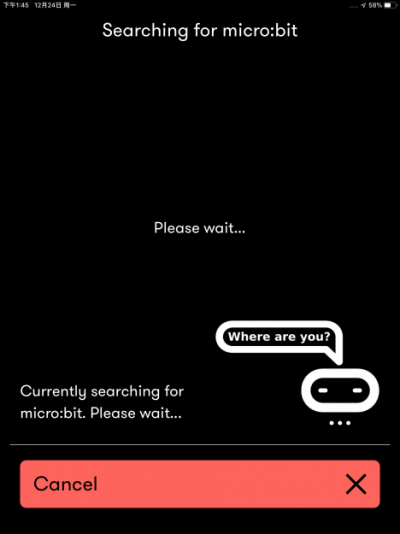
OK, pairing successful!
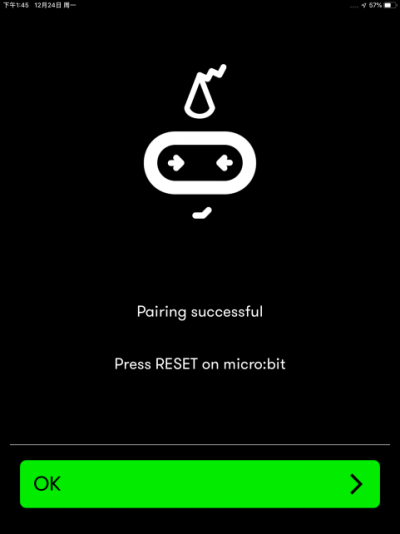
How to control your micro:bit car using the Bluetooth?
Step 1: press down the RESET button on the micro:bit main board. Then TAP the Monitor and Control on the APP interface.

Step 2: Tap the Add and then select the Gamepad.
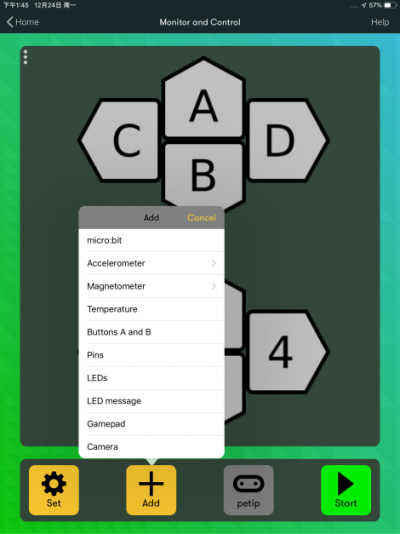
And you should see the control interface shown below. Click Start to connect.
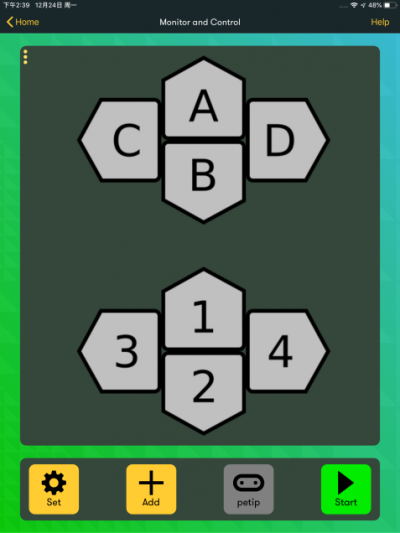
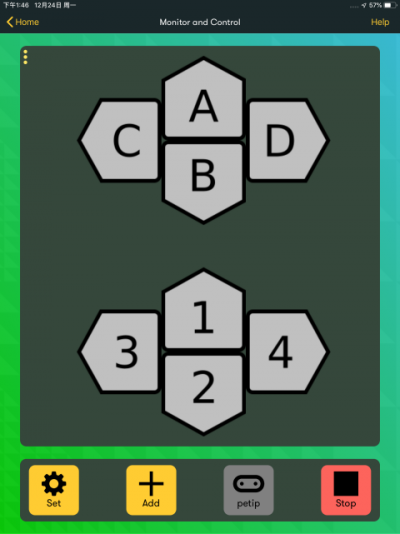
Connection successful! Click Stop to disconnect.
Test Result
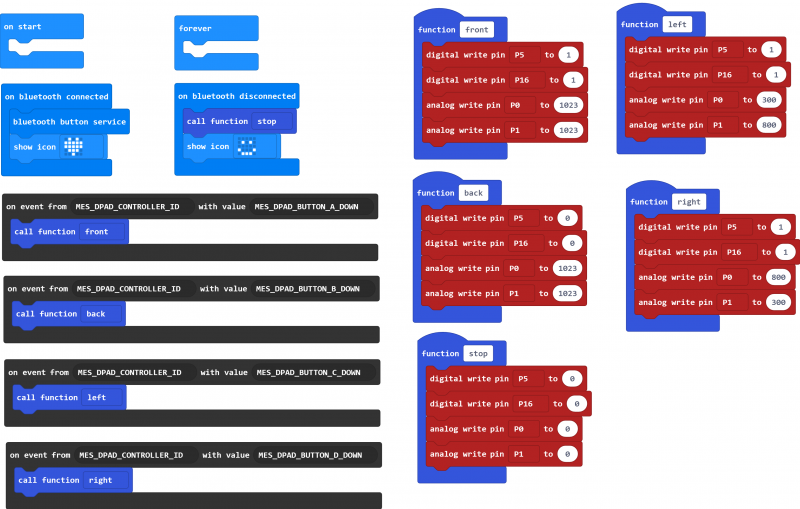
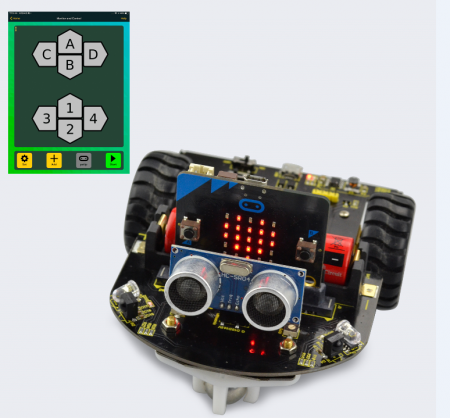
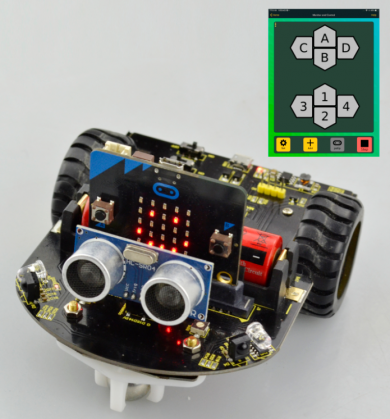
When you press the key A, the micro:bit car goes front; press the key B, go back; press the key C, turn left; press the key D, turn right; press Stop, disconnect the Bluetooth, the car will stop.
Related Resources
You can download micro:bit driver,Bluetooth APP and test code :
https://fs.keyestudio.com/KS0356
Buy From
- Official website: http://www.keyestudio.com/ks0356.html
