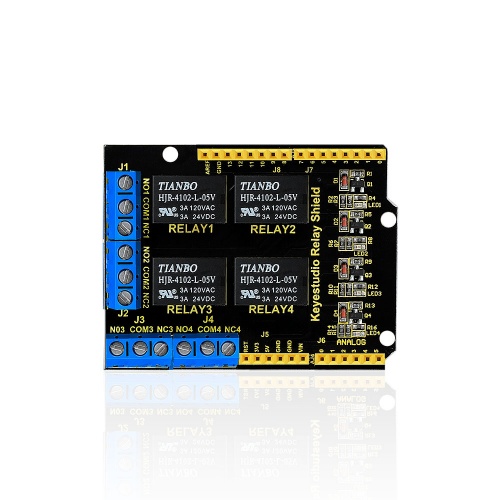
Ks0251 keyestudio 4-channel Relay Shield
Introduction
Keyestudio 4-channel relay shield will integrate 4-channel 5V relay module, which is fully compatible with keyestudio UNO R3 control board. It can work through stacking shield on the keyestudio UNO R3 control board, which is very easy and convenient. The 4-channel relay of shield is for high level effectively. And 4-channel relay control port should respectively connect with the digital port 4, 5, 6, 7 which is on the keyestudio UNO R3 control board. We only need to control the high and low level outputs of digital port 4, 5, 6, 7 on the 4-channel relay, which can achieve to control the relay switch.

Specification
1.Working Style: high level is effective.

2.Contact Capacity: AC120V /3A
                    DC24V/3A
3.Weight: 39.4g

4.Size:69*53*27mm
Sample Code
int BASE = 4 ;  //The first relay is connected to the I / O port
int NUM = 4;   //Total number of relays
void setup()
{
   for (int i = BASE; i < BASE + NUM; i ++)
   {
     pinMode(i, OUTPUT);   //Set the number I/O port to outputs
   }
}
void loop()
{
   for (int i = BASE; i < BASE + NUM; i ++)
   {
     digitalWrite(i, LOW);    //Set the number I/O port outputs to "low", that is, gradually turn off the relay.
     delay(200);        //delay 0.2S
   }
   for (int i = BASE; i < BASE + NUM; i ++)
   {
     digitalWrite(i, HIGH);    //Set the number I/O port outputs to "high", that is, gradually open relay.
     delay(200);        //delay 0.2S
   }
}
Test Result
Stacking the keyestudio 4-channel relay shield on the keyestudio UNO R3 control board, burning the program, after connecting the electricity, the 4-channel relay is first connected, and then disconnected one after another, cycle alternately.
Resources
PDF:
https://drive.google.com/open?id=1a4nvBuwAklTnZkOLlpIqVUbYrd2S9Ko5
VIDEO:
http://www.keyestudio.com/wp/2018/01/ks0251-keyestudio-4-channel-relay-shield/
Get One Now
Official Website
http://www.keyestudio.com/keyestudio-4-channel-relay-shield.html