KS0406 keyestudio RS232 to TTL Conversion Shield Compatible with Arduino
Description
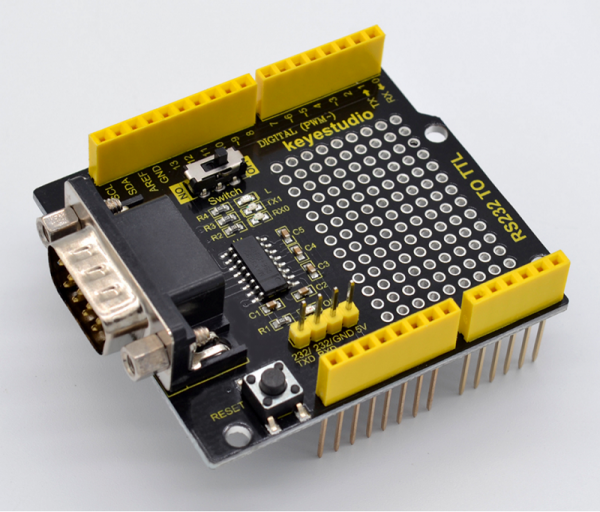
The RS232 to TTL conversion shield is specially designed for UNO R3 control board, very convenient to change the serial port into RS232 interface.
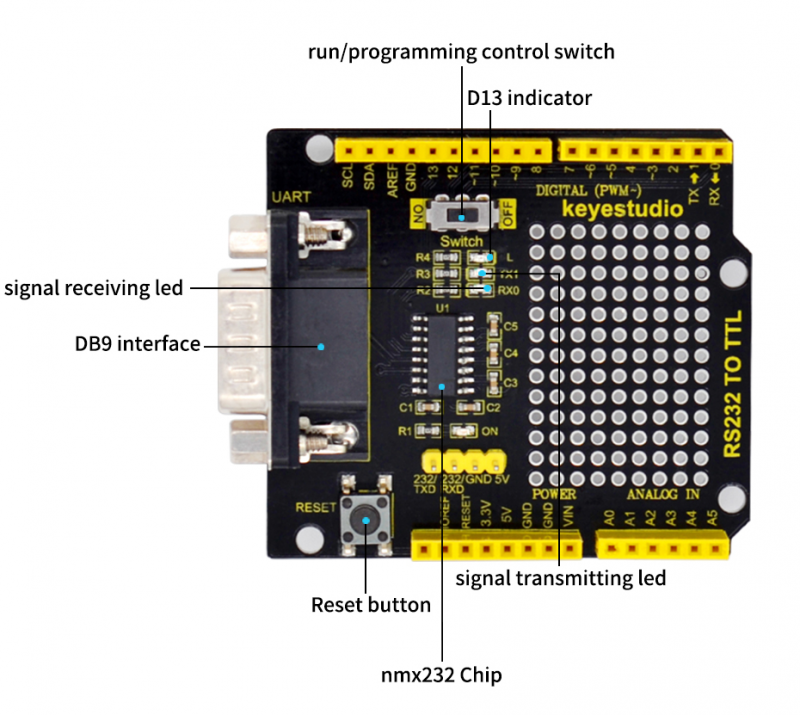
The shield comes with a DB9 connector(male head), easy to connect various RS232 interface equipment. It also comes with a RS232 pin header for connection and debugging.
It even comes with soldering area for DIY design, so you can make full use of this shield. On the shield there is a programming mode control switch; turn OFF for burning the program to UNO R3; turn ON for normal use.

Technical Details
- Power supply: DC 5V
- Comes with 16 digital IO pins(with an I2C pin)
- Comes with 6 analog IO and power
- Comes with a run/programming switch
- Comes with transmitting, receiving indicator and D13 indicator
- DB9 connector(male head)、RS232 pin headers
- Soldering area
- Comes with a Reset button
- Dimensions: 60*53.4MM
- Environmental properties: ROHS
Interface Explanation
Hookup Guide
Test Code
int led = 13;    // define LED pin
void setup()
{
  Serial.begin(9600);    //initialize the serial port
  pinMode(led,OUTPUT);
}
void loop()
{
  int temp;    //temporary cache of serial data
  if(Serial.available())    //if serial port receives the data
  {
    temp=Serial.read();    //save the received data
     if(temp=='V'){
      digitalWrite(led,1-digitalRead(led));    //if received data is the character“V”, change the LED state.
    Serial.println("OK");    //reply OK,means that the character“V” has been received and the LED state changed
     }
  }
}
Test Result
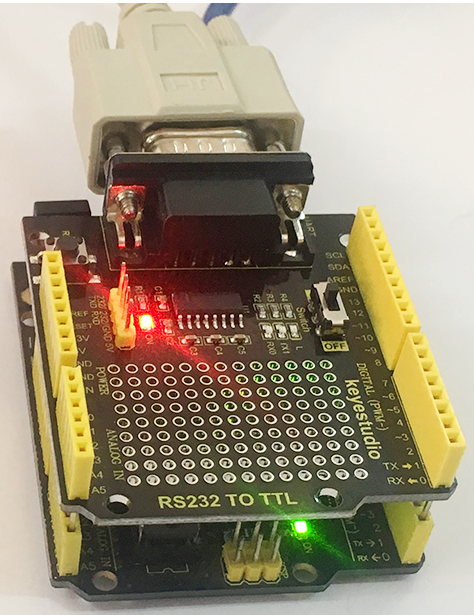
Stack the shield onto UNO R3 board, and connect the UNO R3 control board to your computer using a USB cable. Then connect the shield with RS232 serial port cable. Turn the switch OFF, begin to burn the test program.
Programmed success, turn the switch ON, and open the serial debugging tool , select the proper Port COM1 ( note the baud rate should set to 9600).
Data sending window will show “V” , and receiving window will show “OK”. You should see the built-in TX1 and RXD indicator flashing on. Each time send the “V”, onboard L light turns on, send again, the L light will turn off, repeatedly.
Resources
- Download the PDF here:
https://drive.google.com/open?id=1KXyNZ9PW8mq80fdTn2y0DAfqBu7q4S7J


