Ks0157 keyestudio EASY plug learning kit for Arduino super makers
EASY plug learning kit for Arduino starters
EASY plug starter kit for Arduino
Based on open-source hardware
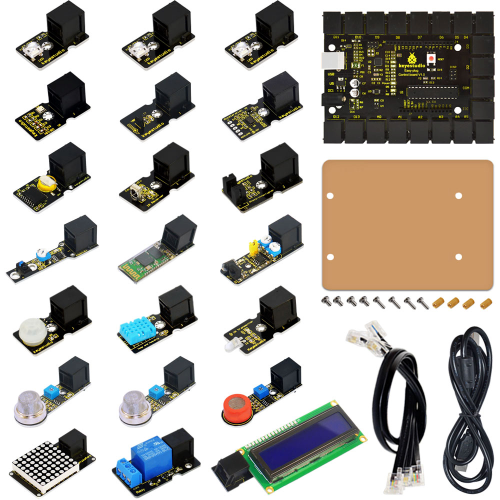
19 various sensors in one box
For you to make interesting projects
Summary
What about you and your kids being makers? What about getting creative and making your ideas come true? Well, let's get started right away!
EASY plug learning kit is developed not only for professional electronic enthusiasts, but also for friends in other lines of work. Even if you have no electronics related knowledge, you can use it to realize your ideas as long as you want to.
The tutorial of this kit has fully considered the learning interest of beginners. Starting from the basics to more complex lessons, well-arranged content and a connection diagram for every lesson help you get started easily and quickly in learning Arduino.
Its unique EASY plug interface makes the wire connection easier than ever! You never have to worry about wrong connection or complicated soldering, avoiding component damage due to wrong wiring or wrong soldering. It's both safe and environmental-friendly.
Kit List
| No. | Product Name | Quantity | Picture |
|---|---|---|---|
| 1 | EASY plug controller Board | 1 |  |
| 2 | Acrylic Board + Copper bush set | 1 |  |
| 3 | EASY plug cable | 3 |  |
| 4 | USB cable | 1 |  |
| 5 | EASY plug Piranha LED Module | 3 |  |
| 6 | EASY plug Line Tracking Sensor | 1 |  |
| 7 | EASY plug Infrared obstacle avoidance sensor | 1 |  |
| 8 | EASY plug Photo Interrupter Module | 1 |  |
| 9 | EASY plug PIR Motion Sensor | 1 |  |
| 10 | EASY plug DS18B20 Temperature Sensor | 1 |  |
| 11 | EASY plug IR Receiver Module | 1 |  |
| 12 | EASY plug IR Transmitter Module | 1 |  |
| 13 | EASY plug Single Relay Module | 1 |  |
| 14 | EASY plug ADXL345 Three Axis Acceleration Module | 1 |  |
| 15 | EASY plug DHT11 Temperature and Humidity Sensor | 1 |  |
| 16 | EASY plug DS3231 Clock Module | 1 |  |
| 17 | EASY plug DS3231 Clock Module | 1 |  |
| 18 | EASY plug Analog Alcohol Sensor | 1 |  |
| 19 | EASY plug MQ135 Air Quality Sensor | 1 |  |
| 20 | EASY plug BMP180 Barometric Pressure Sensor | 1 |  |
| 21 | EASY plug Bluetooth Module | 1 |  |
| 22 | EASY plug 1602 I2C Module | 1 |  |
| 23 | EASY plug I2C 8x8 LED Matrix | 1 | thumb |
Lesson List
1.Who's blinking
2.Flowing light
3.My LCD display
4.Running light
5.Control electricity
6.Black or white
7.Is there something upfront
8.Is the light blocked
9.It’s moving
10.Make a clock
11.What’s the air pressure
12.Bluetooth so easy
13.I receive a signal
14.Transmit a signal
15.How’s the air quality
16.Is there a gas leakage
17.Did he drink
18.Somebody is in this area
19.What’s the temperature
20.How humid & hot is the air
Lesson Details
Lesson 1: Who's blinking
Introduction As the first lesson of this kit, we will begin with something simple. In this lesson, all you need to do is to connect an LED to one of the digital pins of main board. With the program we provided here, you can easily control the blinking of an LED.
Hardware required
EASY plug controller Board *1
EASY plug cable *1
USB cable *1
EASY plug Piranha LED Module *1
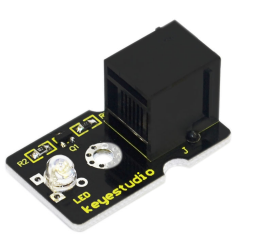
First, let’s take a look at this Piranha LED Module.

This is a special LED module. When you connect it to ARDUINO, after program, it can emit beautiful light. Of course, you can also control it using PWM. It will be like fireflies at night. Isn’t it cool? We can also combine it with other sensors to do various interesting interactive experiments. Below are its specifications:
Module type: digital
Working voltage: 5V
Distance between pins: 2.54mm
Size: 33.7*20mm
Weight: 3g
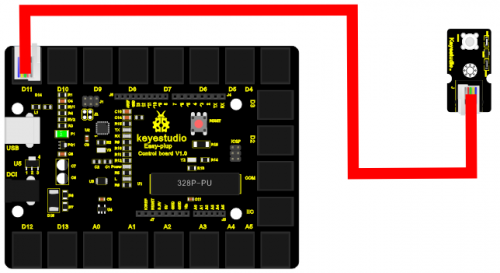
Connection Diagram
Now, let’s connect this module to the D11 port of the controller board using the EASY plug cable, just as simple as that!
Sample Code Connect the board to your PC using the USB cable; copy below code into Arduino IDE, and click upload to upload it to your board.
int ledPin = 11; // define digital pin 11
void setup()
{
pinMode(ledPin, OUTPUT);// define LED pin as output
}
void loop()
{
analogWrite(ledPin,255); //set the LED on, regulate light brightness, ranging from 0-255, 255 is the brightest
delay(1000); // wait for a second
digitalWrite(ledPin, LOW); // set the LED off
delay(1000); // wait for a second
}
Result
The LED will be on for one second, and then off for one second with an interval of one second, just like a shining eye blinking.
Lesson 2: Flowing light
Introduction LED can do many things. I believe you have seen billboards with lights changing to form various patterns. Now, you can make one! This lesson is called Flowing light. We will need 2 more EASY plug cables and 2 more LEDs than the previous lesson.
Hardware required
EASY plug controller Board *1
EASY plug cable *3
USB cable *1
EASY plug Piranha LED Module *3
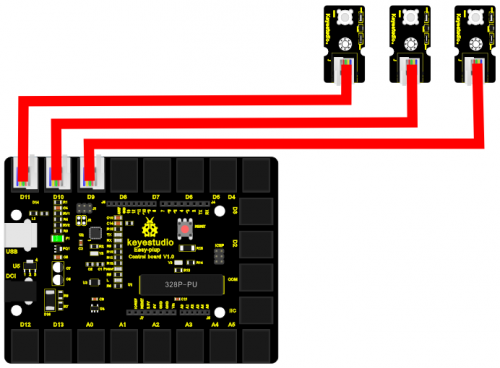
Connection Diagram Now, connect the LED modules one by one to D9, D10 and D11 ports of the controller board using the EASY plug cables.
Sample Code
Connect the board to your PC using the USB cable; copy below code into Arduino IDE, and click upload to upload it to your board.
int BASE = 9 ;  // the I/O pin for the first LED
int NUM = 3;   //  number of LEDs
void setup()
{
   for (int i = BASE; i < BASE + NUM; i ++)
   {
     pinMode(i, OUTPUT);   // set I/O pins as output
   }
}

void loop()
{
   for (int i = BASE; i < BASE + NUM; i ++)
   {
     digitalWrite(i, HIGH);    //set I/O pins as “high”, turn on LEDs one by one
     delay(200);        // wait 0.2S
   }
   for (int i = BASE; i < BASE + NUM; i ++)
   {
     digitalWrite(i, HIGH);    // set I/O pins as “low”, turn off LEDs one by one
     delay(200);        // wait 0.2S
   }
}
Result
3 LEDs turn on one by one, and then turn off one by one, just like flowing light.


