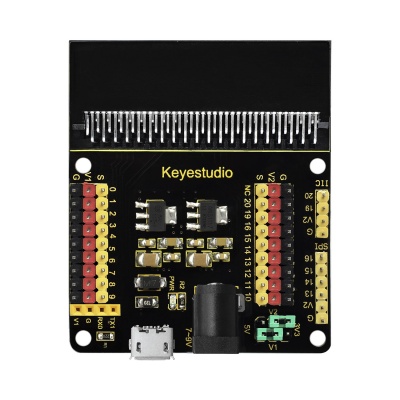
Ks0360 Keyestudio Sensor Shield V2 for BBC micro:bit
Introduction
In the educational market, micro:bit control boards are becoming more and more popular. However, a single micro:bit control board is not easy to test with other sensor modules. We particularly design this keyestudio sensor expansion board V2 for micro:bit.
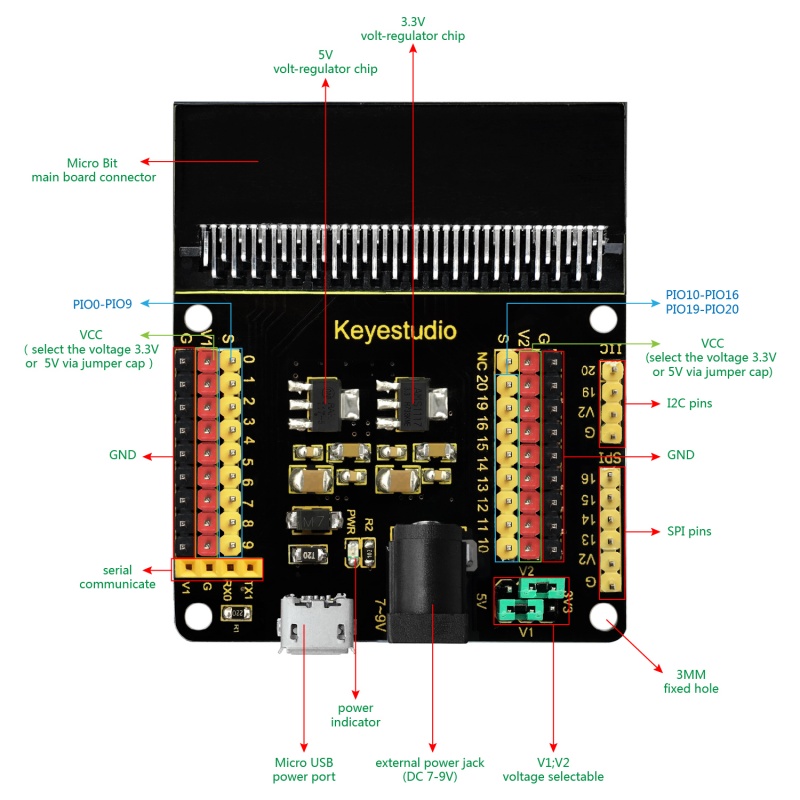
The sensor shield V2 breaks out all the PIO ports on the micro:bit control board into 3PIN interface (GND, VCC, Signal), very easy to connect the micro:bit control board and other sensor modules.
Moreover, it also extends some commonly-used serial communication interfaces into pin or female headers with 2.54mm pin pitch, such as I2C and SPI communication pins. So that this shield will allow communication between micro:bit control board and other communication devices.
You can power the micro:bit board through a black DC jack (DC 7-9V) or a mciro USB port (DC 5V) on the shield.
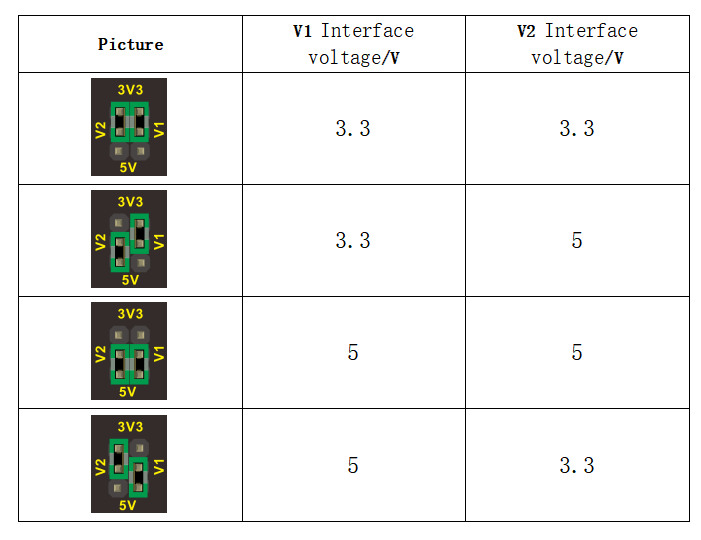
When power the sensor, you could select the supply voltage 3.3V or 5V via jumper cap V1 and V2.
Special note:
when connect external sensor module to the shield for working,the operating current of AMS1117-3.3V and NCP1117ST50T3G chip is too large, so it is easy to get hot. Pay special attention to avoid touching the two chips and causing burns.
Note: we adopt V1.5 micro:bit in the whole tutorial, but our tutorial is also compatible with the latest version micro:bit. When doing experiment with latest micro:bit, you need to transfer code into Makecode online editor first, save code again then download it to micro:bit.
Controller Compatible
- micro:bit control board
Technical Details
- Power input: black DC jack (DC 7-9V) or micro USB port (DC 5V)
- Voltage output: select 3.3V or 5V via jumper cap V1/V2
- Comes with a power indicator
- Extends the PIO of micro:bit into 3PIN interface
- Serial communication pin
- I2C communication pin
- SPI communication pin
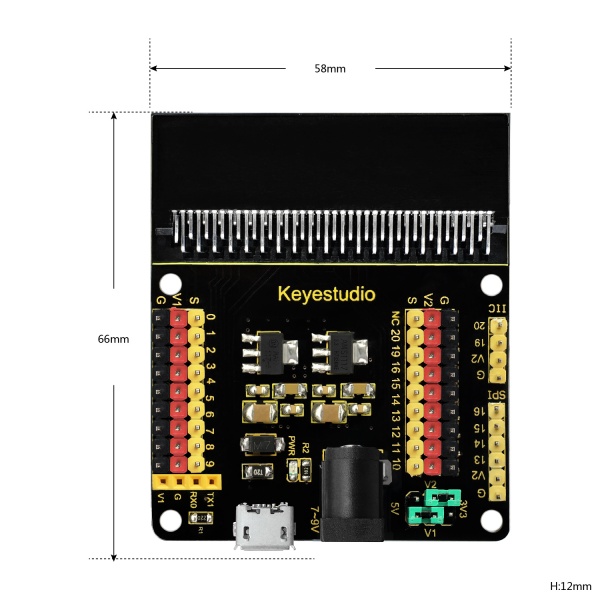
- Dimensions: 65mm x58mm x12mm
- Weight: 31g
Pinout Diagram
Example Use
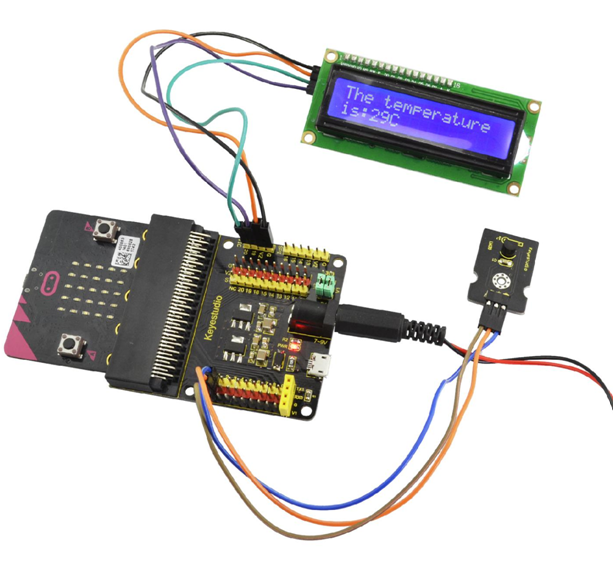
Send the code to your micro:bit board, and insert it into the sensor shield. Then set the V1 and V2 to 5V output, power it via DC jack (DC7-9V). Connect the LM35 sensor and 12C 1602 LCD to the sensor shield using jumper wires. Finally display the current temperature value on the LCD. You could refer to an example picture below.
Resources
- BBC micro:bit website
- Micro:bit MakeCode Block Editor
- Meet micro:bit starter programming
- BBC micro:bit Features Guide
- BBC micro:bit Safety Warnings
- BBC micro:bit Quick Start Guide
- BBC micro:bit Pins
