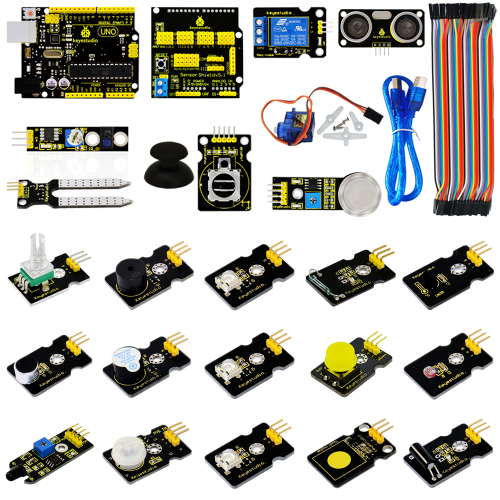
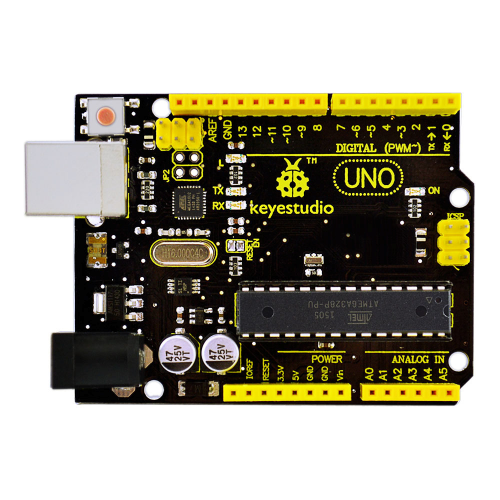
Ks0086 ARDUBLOCK Graphical Programming Starter Kit
ARDUBLOCK Graphical Programming Starter Kit
1. Introduction
Ardublock zero-based programming kit is a new graphical programming study kit which is based on Arduino enthusiasts and developed by keyestudio. It greatly lowers the difficulty in program learning for enthusiasts. All computer language and professional statements of a program can be simplified into blocks. Compiling is as easy as block building. Interactive with Arduino development board, they can achieve exciting works.
The open source feature of Arduino makes it extremely popular. You can find a many learning communities on the Internet. Ardublock is a graphical programming environment, just like blocks building, which greatly lowers the learning difficulty for starters. As long as you love it, everyone can play with Arduino without professional knowledge or relevant background. As for parents who stress on the education of next generation, this will be one of your best way to interact with your children.
2. Kit Contents
Project 1 LED Blinking
Project 2 PWM Regulating Light Brightness
Project 3 Flowing Light
Project 4 Button-controlled LED
Project 5 Passive Buzzer Sound Production
Project 6 Active Buzzer Sound Production
Project 7 Reading-out Analog Value
Project 8 Light-controlled Sound
Project 9 Sound-controlled Light
Project 10 Servo Motor Control
Project 11 Ultrasonic Distance Measurement
Project 12 PS2 Joystick Module
Project 13 LM35 Temperature Sensor
Project 14 5V Relay Module
Project 15 Tilting Switch Module
Project 16 Capacitive Touch Module Control LED
Project 17 Flame Alarm Module
Project 18 Reed Switch Module
Project 19 Human Body IR Pyroelectricity
Project 20 Line Tracking Sensor
Project 21 MQ-2 Combustible Gas and Smoke Sensor
Project 22 Soil Module
3. Application of Arduino
Introduction
What’s Arduino? Arduino is an open-source hardware project platform. This platform includes a circuit board with simple I/O function and program development environment software. It can be used to develop interactive products. For example, it can read signals of multiple switches and sensors, and control light, servo motor and other various physical devices. It’s widely applied in robot field.
4. Arduino installation and program upload
First, download Arduino development software, click below hyperlink:
https://www.arduino.cc/en/Main/OldSoftwareReleases#1.5.x
Downloaded file is an arduino-1.5.6-r2-windows.zip compressed folder, and unzip it to your hard drive.
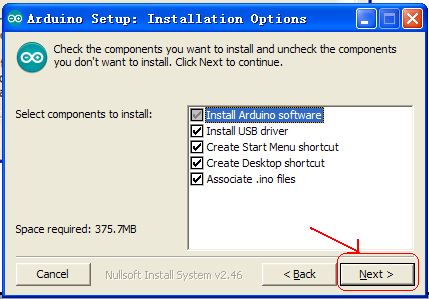
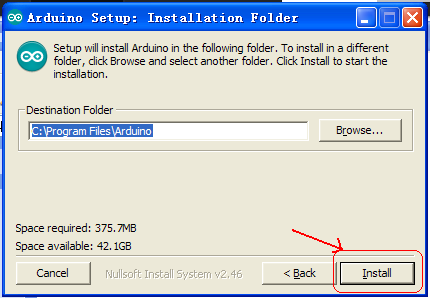
Double click Arduino-1.5.6 .exe. and select “I agree”.
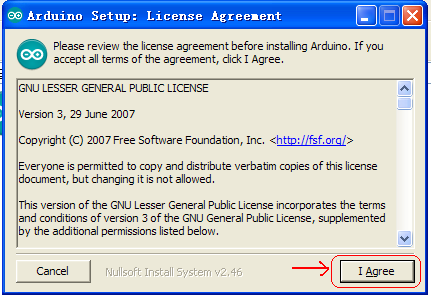
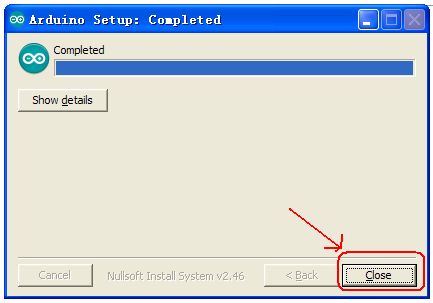
Wait for the installation to be completed, and click close.
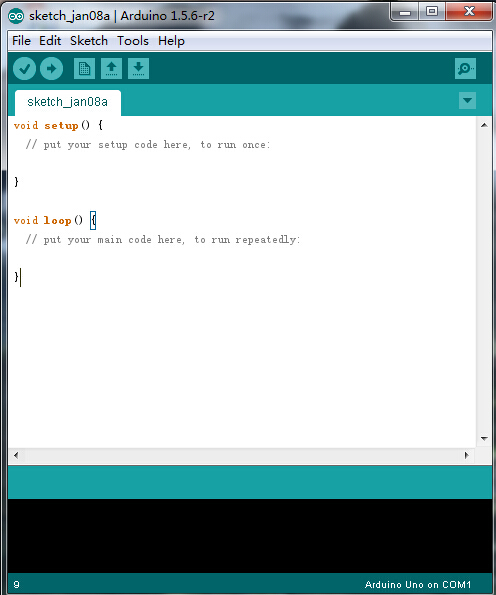
Below is how Arduino 1.5.6 looks like.
Next, let’s install Arduino driver.
For different operating system, there may be slight difference in installation method. Below is an example in WIN 7.
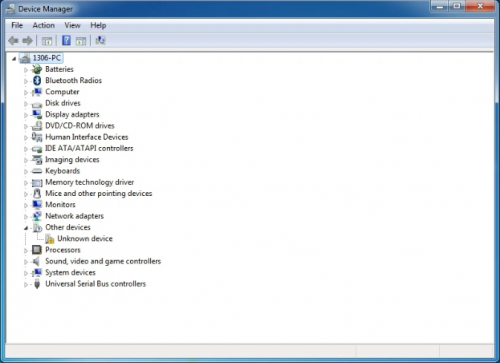
When you connect Arduino Uno to your computer the first time, right click “Computer” —> “Properties”—> “Device manager”, you can see “Unknown devices”.
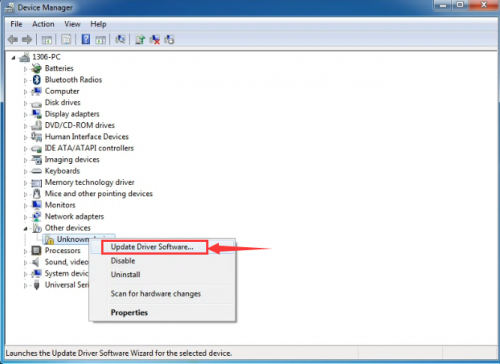
Click “Unknown devices”, select “Update Driver software”.
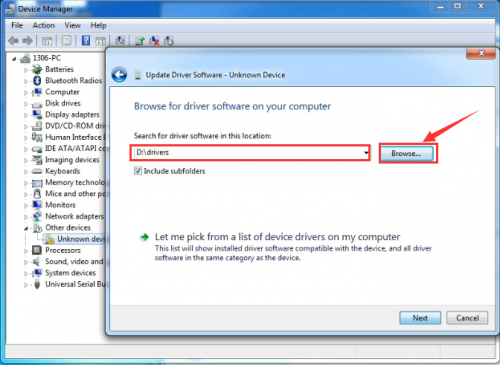
In this page, click “Browse my computer for driver software”.
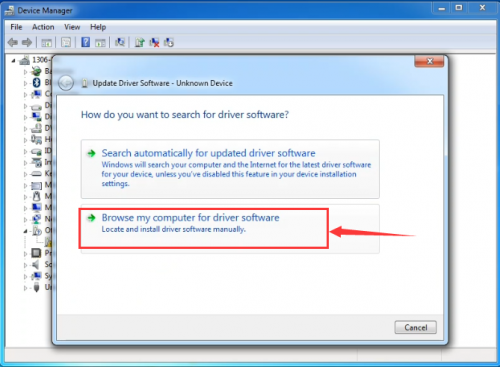
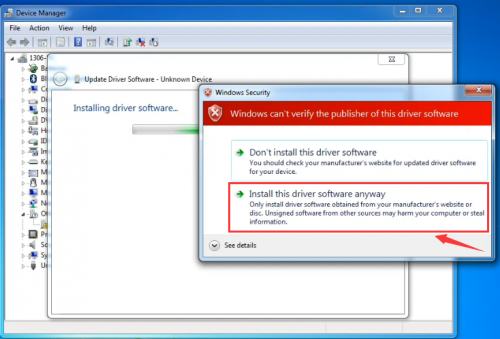
Click “Next”; select “Install this driver software anyway” to begin the installation.
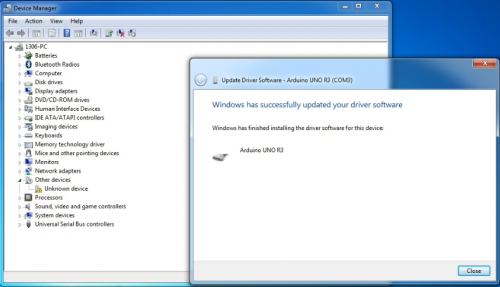
Installation completed; click “Close”.
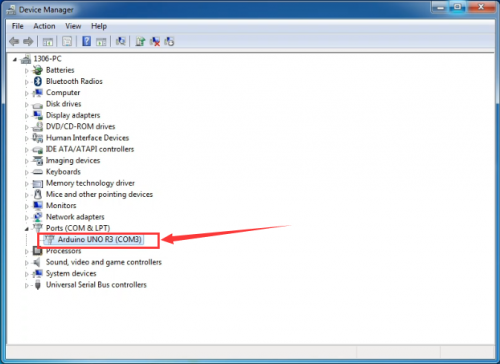
After driver is installed, go to “Device manager” again. Right click “Computer” —> “Properties”—> “Device manager”, you can see UNO device as below figure shows, also the Com port info.
Following is a sketch uploading example called “Hello World!”.
First, open Arduino IDE. In this example sketch, we program Arduino to display “Hello World!” in serial monitor when it receives a specific character string “R”; also the on-board D13 LED will blink once each time it receives “R”.
First, set up board; In “Tools”, select “Arduino Uno”.
thumb
Next, set up COM port; In “Tools”, select “COM3”.
thumb
After selection, you can see indicated area is the same with settings in “Device manager”.
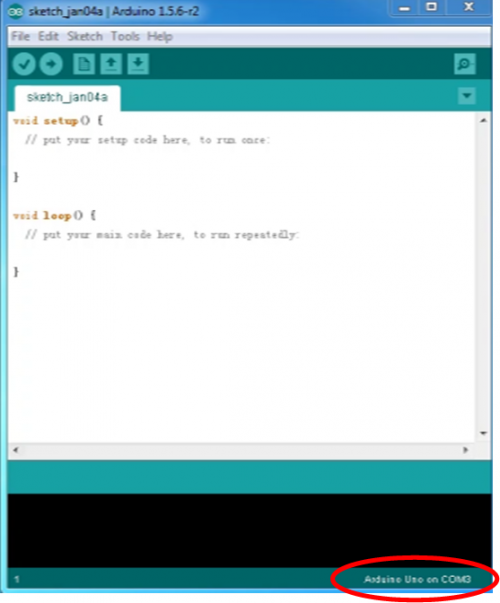
Copy the example sketch and paste it to the IDE; click “Verify ” to check compiling mistakes; click “Upload ” to upload the program to the board.
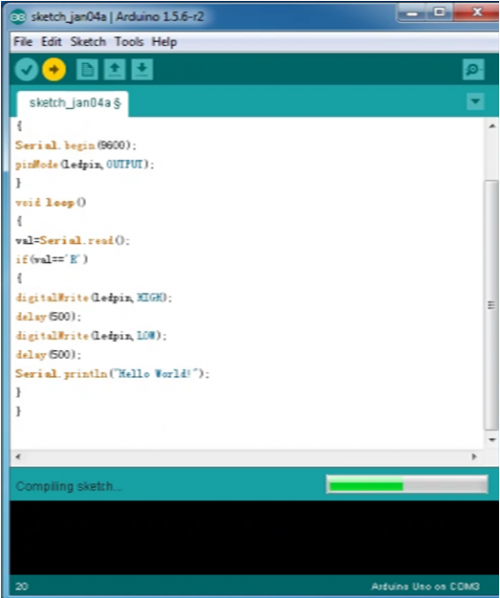
After uploading is done, open “serial monitor ”; enter “R”; click “Send”, the serial monitor will display “Hello World!” and the D13 LED will blink once.
thumb
Congratulations! Your first sketch uploading is a success!
Operating video and related material download address: http://7326097.s21d-7.faiusrd.com/0/ABUIABAAGAAggfjavAUopJzsjAI?f=operating+vedio+and+related+material.zip&v=1469496323
5. Introduction of ArduBlock
Ardublock, developed by Shanghai Xinchejian, is a graphical programming environment software. ArduBlock is a third-party software of Arduino’s official programming environment. It can only work with Arduino software. Different from Arduino's text-based programming environment, it's in graphical form. Programming is like building blocks, which makes programming more visualized and interactive. It also greatly lowers the difficulties in programming. People with no programming experience can also compile a program for Arduino controller.
1. Installation Put “ardublock-beta-20140828”this file into the installing catalog of arduino IDE software, if no installing catalog, create one, for example, I put the file in D:\Program Files\Arduino\tools\ArduBlockTool\tool
Download Address of ardublock-beta-20140828: http://7326097.s21d-7.faiusrd.com/0/ABUIABAAGAAg56fbvAUogIzwugc?f=ardublock-beta-20140828.jar&v=1469502439
6. Project Details
After having a basic understanding of Arduino and ArduBlock , we are going to learn graphical programming by actual operation.
Project 1: LED Blinking
Introduction:
This project is one of the basic experiments, which can achieve LED blinking by graphical programming.
Materials Required:
1. KEYESTUDIO UNO Control Board *1
2. V5 Sensor Shield*1
3. Piranha LED*1
4. Female to Female Dupont Line*1
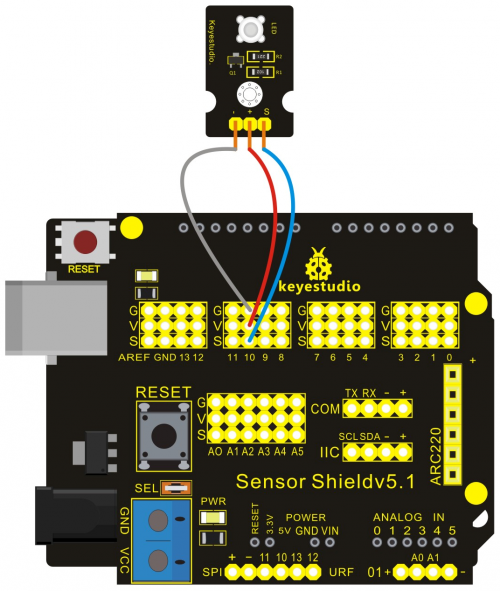
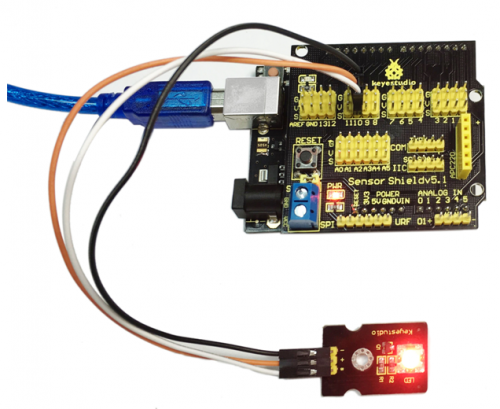
Connection Diagram:
After wiring, we can start programming. We will turn the LED on for one second, and off for one second. This program is simple and similar to one that comes with Arduino except it’s connected to digital pin 10 rather than 13.
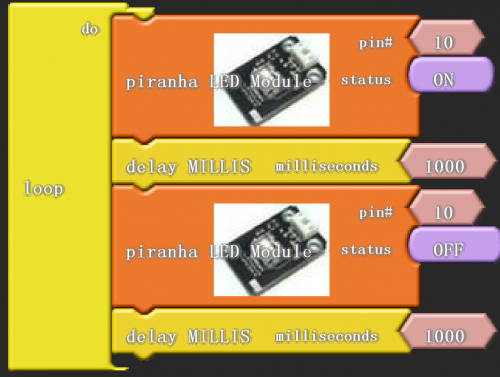
Click “download to Arduino” to see the codes in Arduino interface.
Sample Code:
*****************************************************************************
void setup()
{
  pinMode( 10 , OUTPUT);
}

void loop()
{
  digitalWrite( 10 , HIGH );
  delay( 1000 );
  digitalWrite( 10 , LOW );
  delay( 1000 );
}
*******************************************************************************

}
Result:
Then, you can see the high brightness LED blinking. We have now finished this project!
Note: Arduino software selection On the TOOLS menu, select UNO. COM port selects the same serial port with the first installation. You cannot download program unless both requirements are met.
