KS0317 keyestudio Relay Module (Black and Environmental-friendly): Difference between revisions
Keyestudio (talk | contribs) |
Keyestudio (talk | contribs) No edit summary |
||
| Line 1: | Line 1: | ||
<br>[[File:KS0317 图片1.png| | <br>[[File:KS0317 图片1.png|600px|right|thumb]]<br> | ||
<br> | |||
== Overview == | == Overview == | ||
This is a button-controlled relay module. It integrates a 12V relay. Powered on, you can control the relay on and off through a tactile button on the module. Or you can connect up the white connector on the module to replace the tactile button, so as to remotely control the relay on and off. | This is a button-controlled relay module. It integrates a 12V relay. <br> | ||
Powered on, you can control the relay on and off through a tactile button on the module. <br> | |||
Or you can connect up the white connector on the module to replace the tactile button, so as to remotely control the relay on and off. | |||
<br>[[File:KS0317 继电器模块 黑色 (8).jpg|500px|frameless|thumb]]<br> | <br>[[File:KS0317 继电器模块 黑色 (8).jpg|500px|frameless|thumb]]<br> | ||
<br> | |||
== Features == | == Features == | ||
*Onboard comes with a 12V relay | *Onboard comes with a 12V relay | ||
| Line 13: | Line 16: | ||
*With four fixed holes, you can mount it on other devices | *With four fixed holes, you can mount it on other devices | ||
*Safe and environmental-friendly | *Safe and environmental-friendly | ||
<br>[[File:KS0317 继电器模块 黑色 (6).jpg|500px|frameless|thumb]]<br> | <br>[[File:KS0317 继电器模块 黑色 (6).jpg|500px|frameless|thumb]]<br> | ||
<br> | |||
== Parameters == | == Parameters == | ||
* Operating voltage: DC 12V | * Operating voltage: DC 12V | ||
* Operating current: 30mA | * Operating current: 30mA | ||
<br> | |||
== Example Use == | == Example Use == | ||
Connect DC 12V voltage to DC+ and DC- terminal block on the relay, press down the button, relay is turned on, NO and COM terminals are connected, NC and COM terminals are disconnected. <br> | Connect DC 12V voltage to DC+ and DC- terminal block on the relay, press down the button, relay is turned on, NO and COM terminals are connected, NC and COM terminals are disconnected. <br> | ||
| Line 27: | Line 32: | ||
<br>[[File:Ks0317.jpg|500px|frameless|thumb]]<br> | <br>[[File:Ks0317.jpg|500px|frameless|thumb]]<br> | ||
<br> | |||
== Resources == | == Resources == | ||
*[https://drive.google.com/open?id=1T1bL28GKuSvnIuCFVxtSCp5ZA4UksUFX Click here to download the PDF File ] | |||
<br> | |||
== Get One Now == | == Get One Now == | ||
*[https://www.keyestudio.com/keyestudio-button-controlled-one-channel-12v-relay-module-for-arduino-black-and-environmental-friendly-p0356-p0356.html '''Official website''' ] | |||
*[https://www.aliexpress.com/store/product/Keyestudio-Button-Controlled-One-Channel-12V-Relay-Module-For-Arduino-Black-and-Environmental-friendly/1452162_32891694887.html?spm=2114.12010615.8148356.25.52c31761K2S6h3 '''Shop on aliexpress''' ] | |||
Revision as of 14:12, 29 April 2019
Overview
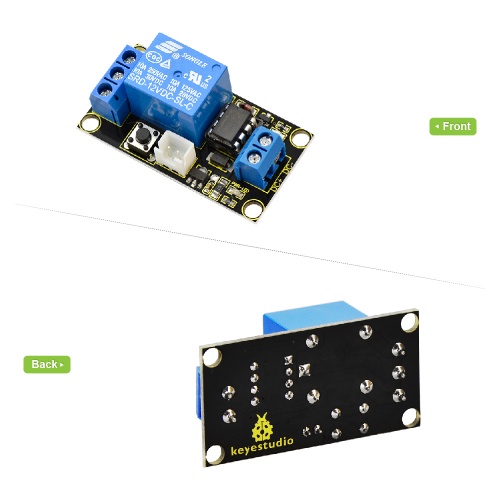
This is a button-controlled relay module. It integrates a 12V relay.
Powered on, you can control the relay on and off through a tactile button on the module.
Or you can connect up the white connector on the module to replace the tactile button, so as to remotely control the relay on and off.

Features
- Onboard comes with a 12V relay
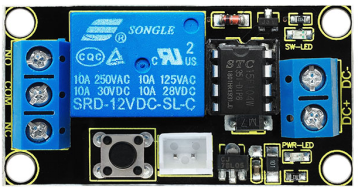
- Control the relay via button or white connector
- With four fixed holes, you can mount it on other devices
- Safe and environmental-friendly
Parameters
- Operating voltage: DC 12V
- Operating current: 30mA
Example Use
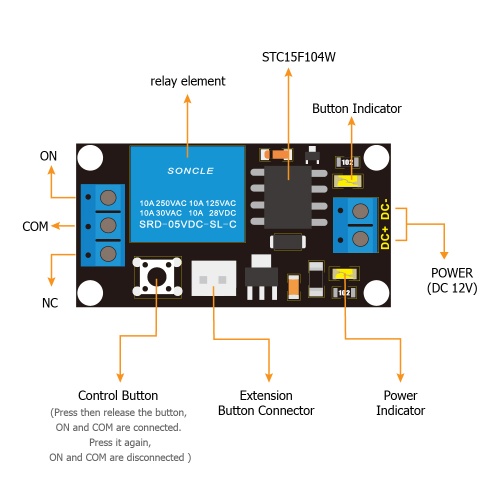
Connect DC 12V voltage to DC+ and DC- terminal block on the relay, press down the button, relay is turned on, NO and COM terminals are connected, NC and COM terminals are disconnected.
Press the button again, NO and COM terminal will be disconnected, while NC and COM terminal are connected.
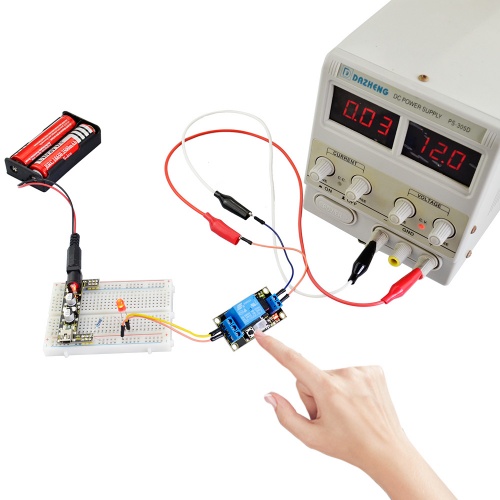
For example, we have supplied DC 12V to the relay module, press the button, relay is turned on, and NO and COM terminals are connected. Meanwhile, power an LED with a breaboard power module, you should see an LED connected on the breadboard lights up. As shown in the picture below.
Resources


