KS0370 EASY plug 2812 2x2 Full Color RGB Module (Black and Eco-friendly): Difference between revisions
Keyestudio (talk | contribs) (Created page with "thumb|600px|right|EASY plug 2812 2x2 full-color RGB Module ==Introduction== EASY plug 2812 2x2 full color RGB module is a smart external control LED...") |
Keyestudio (talk | contribs) |
||
| (12 intermediate revisions by the same user not shown) | |||
| Line 1: | Line 1: | ||
[[image: | [[image:ks0370 图.jpg|thumb|600px|right|EASY plug 2812 2x2 full-color RGB Module ]] | ||
==Introduction== | ==Introduction== | ||
| Line 9: | Line 9: | ||
You can easily connect it to EASY Plug control board for communication using a RJ11 cable.<br> | You can easily connect it to EASY Plug control board for communication using a RJ11 cable.<br> | ||
<span style=color:red> '''Special Note:''' <br> | |||
The sensor/module is equipped with the RJ11 6P6C interface, compatible with our keyestudio EASY plug Control Board with RJ11 6P6C interface. <br> If you have the control board of other brands, it is also equipped with the RJ11 6P6C interface but has different internal line sequence, can’t be used compatibly with our sensor/module. </span><br> | |||
<br> | <br> | ||
==Parameters== | ==Parameters== | ||
* Operating Voltage: DC5V | * Operating Voltage: DC5V | ||
* Power: 0.1W | * Power: 0.1W | ||
* Light Source: SMD 5050 RGB | * Light Source: SMD 5050 RGB | ||
* IC model: 4 / | * IC model: 4 / WS2812 | ||
* Gray level: 256 levels | * Gray level: 256 levels | ||
* Illumination angle: 180° | * Illumination angle: 180° | ||
| Line 21: | Line 24: | ||
==Technical Details== | ==Technical Details== | ||
* Dimensions: 38mm*20mm*18mm | |||
* Weight: 4.5g | |||
<br> | <br> | ||
| Line 31: | Line 34: | ||
<br> | <br> | ||
==Upload the Code== | ==Upload the Code== | ||
Below is an example code. Open or drag below code to [https://wiki.keyestudio.com/Getting_Started_with_Mixly Mixly Blocks] and upload. <br> | |||
<br>[[File:ks0398 12.1.png|600px|frameless|thumb]]<br> | |||
< | <br> | ||
==What You Should See== | |||
<br>[[File:ks0398 12-1.png|500px|frameless|thumb]]<br> | |||
<br> | |||
After uploading the code, you should see the 4 RGB LEDs flash in different colors Red, Green, Blue. | |||
<br>[[File:ks0398 12-2.png|500px|frameless|thumb]]<br> | |||
<br>[[File:ks0398 12-3.png|500px|frameless|thumb]]<br> | |||
<br> | |||
<br> | |||
==Resources == | |||
https://fs.keyestudio.com/KS0370 | |||
<br> | |||
==Buy from == | |||
*[https://www.keyestudio.com/keyestudio-easy-plug-2812-2x2-full-color-rgb-module-for-arduino-p0497-p0497.html '''Official Website''' ] | |||
*[https://www.aliexpress.com/store/product/Keyestudio-EASY-plug-2812-2x2-full-color-RGB-Module-for-Arduino/1452162_32956392888.html?spm=2114.12010612.8148356.8.65312f0ceIoXXb Shop on aliexpress ] | |||
[[category:EASY Plug]] | |||
Latest revision as of 08:45, 8 January 2021
Introduction
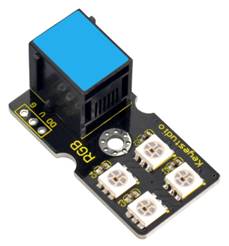
EASY plug 2812 2x2 full color RGB module is a smart external control LED light source that integrates control circuit and lighting circuit.
Each LED has the same appearance as a 5050 LED bead, and each component is a pixel point.
The pixel point includes an intelligent digital interface data latch signal shaping and amplifying driving circuit, as well as a high-precision internal oscillator and a 12V high-voltage programmable constant current control part, which effectively ensures that the color of the pixel point light is highly uniform.
The data protocol adopts the single-line return-to-zero code communication mode. After power-on and reset the pixel point, the S pin receives the data transmitted from the controller. And the 24-bit data are extracted by the first pixel and then sent to the data latch inside the pixel point.
LED has advantages of low voltage drive, environmental protection and energy saving, high brightness, wide scattering angle, good consistency, ultra low power, long life and so on.
You can easily connect it to EASY Plug control board for communication using a RJ11 cable.
Special Note:
The sensor/module is equipped with the RJ11 6P6C interface, compatible with our keyestudio EASY plug Control Board with RJ11 6P6C interface.
If you have the control board of other brands, it is also equipped with the RJ11 6P6C interface but has different internal line sequence, can’t be used compatibly with our sensor/module.
Parameters
- Operating Voltage: DC5V
- Power: 0.1W
- Light Source: SMD 5050 RGB
- IC model: 4 / WS2812
- Gray level: 256 levels
- Illumination angle: 180°
- Luminous color: can be adjusted by the controller, white, red, yellow, blue, green, etc.
Technical Details
- Dimensions: 38mm*20mm*18mm
- Weight: 4.5g
Connect It Up
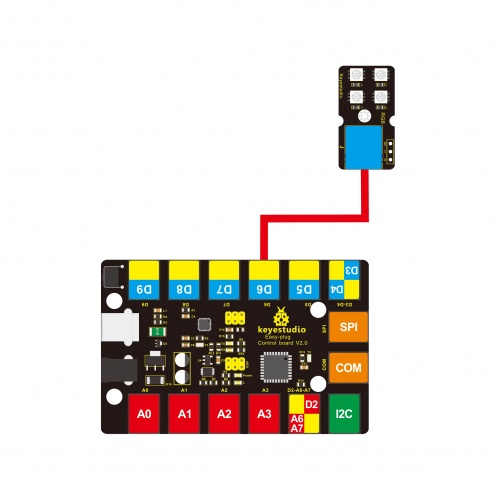
Connect the EASY Plug RGB module to control board using an RJ11 cable. Then connect the control board to your PC with a USB cable.
Upload the Code
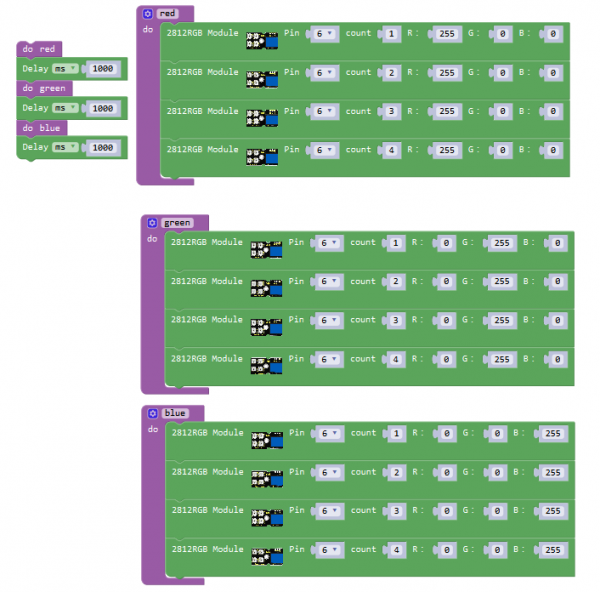
Below is an example code. Open or drag below code to Mixly Blocks and upload.
What You Should See

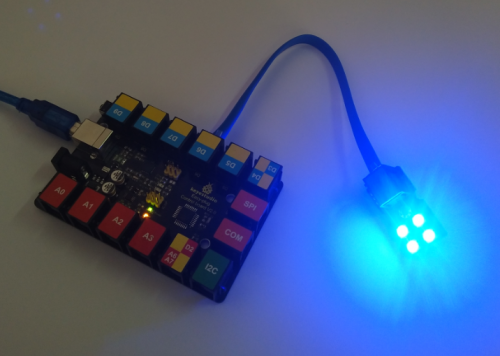
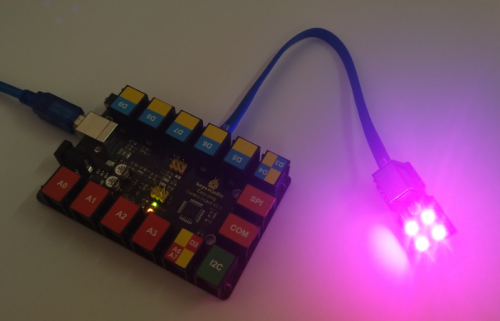
After uploading the code, you should see the 4 RGB LEDs flash in different colors Red, Green, Blue.
Resources
https://fs.keyestudio.com/KS0370
