KS0381 EASY plug I2C 1602 LCD Module-180° Interface
Introduction
This is a basic 16 character by 2 line LCD display module.
The LCD module displays white text on blue background, and comes with I2C communication interface.
You can use only one line to connect it to microcontroller’s I2C communication interface.
On the back comes with a potentiometer, which can be used to adjust the backlight, with default address 0x27.
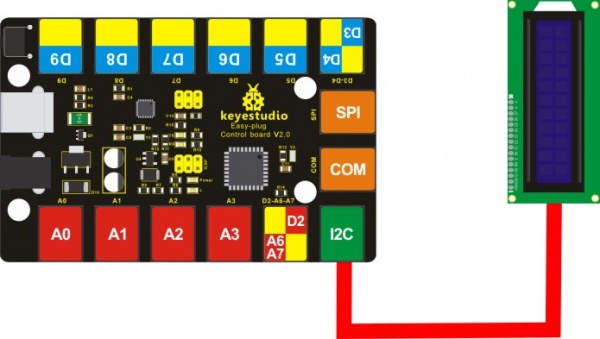
It is very easy for you to connect the module to control board for communication using only an RJ11 cable
Special Note:
The sensor/module is equipped with the RJ11 6P6C interface, compatible with our keyestudio EASY plug Control Board with RJ11 6P6C interface.
If you have the control board of other brands, it is also equipped with the RJ11 6P6C interface but has different internal line sequence, can’t be used compatibly with our sensor/module.
Features
- Interface: Easy plug
- Operating voltage: DC 5V
- White text on blue background
- Communication way: I2C
- I2C Address: 0x27
- Display characters: 16 characters per row, 32 characters in 2 rows
- Adjusting contrast by a potentiometer
- Dimensions: 80mm*36mm*30mm
- Weight: 37.5g
Connection Diagram
Test Code
Copy and paste below code to Arduino IDE and upload.
#include<Wire.h>    // Place file “Wire.h” under the directory “library” of Arduino
#include<LiquidCrystal_I2C.h>  // Place “LiquidCrystal_I2C.h” under the directory “library” of Arduino
LiquidCrystal_I2C lcd(0x27,16,2);// set the LCD address to 0x27 for a 16 chars and 2 line display
void setup()
{
lcd.init();// initialize the LCD
lcd.init();// Print a message to the LCD.
lcd.backlight();
lcd.setCursor(2,0);
lcd.print("Hello, world!");
lcd.setCursor(2,1);
lcd.print("keyestudio!");
}
void loop()
{
}
Code to Note:
Before compile the code, do remember to put the libraries needed inside the libraries folder of Arduino IDE directory.
Download all the libraries:
https://drive.google.com/open?id=105RNjo0aDBthorceoKgqaJ251D3tbWlc
Test Result
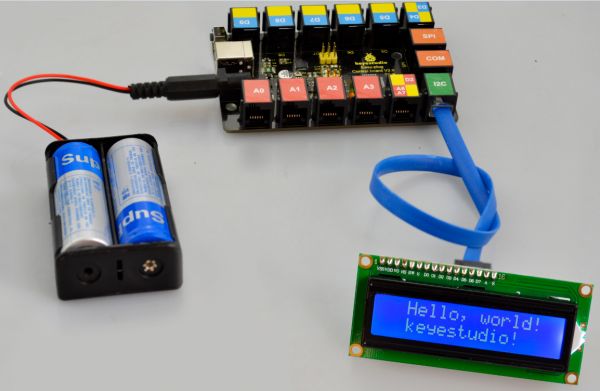
Initially, you should see the words “hello, word!” and “keyestudio!” pop up on your LCD.
Remember you can adjust the contrast using the potentiometer on the module back if you can’t make out the words clearly.

Resources Download
https://fs.keyestudio.com/KS0381
Get One Now

