Ks0030 keyestudio Magical Light Cup Module: Difference between revisions
Jump to navigation
Jump to search
Keyestudio (talk | contribs) No edit summary |
Keyestudio (talk | contribs) No edit summary |
||
| Line 14: | Line 14: | ||
<br> | <br> | ||
==Connection Diagram == | ==Connection Diagram == | ||
<br>[[File: | <br>[[File:Ks0030.png|700px|frameless|thumb]]<br> | ||
<br> | <br> | ||
| Line 67: | Line 67: | ||
} | } | ||
</pre> | </pre> | ||
<br> | |||
== Example Result == | |||
<br>[[File:Ks0349-41-2.png|800px|frameless|thumb]]<br> | |||
Wire it up as the above diagram and upload well the code to the board, then you can see one cap lights up while the other one is off. When tilt these two caps towards the same side, one cap is gradually become bright, another bright cap is gradually off. | |||
<br>[[File:Ks0349-41-3.png|800px|frameless|thumb]]<br> | |||
<br> | <br> | ||
==Resources == | ==Resources == | ||
'''Video'''<br> | * '''Video'''<br> | ||
http:// | http://video.keyestudio.com/ks0030/ | ||
'''PDF''' <br> | * '''PDF''' <br> | ||
https://drive.google.com/open?id=11AEsNv626f0mFFFdpPyek2yhTPsPFTX0 | https://drive.google.com/open?id=11AEsNv626f0mFFFdpPyek2yhTPsPFTX0 | ||
<br> | |||
==Buy from == | ==Buy from == | ||
*[https://www.keyestudio.com/free-shipping-keyestudio-magic-light-cup-module-compatible-with-arduino-p0382-p0382.html '''Official Website'''] | |||
*[https://www.aliexpress.com/store/product/Free-shipping-KEYES-Magic-cup-light-module-for-arduino/1452162_2051331322.html?spm=2114.12010615.8148356.1.238f2176utX86E '''Shop on aliexpress'''] | |||
[[Category: Sensor]] | [[Category: Sensor]] | ||
Revision as of 16:41, 12 April 2019
Introduction
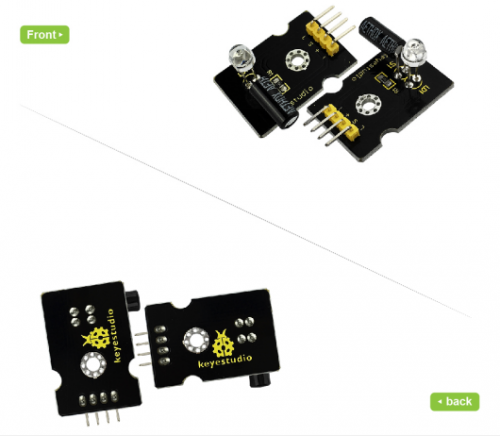
Keyestudio magic light cup module is able to interact with ARDUINO.
The principle is based on the principle of PWM dimming. The brightness of two modules change.
The mercury switch provides a digital signal and trigger PWM regulation, and then you can see the effect like changing two set of cups full of light through the program design.

Specification
- Supply Voltage: 3.3V to 5V
- Interface: Digital
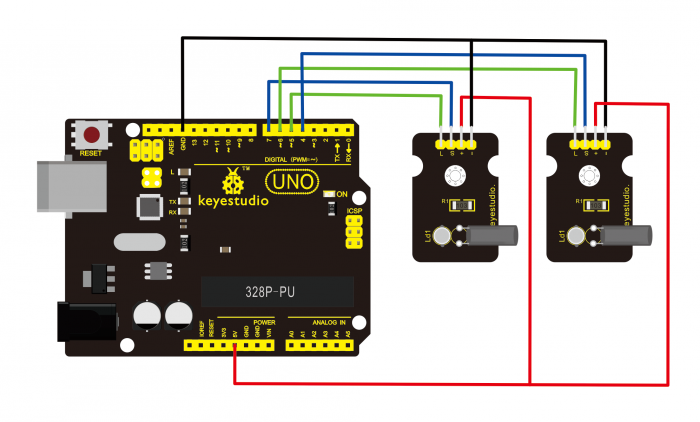
Connection Diagram
Sample Code
int LedPinA = 5;
int LedPinB = 6;
int ButtonPinA = 7;
int ButtonPinB = 4;
int buttonStateA = 0;
int buttonStateB = 0;
int brightnessA = 0;
int brightnessB= 255;
void setup()
{
Serial.begin(9600);
pinMode(LedPinA, OUTPUT);
pinMode(LedPinB, OUTPUT);


pinMode(ButtonPinA, INPUT);
pinMode(ButtonPinB, INPUT);
}
void loop()
{
buttonStateA = digitalRead(ButtonPinA);
if (buttonStateA == HIGH && brightnessA != 255)
{
brightnessA ++;
}
if (buttonStateA == LOW && brightnessA != 0)
{
brightnessA --;
}
analogWrite(LedPinB, brightnessA);
Serial.print(brightnessA);

Serial.print("   ");
buttonStateB = digitalRead(ButtonPinB);
if (buttonStateB == HIGH && brightnessB != 0)
{
brightnessB --;
}
if (buttonStateB == LOW && brightnessB != 255)
{
brightnessB++;
}
analogWrite(LedPinA, brightnessB);
Serial.println(brightnessB);
delay(5);
}
Example Result

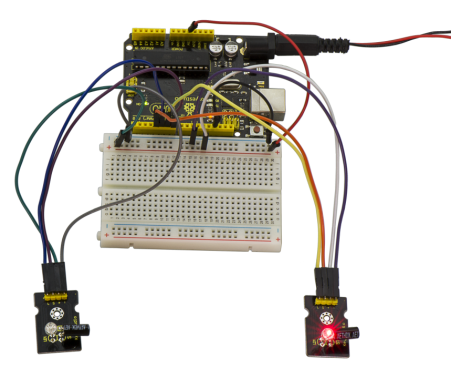
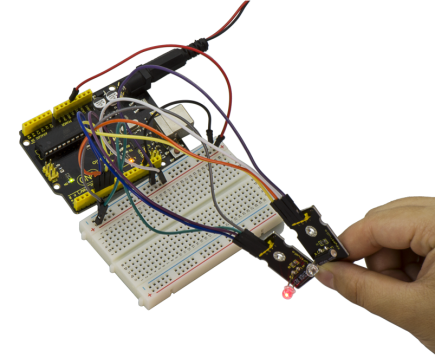
Wire it up as the above diagram and upload well the code to the board, then you can see one cap lights up while the other one is off. When tilt these two caps towards the same side, one cap is gradually become bright, another bright cap is gradually off.

Resources
- Video
http://video.keyestudio.com/ks0030/
- PDF
https://drive.google.com/open?id=11AEsNv626f0mFFFdpPyek2yhTPsPFTX0
