Ks0110 keyestudio EASY plug Hall Magnetic Sensor: Difference between revisions
Keyestudio (talk | contribs) |
Keyestudio (talk | contribs) No edit summary |
||
| Line 10: | Line 10: | ||
<br> | <br> | ||
==Features== | ==Features== | ||
* Connector: Easy plug | * Connector: Easy plug | ||
| Line 17: | Line 16: | ||
* Output: Digital ON/OFF | * Output: Digital ON/OFF | ||
* Detection range and magnetic field strength are proportional | * Detection range and magnetic field strength are proportional | ||
<br> | <br> | ||
==Technical Details== | ==Technical Details== | ||
* Dimensions: 41mm*20mm*18mm | * Dimensions: 41mm*20mm*18mm | ||
* Weight: 4.4g | * Weight: 4.4g | ||
<br> | <br> | ||
==Connect It Up== | ==Connect It Up== | ||
Connect the EASY Plug Hall Magnetic sensor to control board using an RJ11 cable. Then connect the control board to your PC with a USB cable. | Connect the EASY Plug Hall Magnetic sensor to control board using an RJ11 cable. Then connect the control board to your PC with a USB cable. | ||
| Line 29: | Line 28: | ||
<br> | <br> | ||
==Upload the Code== | ==Upload the Code== | ||
Below is an example code. Open or drag below code to [https://wiki.keyestudio.com/Getting_Started_with_Mixly Mixly Blocks] and upload. <br> | |||
< | <br>[[File:ks0397 11.1.png|600px|frameless|thumb]]<br> | ||
< | |||
<br> | <br> | ||
==What You Should See== | ==What You Should See== | ||
When | <br>[[File:ks0397 11-1.png|600px|frameless|thumb]]<br> | ||
<br>[[File: | <br> | ||
When magnetic beads are approaching to the sensor, the LED will be turned on. Otherwise, the LED is off. | |||
<br>[[File:ks0397 11-2.png|600px|frameless|thumb]]<br> | |||
<br> | <br> | ||
<span style="color: red">'''Little Knowledge:'''</span> <br> | |||
If you want to change another way, that is, once magnetic field is detected by sensor, LED is turned off; if no detecting magnetic field, LED is on. <br> | |||
Just need to change the LED state ON or OFF in the code, shown below.<br> | |||
<br>[[File:ks0397 11-2-.png|600px|frameless|thumb]]<br> | |||
<br> | |||
==Extension Experiment== | |||
<span style="color: brown>'''Adding 4-digit LED Display'''</span><br> | |||
'''Hookup Guide'''<br> | |||
Connect the EASY Plug hall sensor, 4-digit LED display and red LED module to control board using RJ11 cables. | |||
<br>[[File:霍尔灯数码管.jpg|600px|frameless|thumb]]<br> | |||
<br> | |||
'''Upload the Code'''<br> | |||
Below is an example code. | |||
<br>[[File:ks0397 11.2.1.png|600px|frameless|thumb]]<br> | |||
<br>[[File:ks0397 11.2.2.png|600px|frameless|thumb]]<br> | |||
<br> | |||
'''What You Should See'''<br> | |||
When magnetic beads are approaching to the sensor, the LED will be turned on. Otherwise, the LED is off. <br> | |||
How many times the magnet approaches to the sensor? You should be able to see the result showed on the 4-digit LED display or serial monitor.<br> | |||
<br>[[File:ks0397 11-5.png|600px|frameless|thumb]]<br> | |||
<br>[[File:ks0397 11-4.png|600px|frameless|thumb]]<br> | |||
<br> | |||
==Resources == | ==Resources == | ||
'''Download the PDF:'''<br> | '''Download the Arduino Code and PDF:'''<br> | ||
https://drive.google.com/open?id= | https://drive.google.com/open?id=1CGKYNqPJzNIyAJS-0c4HKeRlfSf__EIB | ||
'''Download the Mixly Code and Datasheet:'''<br> | |||
https://drive.google.com/open?id=1CmaoHzxFEEsAhN_zUWGp0rBeymhSTROJ | |||
<br> | <br> | ||
==Buy from == | ==Buy from == | ||
* | *[https://www.keyestudio.com/keyestudio-rj11-easy-plug-hall-magnetic-sensor-module-for-arduino-steam-p0083-p0083.html '''Official Website''' ] | ||
*[https://www.aliexpress.com/store/product/2016-New-Keyestudio-EASY-plug-Hall-Magnetic-Sensor-Module-for-Arduino/1452162_32641794701.html?spm=2114.12010612.8148356.1.7d2a484ehrcc19 Shop on aliexpress ] | *[https://www.aliexpress.com/store/product/2016-New-Keyestudio-EASY-plug-Hall-Magnetic-Sensor-Module-for-Arduino/1452162_32641794701.html?spm=2114.12010612.8148356.1.7d2a484ehrcc19 Shop on aliexpress ] | ||
Revision as of 14:55, 6 May 2019
Introduction
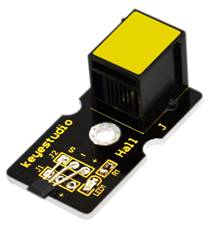
The Hall sensor is based on Hall Effect. It can detect whether there is a magnetic object nearby or not. And it correctly tells you through digital output.
This sensor uses the SFE Reed Switch - Magnetic Field Sensor. It can sense the magnetic materials within a detection range up to 75px.
The detection range and the strength of magnetic field are proportional.
It is useful for non-contact/waterproof type switches, position sensors, rotary/shaft encoders.
Note: this sensor needs to be used together with EASY plug control board.
Features
- Connector: Easy plug
- Sensing magnetic materials
- Detection range: up to 75px
- Output: Digital ON/OFF
- Detection range and magnetic field strength are proportional
Technical Details
- Dimensions: 41mm*20mm*18mm
- Weight: 4.4g
Connect It Up
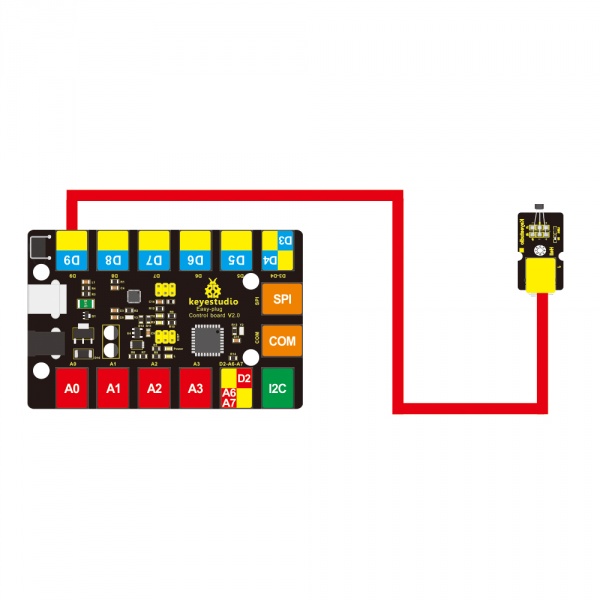
Connect the EASY Plug Hall Magnetic sensor to control board using an RJ11 cable. Then connect the control board to your PC with a USB cable.
Upload the Code
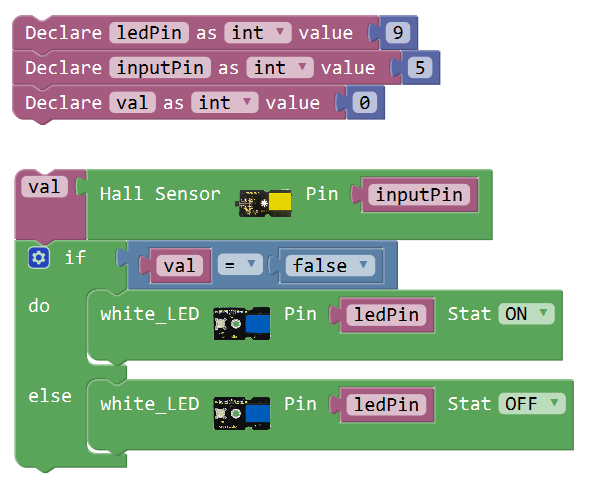
Below is an example code. Open or drag below code to Mixly Blocks and upload.
What You Should See
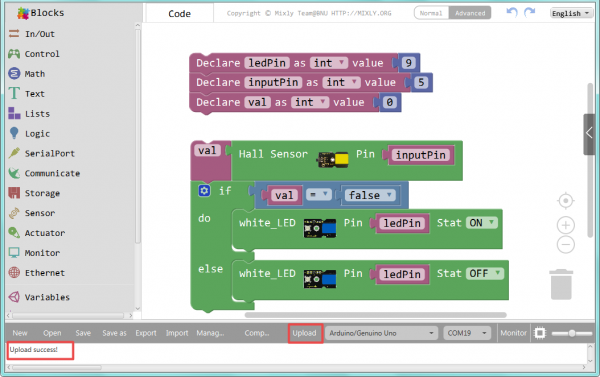
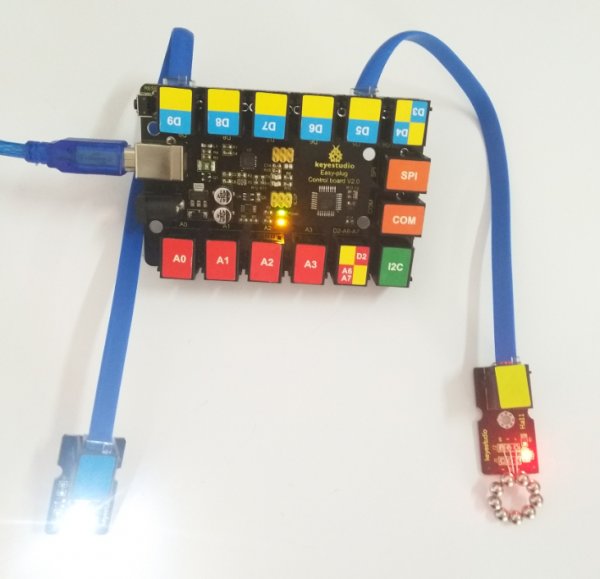
When magnetic beads are approaching to the sensor, the LED will be turned on. Otherwise, the LED is off.
Little Knowledge:
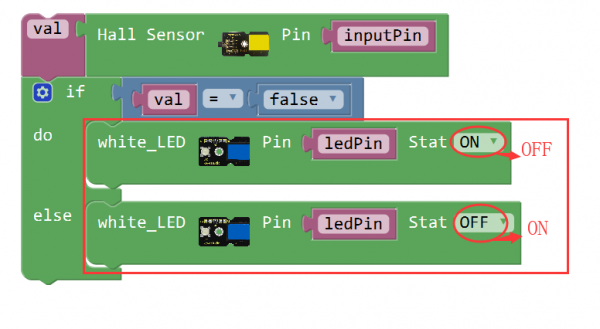
If you want to change another way, that is, once magnetic field is detected by sensor, LED is turned off; if no detecting magnetic field, LED is on.
Just need to change the LED state ON or OFF in the code, shown below.
Extension Experiment
Adding 4-digit LED Display
Hookup Guide
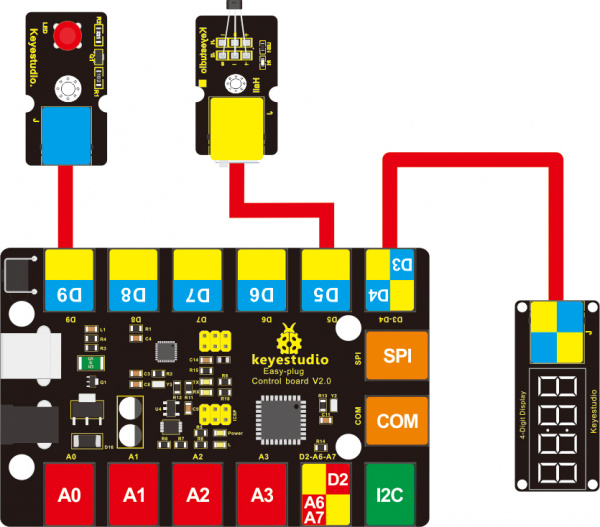
Connect the EASY Plug hall sensor, 4-digit LED display and red LED module to control board using RJ11 cables.
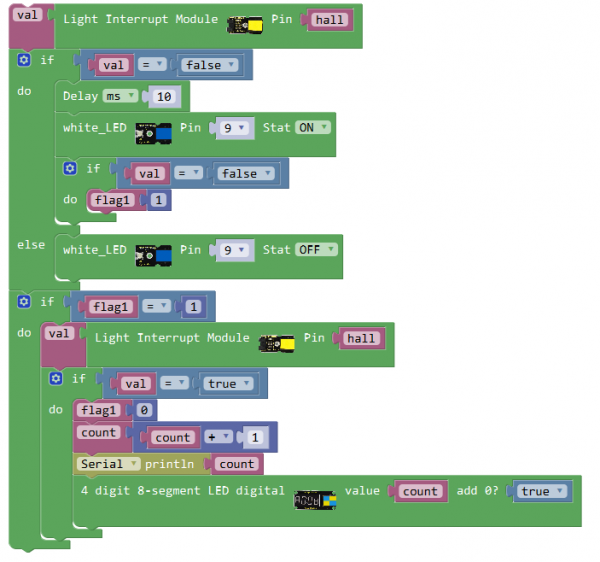
Upload the Code
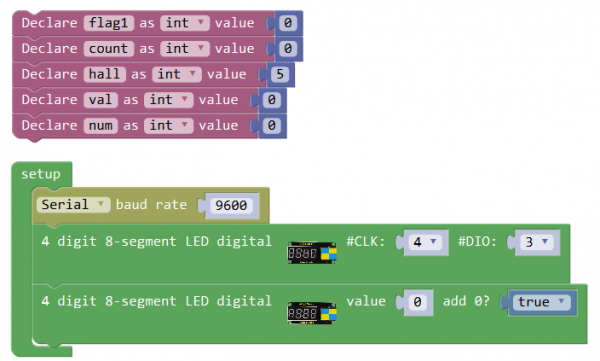
Below is an example code.
What You Should See
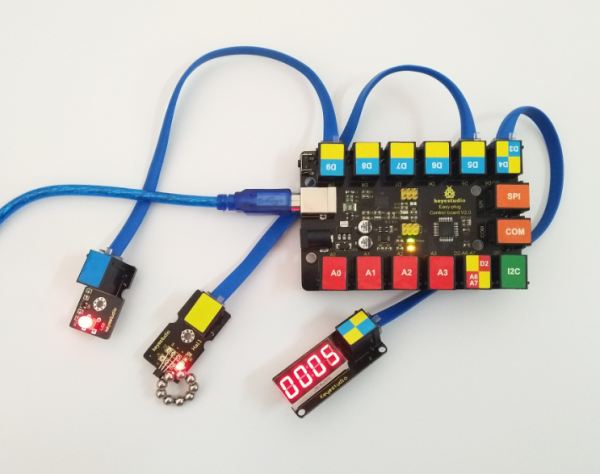
When magnetic beads are approaching to the sensor, the LED will be turned on. Otherwise, the LED is off.
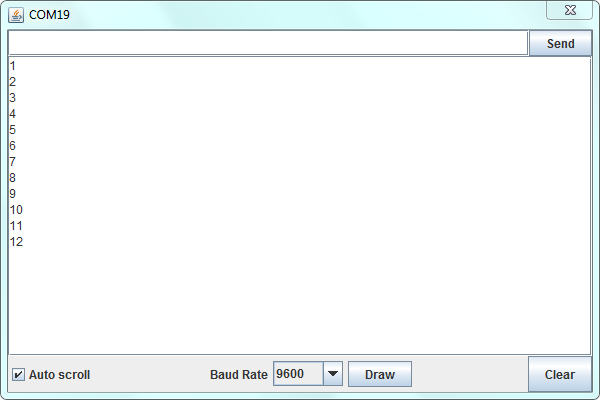
How many times the magnet approaches to the sensor? You should be able to see the result showed on the 4-digit LED display or serial monitor.
Resources
Download the Arduino Code and PDF:
https://drive.google.com/open?id=1CGKYNqPJzNIyAJS-0c4HKeRlfSf__EIB
Download the Mixly Code and Datasheet:
https://drive.google.com/open?id=1CmaoHzxFEEsAhN_zUWGp0rBeymhSTROJ
