Ks0232 keyestudio Red LED Module: Difference between revisions
Keyestudio (talk | contribs) No edit summary |
Keyestudio (talk | contribs) |
||
| (3 intermediate revisions by the same user not shown) | |||
| Line 8: | Line 8: | ||
You can combine with other sensors to do various interactive experiments. <br> | You can combine with other sensors to do various interactive experiments. <br> | ||
You can also choose other LED modules to emit different light color like blue, green, yellow and white.<br> | You can also choose other LED modules to emit different light color like blue, green, yellow and white.<br> | ||
<br>[[File: | <br>[[File:Ks0232-1.png|400px|frameless|thumb]]<br> | ||
<br> | <br> | ||
== Features == | == Features == | ||
* Control interface: Digital | * Control interface: Digital | ||
| Line 27: | Line 28: | ||
== Connect It Up == | == Connect It Up == | ||
Connect the red LED module to control board using three jumper wires. Then connect the control board to your PC with a USB cable.<br> | Connect the red LED module to control board using three jumper wires. Then connect the control board to your PC with a USB cable.<br> | ||
<br>[[File: | <br>[[File:Ks0232-2.png|600px|frameless|thumb]]<br> | ||
<br> | <br> | ||
| Line 51: | Line 52: | ||
The LED will flash on for one second, then off for one second, repeatedly and alternately. <br> | The LED will flash on for one second, then off for one second, repeatedly and alternately. <br> | ||
If it doesn’t, make sure you have assembled the circuit correctly and verified and uploaded the code to your board. <br> | If it doesn’t, make sure you have assembled the circuit correctly and verified and uploaded the code to your board. <br> | ||
<br>[[File: | <br>[[File:Ks0232-3.png|500px|frameless|thumb]]<br> | ||
<br> | <br> | ||
==Resources == | ==Resources== | ||
https://fs.keyestudio.com/KS0232 | |||
<br> | <br> | ||
==Buy from == | ==Buy from == | ||
Latest revision as of 08:49, 28 April 2021
Introduction
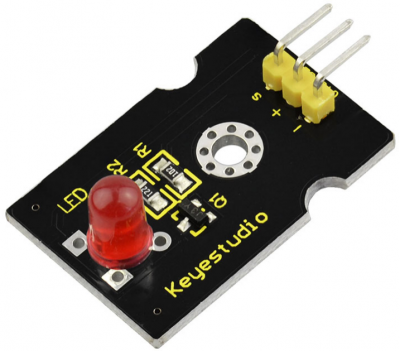
This is a red LED module. The main function is to control a plugin LED on and off. When connecting to ARDUINO, after programming, it will emit red light color.
The pin pitch of 3Pin is 2.54mm.
This LED module has 3 Pins; - pin is connected to ground, + pin is connected to VCC(3.3-5V), S pin is for signal control; you can set the High or Low level to control the LED on and off.
You can combine with other sensors to do various interactive experiments.
You can also choose other LED modules to emit different light color like blue, green, yellow and white.

Features
- Control interface: Digital
- Working voltage: DC 3.3-5V
- Pin pitch: 2.54mm
- LED color: red
- Easy to use
- Useful for light projects
Technical Details
- Dimensions: 34mm*20mm*11.5mm
- Weight: 2.7g
Connect It Up
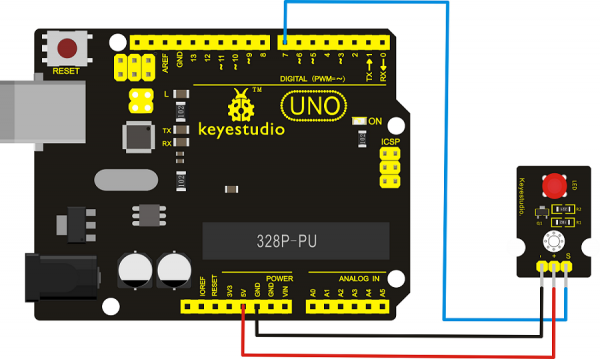
Connect the red LED module to control board using three jumper wires. Then connect the control board to your PC with a USB cable.

Upload the Code
Copy and paste below code to Arduino IDE and upload.
int led = 7;
void setup()
{
  pinMode(led, OUTPUT);     //Set Pin7 as output
}
void loop()
{    digitalWrite(led, HIGH);   //Turn off led
          delay(1000);
          digitalWrite(led, LOW);    //Turn on led
          delay(1000);
}
What You Should See
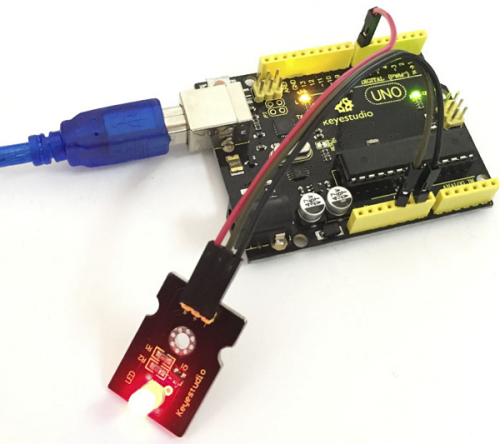
The LED will flash on for one second, then off for one second, repeatedly and alternately.
If it doesn’t, make sure you have assembled the circuit correctly and verified and uploaded the code to your board.

Resources
https://fs.keyestudio.com/KS0232