Ks0288 keyestudio CNC GRBL V0.9: Difference between revisions
Keyestudio (talk | contribs) |
Keyestudio (talk | contribs) |
||
| Line 44: | Line 44: | ||
a.Double click arduino-1.5.6-r2-windows to start. | a.Double click arduino-1.5.6-r2-windows to start. | ||
Select “I Agree”to accept license agreement. | Select “I Agree”to accept license agreement. | ||
<br>[[File:图片7.png|500px|frameless|thumb]]<br> | |||
b.Select components to install and click “Next”. | |||
<br>[[File:图片8.png|500px|frameless|thumb]]<br> | |||
c.Click “Browse” and select another folder. Click “Install” to start the installation. | |||
<br>[[File:图片9.png|500px|frameless|thumb]]<br> | |||
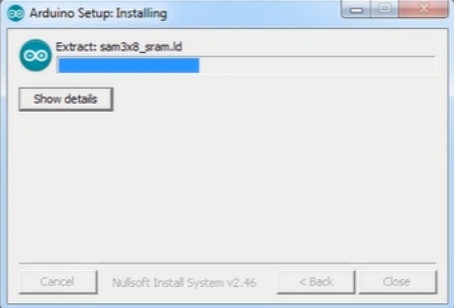
d.Finally, wait for a few minutes to finish. | |||
<br>[[File:图片10.png|500px|frameless|thumb]]<br> | |||
== Heading text == | == Heading text == | ||
== Heading text == | == Heading text == | ||
Revision as of 13:07, 28 November 2017
Keyestudio CNC GRBL V0.9
Introduction
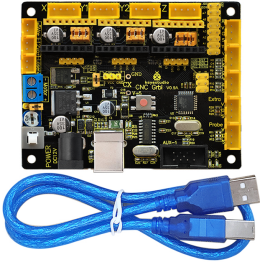
Keyestudio CNC GRBL V0.9 is a motherboard developed for various robots such as laser engraving, CNC, writing robot and so on. It has complete interfaces with cheap price, and can connect external drive, very suitable for DIY or factory use.
Specification
- Microprocessor:MEGA328p
- Input voltage: DC 12V
- File supporting format:Gcode
- Supporting machine structure:CNC,laser engraving,writing robot.
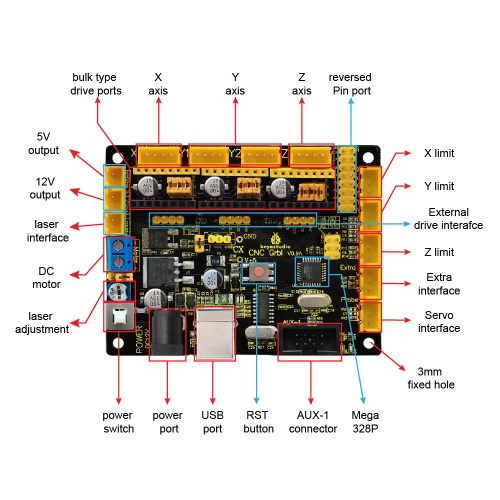
Pin Explanation
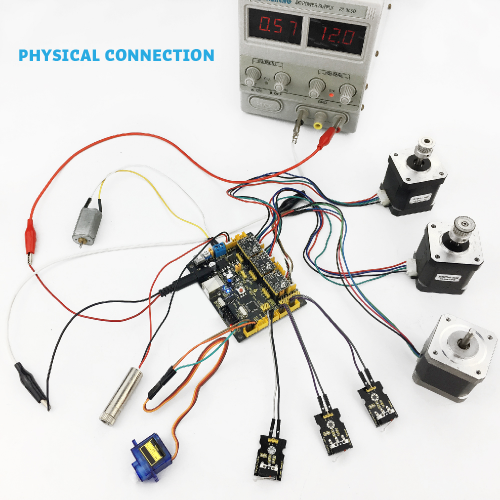
Wiring Diagram
Install Driver Software and Development Environment Software IDE
(1)Install Diver Software
For different operating system, there may be slight difference in installation method. Below is an example in WIN 7.
a.When you connect Keyestudio CNC GRBL V0.9 to your computer at the first time, right click “Computer” —>“Properties”—> “Device manager”, you can see “USB2.0-Serial”. Shown below.
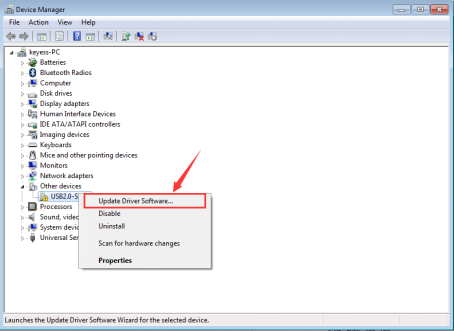
b.Click “USB2.0-Serial”, select “Update Driver software”.
c.Then, click “Browse my computer for driver software”.
d.Find the “usb_ch341_3.1.2009.06” file.
e.Click “Next”,Installation completed; click “Close”.
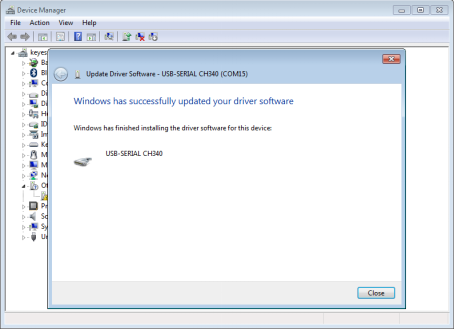
f.After driver is installed, go to “Device manager” again. right click “Computer” —> “Properties”—> “Device manager”, you can see the Board and Com port as below figure shown.
thumb
(2) Install Development Environment Software IDE
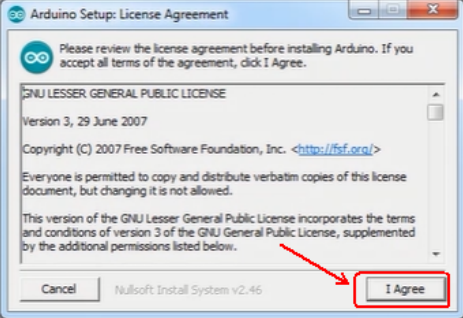
a.Double click arduino-1.5.6-r2-windows to start.
Select “I Agree”to accept license agreement.
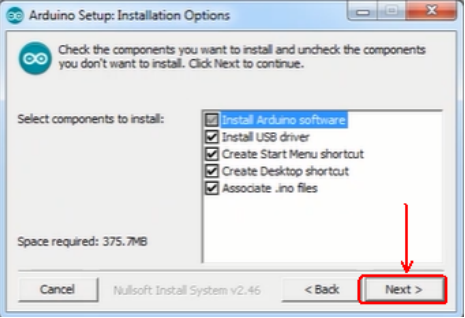
b.Select components to install and click “Next”.
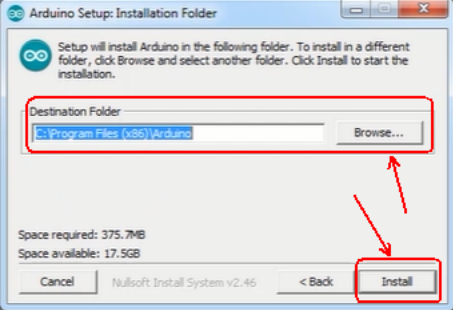
c.Click “Browse” and select another folder. Click “Install” to start the installation.
d.Finally, wait for a few minutes to finish.
