Ks0049 keyestudio Soil Humidity Sensor
Introduction
This is a simple soil humidity sensor aims to detect the soil humidity.
If the soil is in lack of water, the analog value output by the sensor will decrease; otherwise, it will increase.
If you use this sensor to make an automatic watering device, it can detect whether your botany is thirsty to prevent it from withering when you go out.
Using the sensor with Arduino controller makes your plant more comfortable and your garden smarter.
The soil humidity sensor module is not as complicated as you might think, and if you need to detect the soil in your project, it will be your best choice.
The sensor is set with two probes inserted into the soil, then with the current go through the soil, the sensor will get resistance value by reading the current changes between the two probes and convert such resistance value into moisture content.
The higher moisture (less resistance), the higher conductivity the soil has.
Insert it into the soil and then use the AD converter to read it. With the help of this sensor, the plant can remind of you: I need water.
Specification
- Power Supply Voltage: 3.3V or 5V
- Working Current: ≤ 20mA
- Output Voltage: 0-2.3V (When the sensor is totally immersed in water, the voltage will be 2.3V) the higher humidity, the higher the output voltage
- Sensor type: Analog output
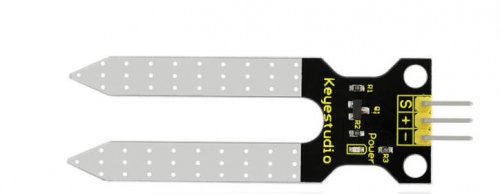
- Interface definition: Pin1- signal, Pin2- GND, Pin3 - VCC
- Packaging : Electrostatic bag sealing
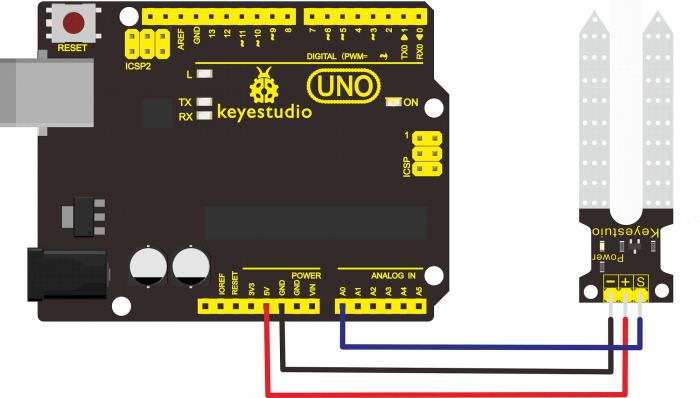
Connection Diagram
Sample Code 1
Upload the code 1 to check the analog value on the monitor
/*
  # Example code for the moisture sensor
  # Connect the sensor to the A0(Analog 0) pin on the Arduino board
  # the sensor value description
  # 0  ~300     dry soil
  # 300~700     humid soil
  # 700~950     in water

*/
void setup(){

  Serial.begin(57600);
}
void loop(){
  Serial.print("Moisture Sensor Value:");
  Serial.println(analogRead(0));
  delay(100);
}
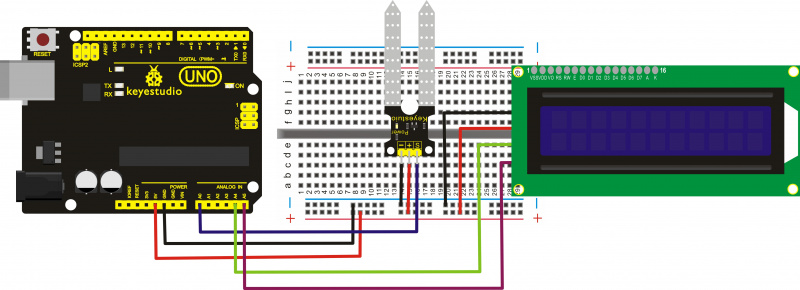
Connection 2
Introduction to the pins of LCD1602:
- GND: a pin that connects to ground
- VCC: a pin that connects to a +5V power supply
- SDA: a pin that connects to analog port A4 for IIC communication
- SCL: a pin that connects to analog port A5 for IIC communication
Sample Code 2
#include <Wire.h>
#include <LiquidCrystal_I2C.h>
LiquidCrystal_I2C lcd(0x27,16,2);  // set the LCD address to 0x27 for a 16 chars and 2 line display

void setup() {
  lcd.init();                      // initialize the lcd
  lcd.init();
  // Print a message to the LCD.
  lcd.backlight();
  lcd.setCursor(0,0);
  lcd.print("Value:");
}
void loop() {
  int sensorValue = analogRead(A0); // read A0 data and assign to sensorValue
  if(sensorValue<10)
  {
  lcd.setCursor(6,0);
  lcd.print(sensorValue);
  lcd.setCursor(7,0);
  lcd.print("    ");
  }
  if(sensorValue<100)
  {
  lcd.setCursor(6,0);
  lcd.print(sensorValue);
  lcd.setCursor(8,0);
  lcd.print("    ");
  }
  if(sensorValue>99)
  {
  lcd.setCursor(6,0);
  lcd.print(sensorValue);
  }
   if(sensorValue<301)
  {
  lcd.setCursor(0,1);
  lcd.print("dry soil       ");
  }
  if((sensorValue>300)&&(sensorValue<501))
  {
  lcd.setCursor(0,1);
  lcd.print("humid soil   ");
  }
     if(sensorValue>500)
  {
  lcd.setCursor(0,1);
  lcd.print("in water       ");
  }
  delay(200);
}
If upload the code 2, you will see the result as below:
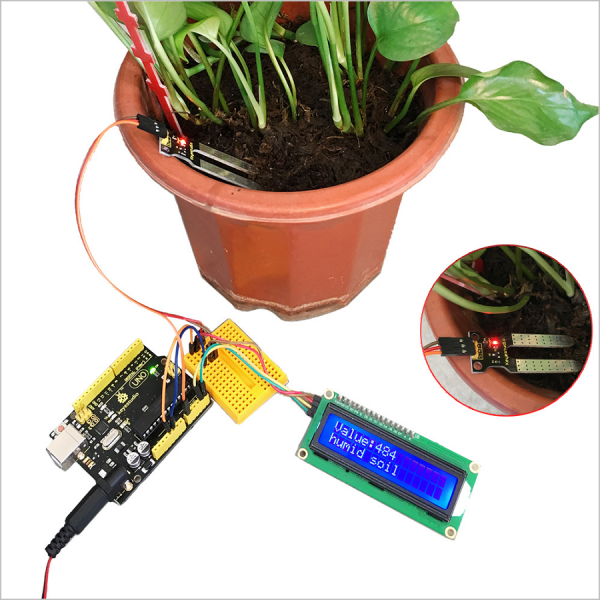
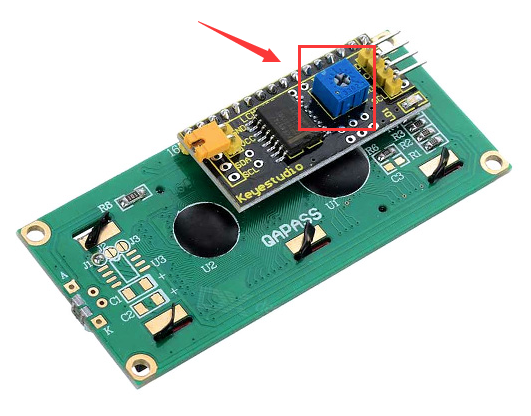
Remember you can adjust the contrast by turning the potentiometer on the back if you can’t make out the words clearly.
Resources
- Video
http://video.keyestudio.com/ks0049/
- Get the Libraries of Wire and LiquidCrystal_I2C
https://fs.keyestudio.com/KS0049
