Ks0198 keyestudio 4DOF Robot Mechanical Arm Kit for Arduino DIY

From Keyestudio Wiki
Revision as of 10:52, 30 November 2018 by Keyestudio (talk | contribs)
Jump to navigation Jump to search


Kit Overview

How to DIY a robotic arm to complete multiple movements? Cool.With this keyestudio robotic arm kit, you are able to DIY your own controllable mechanical arm using ARDUINO microcontroller. It uses UNO R3 and 2 JoyStick modules to control the angle degree of 4 servos. When DIY this 4DOF robot arm kit, you could get everything needed for arm installation and debugging. There are 3 controlling methods are as follows: 1) Controlling through Wired JoyStick (included in the kit); 2) Phone Bluetooth Controlling (note: HC-06 Bluetooth module Not Included, only provide the test code for Bluetooth and APP for Android phone); 3) Wireless PS2 JoyStick Control (PS2 JoyStick module Not Included, we only provide the test code.) You are able to get all related information in the Arm kit. Take your brain on an inspiring journey through the world of programming. Get started now!


Kit Features

You can check out these features:

  • Detailed installation instructions
  • Detailed debugging methods, starting Arduino from entry.
  • Three controlling methods: Wired JoyStick Control; Phone Bluetooth Control; Wireless PS2 JoyStick Control.


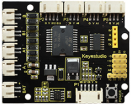
The parameters of keyestudio TB6612FNG motor/servo drive expansion board are as follows:

  • VIN voltage: VIN = DC 7-15V
  • VIN current: 5A
  • Two-way 5V output: 5V/3A
  • TB6612FNG: VIN input DC 7-15V; average drive current 1.2A; peak current 3.2A
  • PS2 interface: compatible with Sony PS2 receiver, can be plugged directly into the expansion board.
  • Dimensions: 73*53.34mm


Part List

You can see a pretty beautiful packaging box for the arm kit, and inside the packaging you will find all the parts and screws listed below.

No. Component Quantity Picture
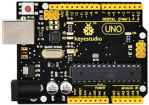
1 Keyestudio UNO R3 Main Board 1
thumb
2 keyestudio TB6612FNG motor/servo drive shield 1
thumb
3 Keyestudio quick connectors IR receiver module 1
thumb
4 Keyestudio quick connectors line tracking sensor 1
thumb
5 Keyestudio quick connectors 12FN20 motor A 1
thumb
6 Keyestudio quick connectors 12FN20 motor B 1
thumb
7 Keyestudio 8x8 Dot Matrix Module 1
thumb
8 Keyestudio quick connectors ultrasonic module 1
thumb
9 keyestudio Bluetooth HC-06 1
thumb
10 Keyestudio JMFP-4 17-button 86*40*6.5MM yellow (eco-friendly) (no battery) 1
thumb
11 Double-Connector JST-PH2.0MM-5P 24AWG blue-green-yellow-red-black wire 15CM (reverse direction) 1
thumb
12 Double-Connector JST-PH2.0MM-4P 24AWG green-yellow-red-black wire 8CM (reverse direction) 1
thumb
13 Double-Connector JST-PH2.0MM-3P 24AWG yellow-red-black wire 8CM (reverse direction) 1
thumb
14 Double-Connector JST-PH2.0MM-2P 24AWG red-black wire 160mm 2
thumb
thumb
15 Battery holder with JST-PH2.0MM-2P socket lead, black-red lead length 150mm 1
thumb
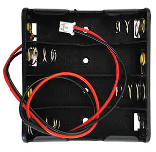
16 4-cell AA battery case 1
thumb
17 Screw M2*12MM round head 4
thumbthumbthumbthumb
18 Nut M2 nickle plating 4
thumbthumbthumbthumb
19 Screw M3*6MM round head 27
thumb thumb thumb thumb thumb thumb thumb thumb thumb
20 Screw M3*6MM flat head 2
thumb
21 Nut M3 nickle plating 5
thumb thumbthumbthumbthumb
22 Dual-pass M3*10MM Copper Pillar 8
thumb thumb thumb thumbthumb thumb thumb thumb
23 Dual-pass M3*40MM Copper Pillar 4
thumb thumb thumb thumb
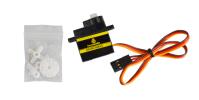
24 keyestudio 9G black servo 180° with mounts 1
thumb
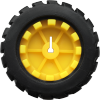
25 N20 motor wheel 2
thumbthumb
26 White U-type motor holder 2
thumb
27 Black plastic platform 1
thumb
28 3PI miniQ universal caster 304 stainless steel 1
thumb
29 Black-yellow Handle 3*40MM cross screwdriver 1
thumb
30 1m USB cable 1
thumb
31 Black cable ties 3*100MM 5
thumb thumb thumb thumb thumb
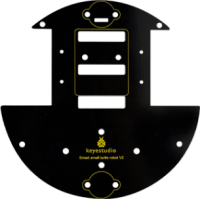
32 Robot bottom PCB 1
thumb
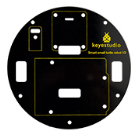
33 Robot TOP PCB 1
thumb
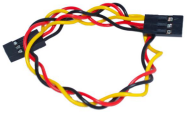
34 female-female jumper wire 1
thumb
35 keyestudio White Piranha LED Module 1
thumb
36 3Pin female header jumper wire length 20CM 2.54mm 1
thumb


Assembly Guide

Follow the assembly steps below to build your own robot arm, believe you will be full of delight to experience the robot arm DIY. If still confused, you can refer to the assembly video.

Step1: Begin with the Baseplate Assembly

(1) Firstly, you should prepare the components as follows:

  • M3*30+5MM single-pass copper pillar *4
  • M3*6mm+6mm single-pass copper pillar *4
  • M3 Hex Nut *8
  • Black Acrylic plate *1