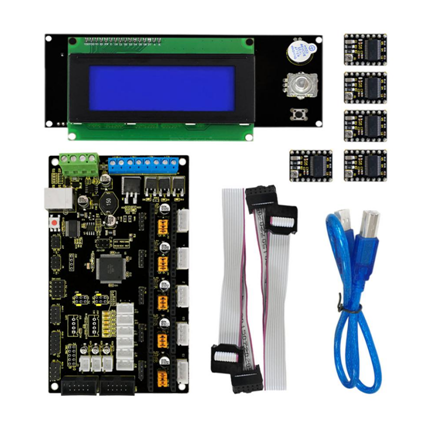
Ks0092 keyestudio 3D Printer Kit MKS Base V1.2 + 5x 8825 + LCD 2004 Smart Controller
Keyestudio 3D Printer Kit MKS base V1.2 + 5x 8825 + LCD 2004 smart Controller
Description
1.The new MKS Base 1.2 3D Printer Controller board combines and improves the assets of the RAMPS 1.4 and Arduino Mega 2560 boards on a fantastic single board solution. The MKS Base 1.2 is an optimal 3D printer controller solution for your Reprap 3D Printer.
2. LCD 2004 Smart Controller
It contains a SD-Card reader, a rotary encoder and a 20 Character x 4 Line LCD display. You can easy connect it to your Ramps board using the "smart adapter" included. After connecting this panel to your Ramps you don't need your pc any more, the Smart Controller supplies power for your SD card.
3. The DRV8825 stepper motor driver carrier is a breakout board for TI’s DRV8825 microstepping bipolar stepper motor driver. The module has a pinout and interface that are nearly identical to those of our A4988 stepper motor driver board, so it can be used as a higher-performance drop-in replacement for those boards in many applications. The DRV8825 features adjustable current limiting, overcurrent and overtemperature protection, and six microstep resolutions (down to 1/32-step). It operates from 8.2 – 45 V and can deliver up to approximately 1.5 A per phase without a heat sink or forced air flow (rated for up to 2.2 A per coil with sufficient additional cooling).
Package list
- 1pcs MKS base V1.2
- 1pcs Lcd2004 smart Controller
- 5pcs 8825 stepper driver
- 1pcs USB 2.0 cable
Connection Method
A. Mount DRV8825 correctly, don’t mount reversely, or they will be burnt, as shown below:

B. As for 2004LCD, connect ESP1 to ESP1, ESP2 to ESP2, as shown below:
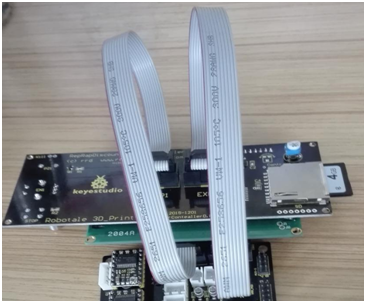
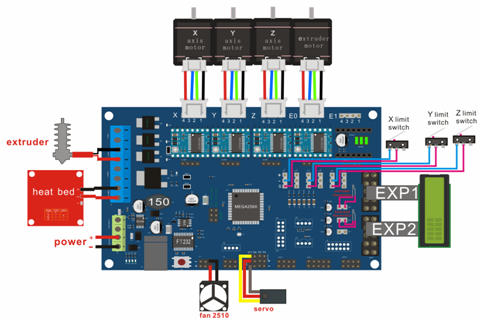
C. Diagram connection as shown below:
Adjusting the drive current
In the kit, we have applied the A4988 drive module to drive stepper motor. When using, you can turn the potentiometer on the drive module to adjust the drive current.
The specific method please refer to the website link below:
https://wiki.keyestudio.com/Ks0281_Keyestudio_Reprap_Stepper_Motor_Driver
Using Method
Install Diver Software
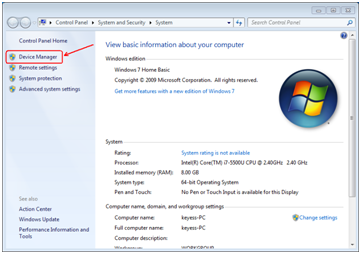
A. Connect the main board with computer, and then right click “Computer” to enter “Device Manage”.
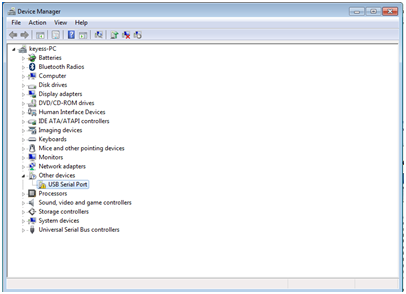
B. Double click “Other devices”, appearing “USB Serial Port”.
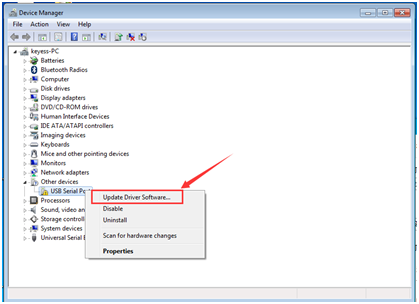
Then, right click “USB Serial Port” and select “Update Driver Software” to install driver software.
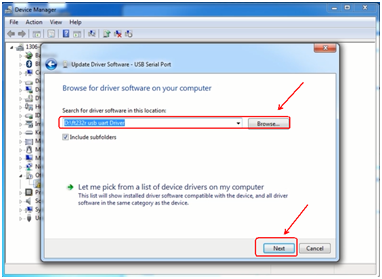
After that, select “Browse my computer for driver software” to find the file.
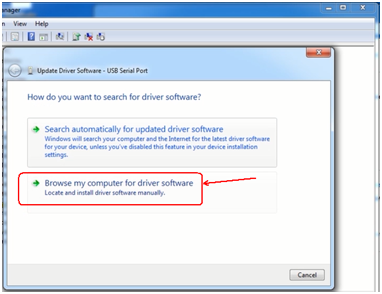
Browse to search for driver software.
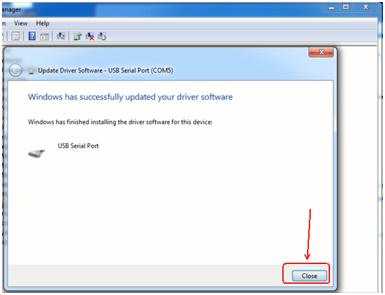
After your driver software updated, click “Close” to finish.
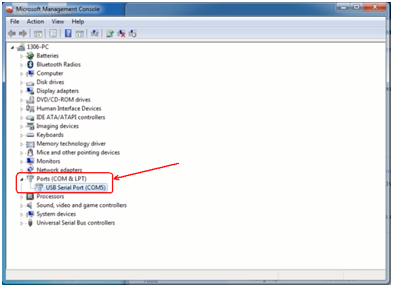
C. Finally, installation is done, and double click “Ports”in “Device Manager”, you can see “USB Serial Port”.
Install development environment software IDE
Double click arduino-1.5.6-r2-windows to start.
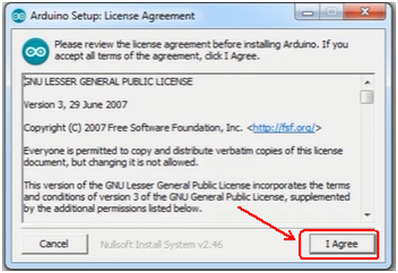
Select “I Agree”to accept license agreement.
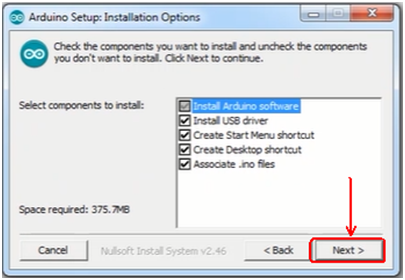
Select components to install and click “Next”.
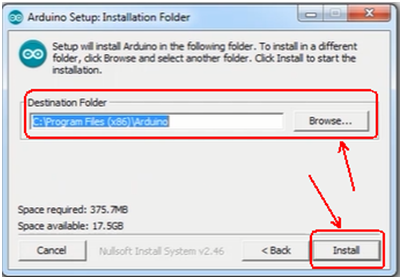
Click “Browse” and select another folder. Click “Install” to start the installation.
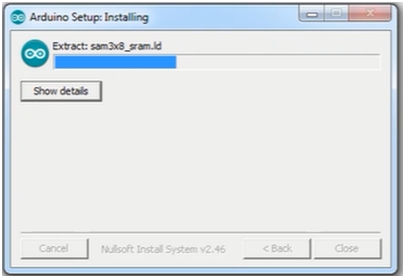
Finally, wait for a few minutes to finish.
Install Firmware for Main Board
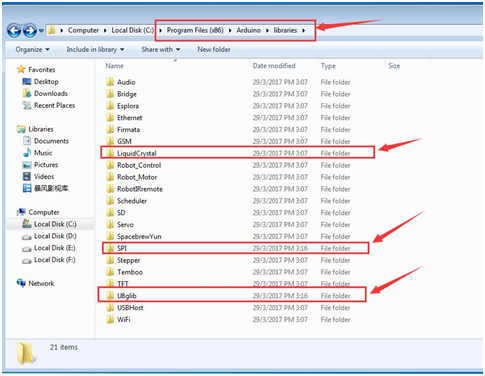
A. You must close Arduino IDE firstly, and then place three libraries LiquidCrystal, SPI and U8glib from Marlin_Marlin_v1→ArduinoAddons→Arduino_1.x.x→libraries into Arduino/libraries.
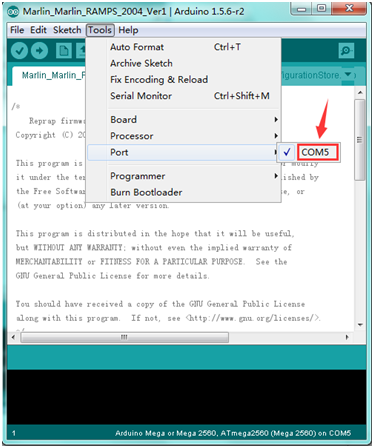
B. Enter Marlin_Marlin_RAMPS_2004_Ver1 this folder, double click Marlin_Marlin_RAMPS_2004_Ver1.ino this file, finally click “Tools” to set “Board”and “Port”.

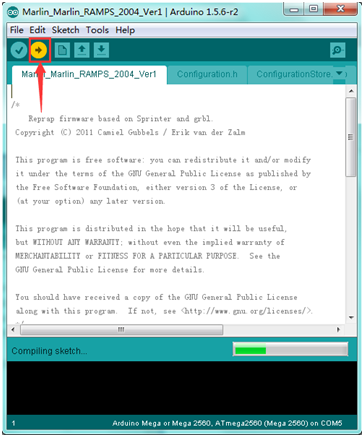
After verifying, write code.
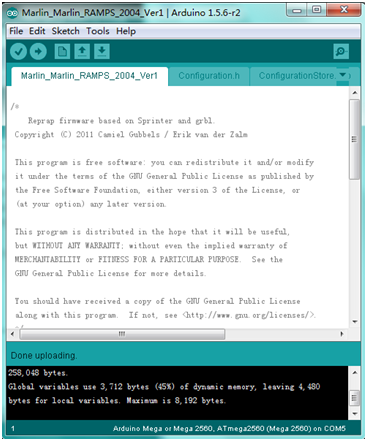
Done uploading.
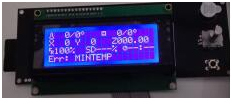
C. After upload the firmware the LCD will display some parameter as shown below:
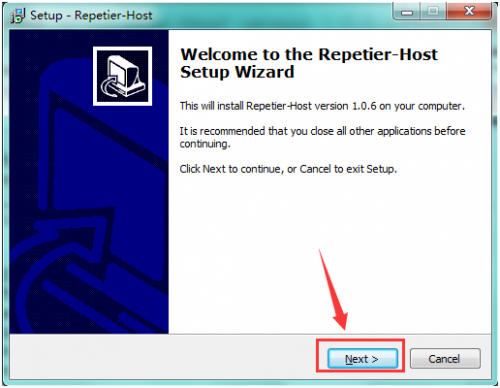
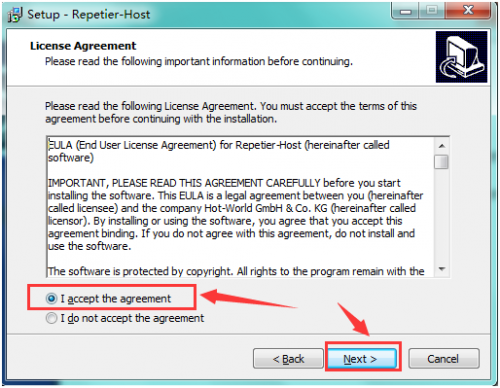
Install Slicer Software Repetier-Host
Check “I accept the agreement”, and click “Next” to continue.
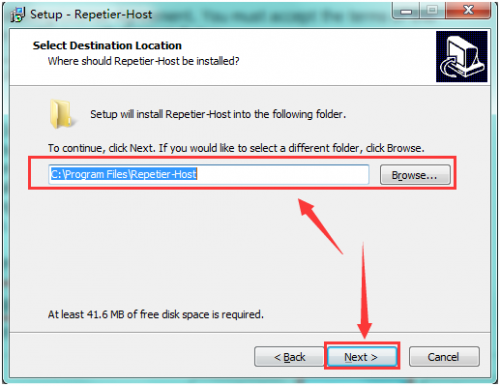
Select destination location, and click “Next” to continue.
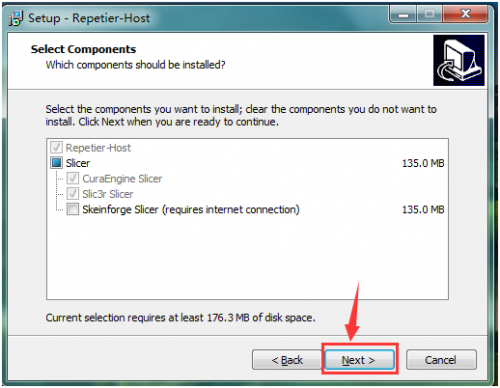
Check components that should be installed, and click “Next” to continue.
Select star menu folder, and click “Next” to continue.
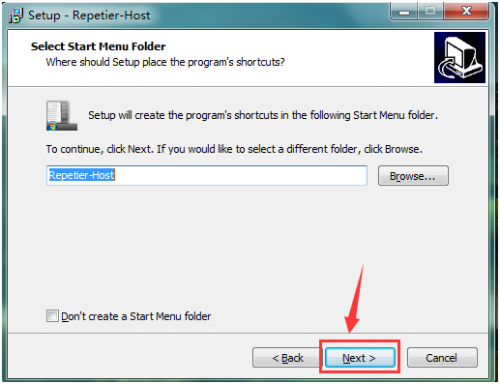
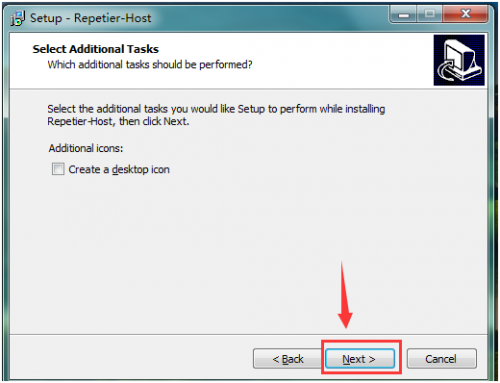
Click “Next” to continue.
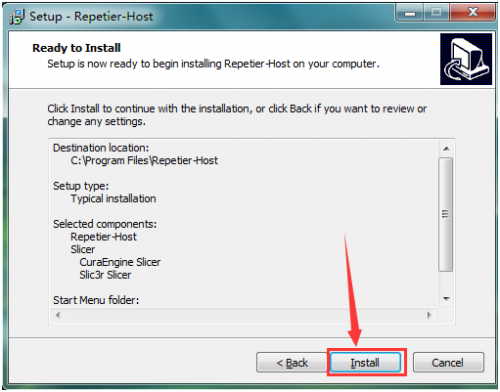
Click “Install” to install.
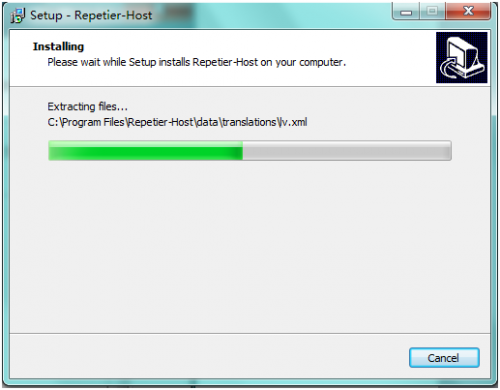
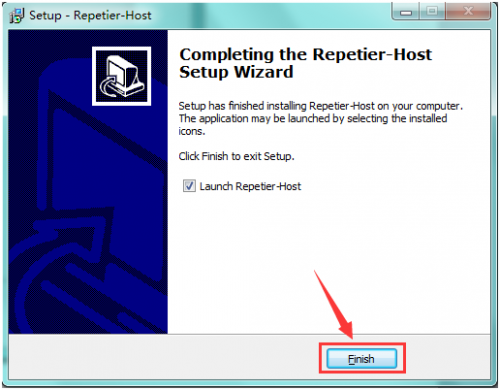
Click “Finish” to exit Setup.
Application of Slicer Software
A. Run Repiter-Host,click Load to open a printing model.
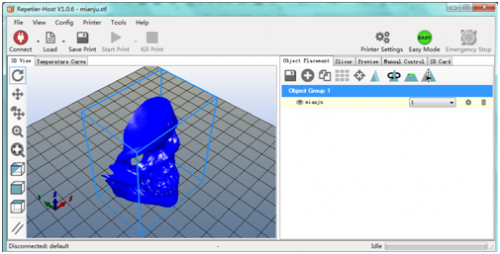
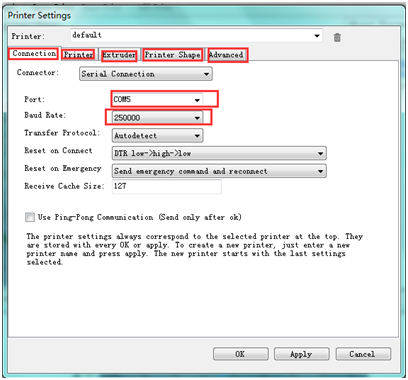
B. Click Printer Settings to complete some setup, referring to below figure.
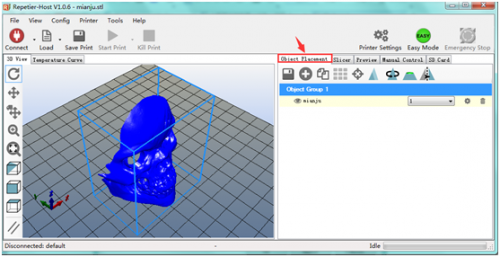
C. Enter Object Placement to set placing position, printing size and so on.
D. Click Slicer to set slicer, like printing speed. After setting slicer, click Start Slicing to begin slicing.
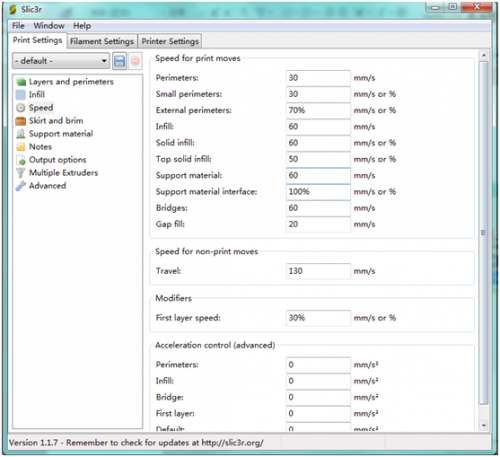
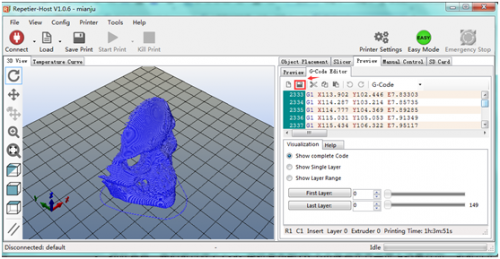
E. After slicing, go to Preview→G-Code Editor, copy G-Code to SD card, and then insert the card into the main board. It is time to kick off the print! Though the LCD screen go to : Print from SD→Desired File. Or you can connect your 3D printer to computer using a USB cable to start the print.
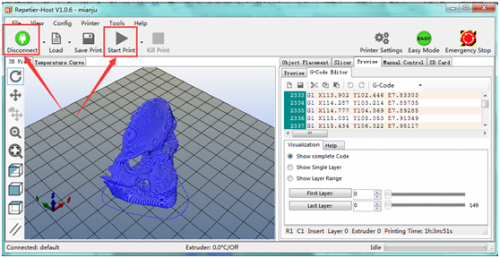
F. Click “Connect”and then click “Start Print” to begin the print. After some time, your printer gets ready and the buzzer rings, then you should press the button on LCD to start.
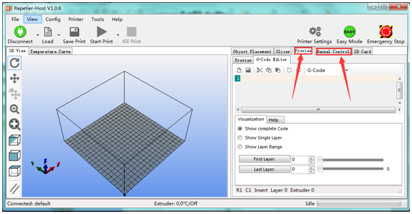
G. We just introduce a simple method about printing. Thanks to selling only main board by us, you should design your own structure and outlook of your 3D printer, and you should also set your own configuration to meet your need. After you assembling your printer, the printer need to be leveled, so you can make some setup in Preview and Manual Control, and surf the internet for further information.
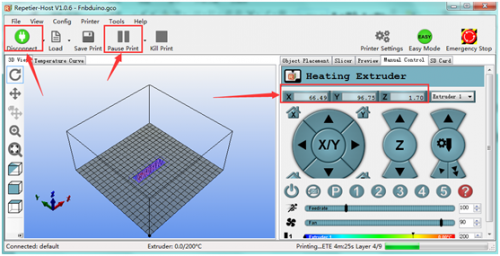
H. We have a G-Code to test the main board. Power it on, open limit switch and stepper motor, drive three motors; put a Fnbduino.gco file to Preview, click Start Print, if the motors rotate, X/Y/Z value in Manual Control changes, the main board works as shown below:
Resources
Repetier-Host Download
https://www.repetier.com/download-now/
Arduino IDE Download
https://www.arduino.cc/en/Main/Donate
Firmware, Driver Software, Testing G-Code and Mask Printing Model Download
https://fs.keyestudio.com/KS0092
Buy from
Official Website:
https://www.keyestudio.com/free-shippin-3-d-printer-kit-for-arduino-mks-gen-v122004lcd-control-5x8825-driveusbadaptor-p0294-p0294.html
