KS0446 Keyestudio Frog Robot for Arduino Graphical Programming: Difference between revisions
Keyestudio (talk | contribs) |
Keyestudio (talk | contribs) |
||
| Line 113: | Line 113: | ||
<br> | <br> | ||
=== Project 1: Keyestudio NANO CH340 === | === Project 1: Keyestudio NANO CH340 === | ||
[[image:图片1- ks0173.png|thumb|900px|right|Keyestudio Nano ch340 ]] | |||
<br> | |||
'''Introduction:'''<br> | |||
keyestudio Nano CH340 is a small, complete, and breadboard-friendly board based on the ATmega328P-AU. Compared with ARDUINO NANO, the USB-to-serial port chip used in keyestudio Nano is CH340G, so that the using method is the same except the driver installation file. <br> | |||
It has 14 digital input/output pins (of which 6 can be used as PWM outputs), 8 analog inputs, a 16 MHz crystal oscillator, a mini USB port, an ICSP header and a reset button. <br> | |||
Note that ICSP (In-Circuit Serial Programming) header is used to program the firmware to ATMEGA328P-AU, but generally the chip has been preburned before leave the factory. So use it less.<br> | |||
The keyestudio Nano can be powered via the Mini-B USB connection, or female headers Vin/GND (DC 7-12V). | |||
<br> | |||
'''TECH SPECS:'''<br> | |||
{| class="wikitable" cellpadding="1" cellspacing="1" | |||
|- | |||
! scope="row" | Microcontroller | |||
|ATmega328P-AU | |||
|- | |||
! scope="row" | Operating Voltage | |||
| 5V | |||
|- | |||
! scope="row" | Input Voltage (recommended) | |||
| DC7-12V | |||
|- | |||
! scope="row" | Digital I/O Pins | |||
| 14 (D0-D13) (of which 6 provide PWM output) | |||
|- | |||
! scope="row" | PWM Digital I/O Pins | |||
| 6 (D3, D5, D6, D9, D10, D11) | |||
|- | |||
! scope="row" | Analog Input Pins | |||
| 8 (A0-A7) | |||
|- | |||
! scope="row" | DC Current per I/O Pin | |||
| 40 mA | |||
|- | |||
! scope="row" | Flash Memory | |||
| 32 KB of which 2 KB used by bootloader | |||
|- | |||
! scope="row" | SRAM | |||
| 2 KB | |||
|- | |||
! scope="row" | EEPROM | |||
| 1 KB | |||
|- | |||
! scope="row" | Clock Speed | |||
| 16 MHz | |||
|- | |||
! scope="row" | LED_BUILTIN | |||
| D13 | |||
|- | |||
|} | |||
<br> | |||
'''Element and Interfaces:'''<br> | |||
Here is an explanation of what every element and interface of the board does: | |||
<br>[[Image:ks0173 pinout.jpg|800px|frameless]]<br><br> | |||
<br>[[Image:ks0173 pinout.jpg|800px|frameless]]<br><br> | |||
<br> | |||
'''Specialized Functions of Some Pins:''' <br> | |||
* '''Serial communication:''' 0 (RX) and 1 (TX). Used to receive (RX) and transmit (TX) TTL serial data. | |||
* '''PWM (Pulse-Width Modulation):''' D3, D5, D6, D9, D10, D11 | |||
* '''External Interrupts:''' D2 (interrupt 0) and D3 (interrupt 1). These pins can be configured to trigger an interrupt on a low value, a rising or falling edge, or a change in value. See the [https://www.arduino.cc/reference/en/language/functions/external-interrupts/attachinterrupt/ attachInterrupt()] function for details. | |||
* '''SPI communication:''' D10 (SS), D11 (MOSI), D12 (MISO), D13 (SCK). | |||
* '''IIC communication:''' A4 (SDA); A5(SCL) | |||
<br> | |||
Revision as of 17:09, 6 August 2019
About the tutorial
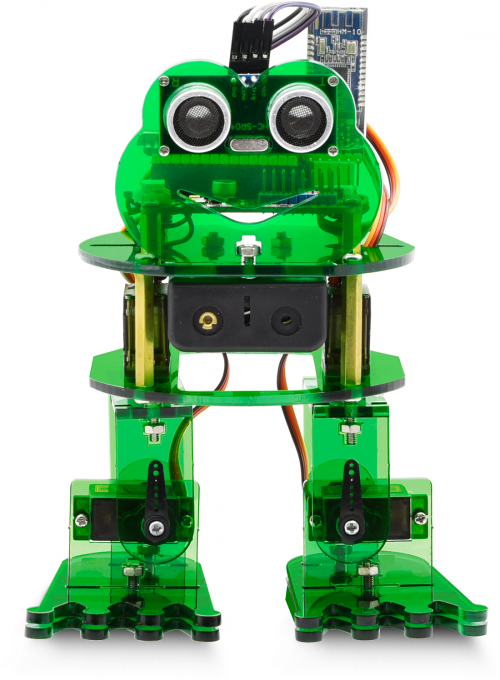
What an amazing Otto Frog Robot is coming!
This kit provides a perfect opportunity to build your very first robot, and it makes the process of learning about robotics easy, interactive, and FUN!
The kit is based on the keyestudio nano ch340, compatible with both Arduino open-source platform and Mixly Blocks coding.
You can program your own robot to walk, dance and follow obstacle, easy to build and code. No prior tech experience required!
Through play and experimentation children can exercise computational thinking and put skills into practice that are necessary for problem solving.
Features
- Voltage input: DC 7-12V
- Ultrasonic module for measuring the front obstacle distance, forming obstacle avoiding system;
- Pairing HM-10 Bluetooth module with mobile Bluetooth to navigate the frog robot;
- Providing the mobile APP compatible with both Android and mac system;
- The NANO shield extends 12 digital pins and 8 analog pins into 3pin header, easy to connect a couple of sensor modules for projects extension;
- The NANO shield comes with an I2C communication pin, able to connect I2C communication module for experiment extension.
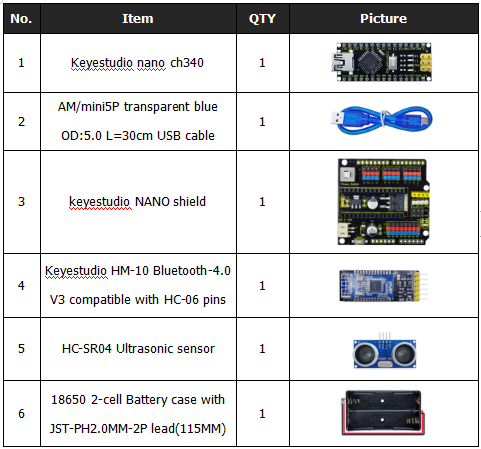
Parts List
In this keyestudio frog robot kit package, you’ll receive all the components needed to build your own robot, easy to code and learn to play.
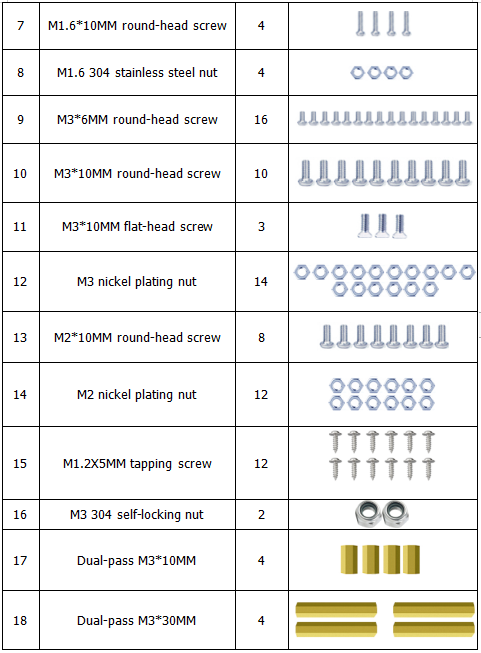
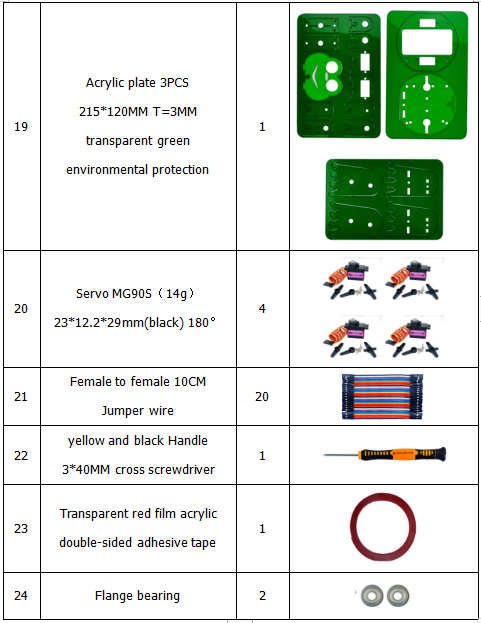
Get Started with Mixly and ARDUINO
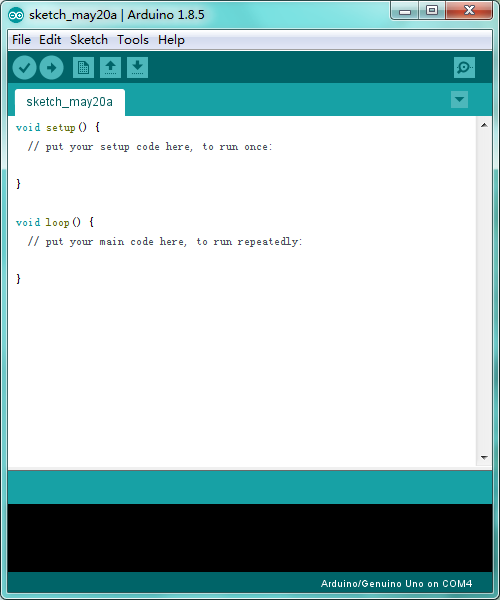
1)Installing Arduino IDE
When program the UNO development board, you can download the Arduino integrated development environment from the link:
See more contents at:
- https://wiki.keyestudio.com/Getting_Started_with_Arduino
- https://wiki.keyestudio.com/How_to_Download_Arduino_IDE
- https://wiki.keyestudio.com/How_to_Install_Arduino_Driver
- https://wiki.keyestudio.com/How_to_Install_Arduino_Library
The functions of each button on the Toolbar are listed below:
![]()
Or you can browse the KEYESTUDIO website at this link, https://www.keyestudio.com/

2)Introduction for Mixly Blocks
Mixly is a free open-source graphical Arduino programming software, based on Google’s Blockly graphical programming framework, and developed by Mixly Team@ BNU.
It is a free open-source graphical programming tool for creative electronic development; a complete support ecosystem for creative e-education; a stage for maker educators to realize their dreams.
More info please check the link to download the Mixly blocks software.
- https://wiki.keyestudio.com/Getting_Started_with_Mixly
- https://wiki.keyestudio.com/Download_Mixly_Software
- https://wiki.keyestudio.com/How_to_Import_Mixly_Library
Before starting the robot projects, please click the link to get the basic understanding of Mixly software.
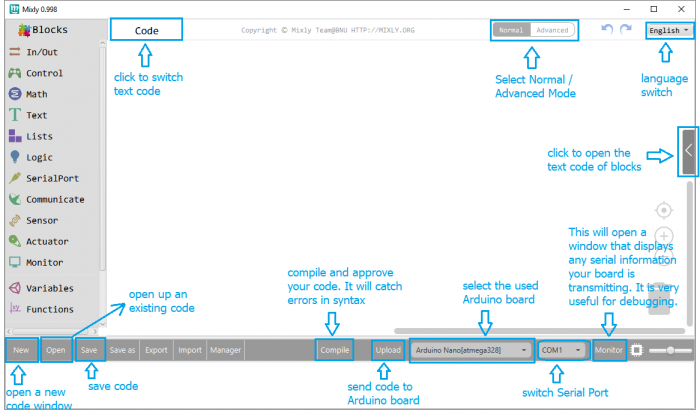
3)Import Robot Library
For the robot kit, we have developed keyestudio frog robot library.
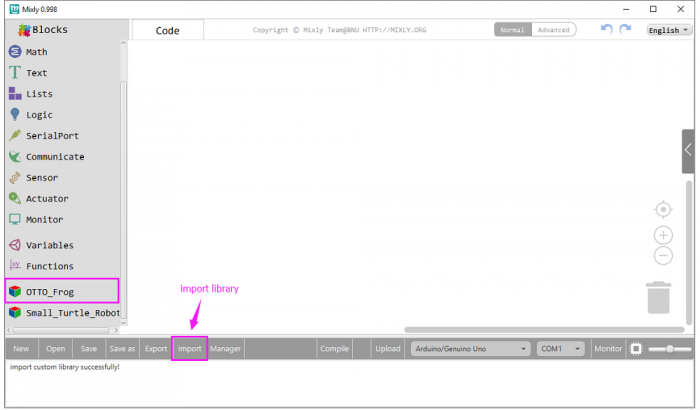
Don’t forget to import the keyestudio OTTO_Frog robot library to Mixly software before coding the robot projects.
Must import the robot library first, or else you can’t check all the test code.
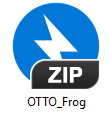
Unzip the OTTO_Frog library package, you can see the OTTO_Frog_Robot XML.document.

Then import this document into Mixly library. Import custom library successfully!
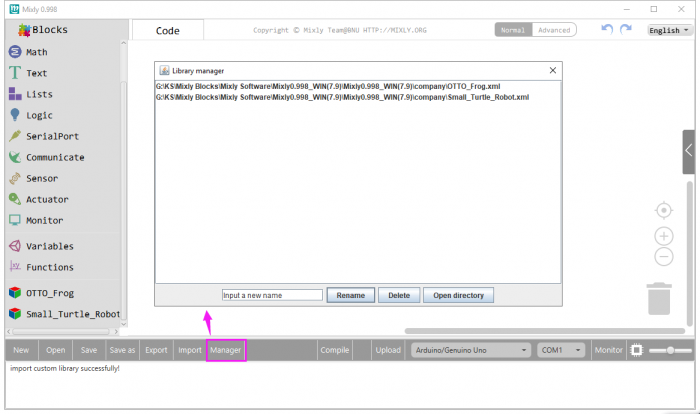
You are able to click “Manager” to manage all imported libraries.
Note: sometimes it may exists a conflict between libraries, so should keep only correct car library when using and delete other library.
Hardware Projects
As you work your way through each project, you will learn to how to program the robot to move, dance, and follow obstacles.
Project 1: Keyestudio NANO CH340
Introduction:
keyestudio Nano CH340 is a small, complete, and breadboard-friendly board based on the ATmega328P-AU. Compared with ARDUINO NANO, the USB-to-serial port chip used in keyestudio Nano is CH340G, so that the using method is the same except the driver installation file.
It has 14 digital input/output pins (of which 6 can be used as PWM outputs), 8 analog inputs, a 16 MHz crystal oscillator, a mini USB port, an ICSP header and a reset button.
Note that ICSP (In-Circuit Serial Programming) header is used to program the firmware to ATMEGA328P-AU, but generally the chip has been preburned before leave the factory. So use it less.
The keyestudio Nano can be powered via the Mini-B USB connection, or female headers Vin/GND (DC 7-12V).
TECH SPECS:
| Microcontroller | ATmega328P-AU |
|---|---|
| Operating Voltage | 5V |
| Input Voltage (recommended) | DC7-12V |
| Digital I/O Pins | 14 (D0-D13) (of which 6 provide PWM output) |
| PWM Digital I/O Pins | 6 (D3, D5, D6, D9, D10, D11) |
| Analog Input Pins | 8 (A0-A7) |
| DC Current per I/O Pin | 40 mA |
| Flash Memory | 32 KB of which 2 KB used by bootloader |
| SRAM | 2 KB |
| EEPROM | 1 KB |
| Clock Speed | 16 MHz |
| LED_BUILTIN | D13 |
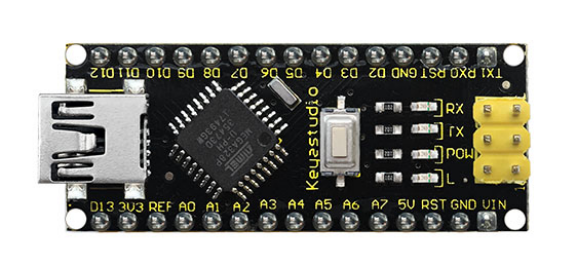
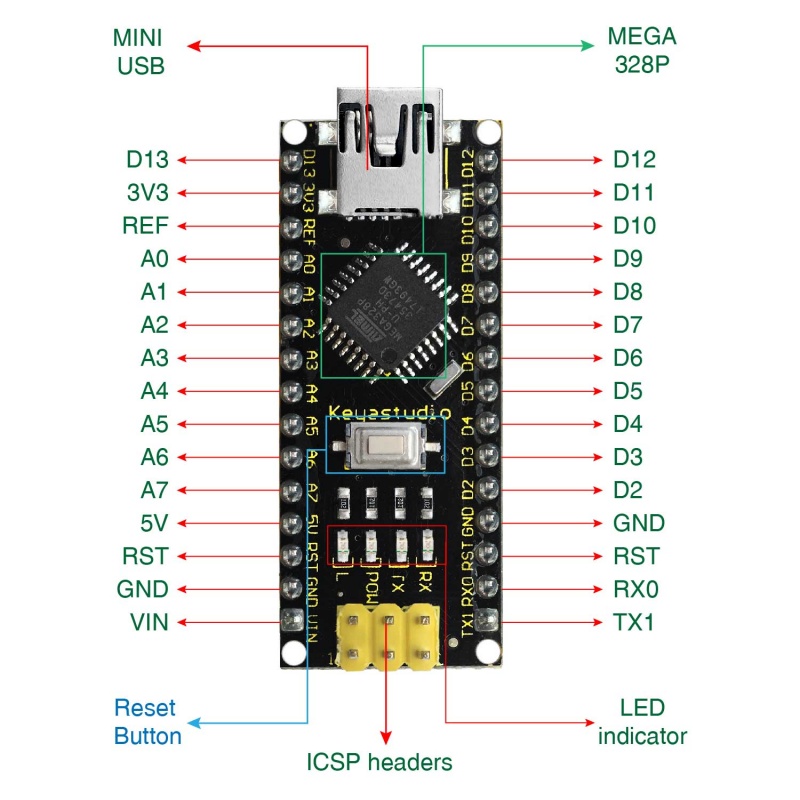
Element and Interfaces:
Here is an explanation of what every element and interface of the board does:

Specialized Functions of Some Pins:
- Serial communication: 0 (RX) and 1 (TX). Used to receive (RX) and transmit (TX) TTL serial data.
- PWM (Pulse-Width Modulation): D3, D5, D6, D9, D10, D11
- External Interrupts: D2 (interrupt 0) and D3 (interrupt 1). These pins can be configured to trigger an interrupt on a low value, a rising or falling edge, or a change in value. See the attachInterrupt() function for details.
- SPI communication: D10 (SS), D11 (MOSI), D12 (MISO), D13 (SCK).
- IIC communication: A4 (SDA); A5(SCL)
